Advanced Clay Sculpting: Perfecting Your Craft
Advanced clay sculpting allows artists to create intricate and detailed sculptures using specialized techniques. This overview will provide an introduction to advanced sculpting methods beyond basic hand-building and wheel-throwing. We’ll explore techniques for creating armatures, achieving realistic textures, sculpting accurate proportions, joining complex forms, refining details, and properly preparing sculptures.
With practice and an understanding of advanced techniques, clay sculptors can perfect their craft. This guide aims to provide both fundamental knowledge and tips to take sculptures to the next level.
Tools and Materials
Having the proper tools is essential for advanced clay sculpting. Some tools that every sculptor should have include:
- Wire loops – These are great for smoothing seams and edges in your sculpture. They come in various sizes and allow you to refine details (https://fireflyart.supplies/blogs/news/10-must-have-tools-for-molding-clay).
- Carving tools – You’ll need an assortment of loops, ribs, knives, and gouges for removing clay and refining forms.
- Modeling tools – Having a variety of tips like balls, spoons, and blades gives you versatility in sculpting forms and textures.
Make sure to use polymer or ceramic clay appropriate for your project, and have things like an armature wire, parchment paper, and water on hand. Investing in quality tools suited for your skill level and having the right materials is key for taking your sculpting to the next level.
Armatures and Structures
Armatures are an essential component of clay sculpture. They provide internal support and structure for the clay, allowing you to build larger, more complex forms. Without an armature, clay sculptures would be prone to cracking and collapse under their own weight. The type of armature used depends on the size and design of the sculpture.
The most common armature materials include wire, aluminum, wood, and rigid foam. Wire offers flexibility and can be bent into shapes before applying clay. Aluminum foil can be tightly wadded to provide bulk and shaped as desired. Wooden dowels or boards work well for solid structures and flat bases. Rigid foam can be carved or shaped to support figures. The armature provides the general form that clay is then modeled around.
When selecting an armature material, consider the size of the sculpture, whether interior support is needed, and how poseable or adjustable the armature should be. A sturdy armature ensures the structural integrity of the finished piece once firing is complete. Carefully planning the armature and skeleton is an important first step in clay sculpture before detailing the exterior clay form.
Textures and Surfaces
Adding realistic textures like skin, hair, and fabric to your clay sculptures can transform your artwork into masterpieces. Here are some techniques for creating lifelike textures on your clay:
For skin textures, use various clay tools like rubber shapers, silicone brushes, and ball styluses to imprint pores, wrinkles, and imperfections into the clay’s surface (https://theartofeducation.edu/2020/02/5-exciting-ways-to-create-texture-on-clay/). Use a roller tool to flatten and smooth areas for younger looking skin. Consider adding blush or makeup textures with cosmetic sponges.
For realistic hair, roll small coils of clay to form strands. Use a needle tool to add finer details and texture. Run a wire through longer strands to keep them sturdy. Use cosmetic sponges and clay shapers to create subtle variations.
To mimic fabric textures like silk, cotton, or lace, press actual fabric pieces into the clay, allowing the patterns to imprint. Use a roller tool over lace for transparency effects. Alternatively, cut custom patterns into rubber stamps to press into the clay.
Keep in mind skin varies around the body – sculpt accordingly. Reference photos help immensely when recreating textures. With practice and experimentation, your clay work can capture remarkably realistic and nuanced surfaces.
Balance and Proportions
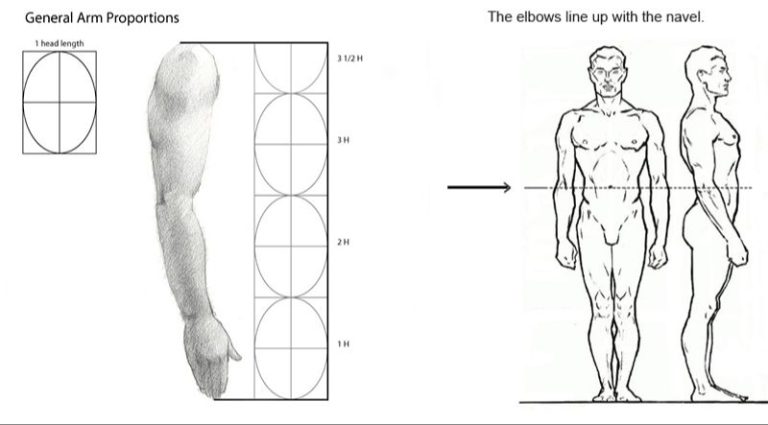
Anatomical proportions are key in sculpting realistic figures. Understanding the ideal relationships between different body parts will help create figures that look proportional and lifelike. Some basic guidelines to follow:
According to https://www.sculpey.com/blogs/blog/sculpting-a-figure-body-proportions, the distance from the top of the head to the chin is equal to the distance from the chin to the bottom of the sternum. The distance from the bottom of the sternum to the pubic bone is equal to the distance from the pubic bone to the floor.
For sculpting faces, a good rule of thumb is that the eyes are halfway between the top of the head and the chin, according to https://missbaide.wordpress.com/sculpting-faces-in-clay/. The bottom of the nose is halfway between the eyes and the chin.
When sculpting a bust or head, maintain proper proportions by using plumb lines and sighting across horizontal points. For a full figure sculpture, use an armature to establish the proper pose and proportions before adding clay.
Strive for symmetrical balance in your sculpting. Unless intentionally sculpting dynamic or exaggerated poses, both sides of the body should have anatomical balance and equilibrium.
Joining and Attachments
When sculpting complex forms, you’ll often need to join separate pieces of clay together into one cohesive whole. Mastering proper joining techniques ensures strong, seamless connections between clay components.
The key to successful joining is making sure clay surfaces are scored or roughened before attaching them. This creates microscopic grooves for the clay to grip together (source). Use a serrated rib tool, knife, or coarse sandpaper to gently score areas to be joined. Press the scored surfaces together firmly to bond.
Another tip is to keep clay damp rather than bone dry when joining. Clay is most pliable and sticky when wet, allowing for the strongest seals (source). Consider wrapping works in progress in plastic to retain moisture.
For large Clay pieces, insert armatures or thick gauge wires into sculpted appendages before attaching to bodies. This provides internal support and stability. Use slip, liquid clay, or commercial clay adhesives like Cernit to seal inserted wires.
When incorporating factory produced parts, sand and score their surfaces first. Let clay attachments dry partially before bonding to decrease risk of slippage.
Take care not to overwork clay at joints by excessive smoothing. This can pull the pieces apart. With practice, you’ll be able to sculpt dynamic multipart creations with imperceptible seam lines.
Finishing and Detailing
Finishing and detailing is one of the most important parts of the sculpting process. It’s what really brings a sculpture to life and makes it feel complete. At this stage, you’ll want to focus on refining the overall look of your sculpture and enhancing it with intricate details.
There are a few key techniques to focus on during the finishing process:
- Smoothing – Go over the entire sculpture, gently rubbing away any uneven textures or rough areas. Use sandpaper, emery boards, or metal sculpting tools to blend surfaces for a seamless look.
- Refinement – Analyze angles, contours, and proportions to identify areas that need subtle improvements. Make small changes to perfect the shape and flow of the sculpture.
- Detailing – Add intricate designs, patterns, textures, or other embellishments to make parts of the sculpture more interesting. Consider carving designs, adding clay accents, or impressing textures.
- Sealing – Use acrylic glazes, varnishes or other sealers to give the sculpture a uniform finished look and protect it during firing.
Take your time perfecting all the fine details. Pay close attention to finishing touches around focal points, prominent areas, and places where clay attaches. Refinement is what takes your sculpture from ordinary to extraordinary.
Baking and Firing
Properly baking clay sculptures is crucial to prevent cracking and breakage. Polymer clay pieces must be baked according to the manufacturer instructions, usually between 130°C and 150°C for 15-30 minutes per 6mm thickness. When baking longer or thicker pieces, it’s best to bake in stages to reduce cracking from trapped moisture.
To prevent cracking and breakage:
- Avoid baking thick pieces all at once. Bake complex sculptures in sections.
- Preheat the oven before baking and allow oven to fully reheat between batches.
- Bake the piece a bit longer than recommended, especially for thicker sections.
- Allow the sculpture to cool down slowly and completely before handling.
If using an oven, place the piece on a baking tray lined with parchment paper or aluminum foil. Monitor the temperature with an oven thermometer, as most ovens fluctuate. Take care not to exceed the clay’s maximum baking temperature. For best results, use a dedicated polymer clay oven or toaster oven to avoid cross-contaminating clay pieces with food residue.
Once cooled, pieces can be sanded, painted, and sealed. With proper baking and curing, polymer clay sculptures will maintain their shape and color vibrancy for years to come. Be sure to frequently wash hands after handling uncured clay. Cite: https://katersacres.com/polyclay/hints/how-to-bake-polymer-clay-2/
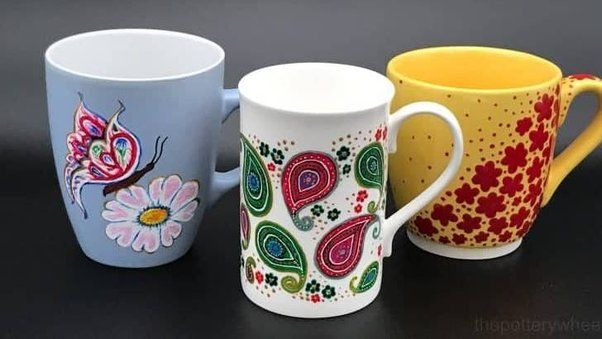
Painting and Coloring
Painting your sculpted creations can add extra visual appeal and allow you to get creative with colors and effects. There are several techniques and types of paint to consider when painting clay sculptures:
Acrylic Paints
Acrylic paint is one of the most popular choices for painting clay. It’s easy to apply and dries quickly, allowing you to add multiple layers of color. Make sure to seal the clay before painting with a clear acrylic sealer so the paint adheres properly. Acrylic paint can be thinned with water for a smoother application. Source
Oil and Enamel Paints
Oil and enamel paints provide a glossy, durable finish on clay. They take longer to dry than acrylics, so are better suited for covering large surface areas. Be sure to allow ample drying time between coats. Oil and enamel paints usually require a primer coat first.
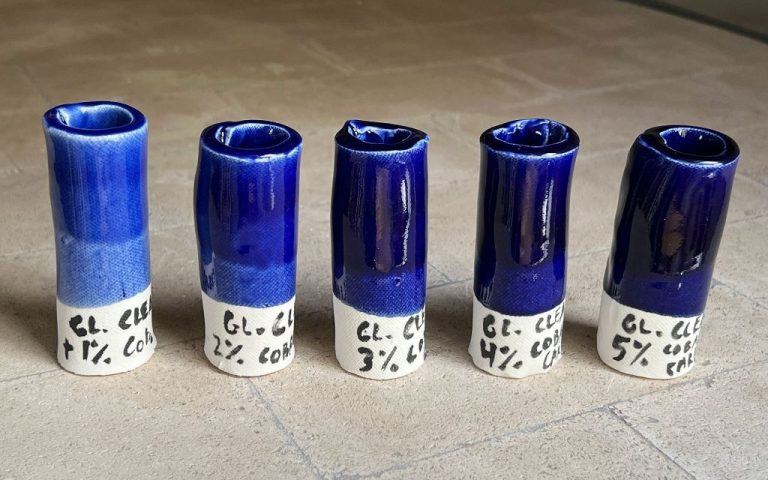
Glazes and Stains
Glazes and stains are translucent mixtures that can be brushed or sponged onto clay to create attractive coloring effects. They are often made from acrylic paint mixed with a glazing liquid or water. Multiple layers can be built up for more intense color. Glazes bring out the clay’s natural texture.
Chalk Pastels
Soft pastel chalks can add quick color to sculptures. Rub the pastel over the surface to deposit pigment, then seal with a fixative spray. Pastels create a soft, dusty look. Blend colors by layering or smudging with cotton swabs.
Experiment with different paints and coloring techniques when finishing your clay sculptures. Proper preparation and sealing is key for the paint to adhere correctly and avoid chipping or fading over time.
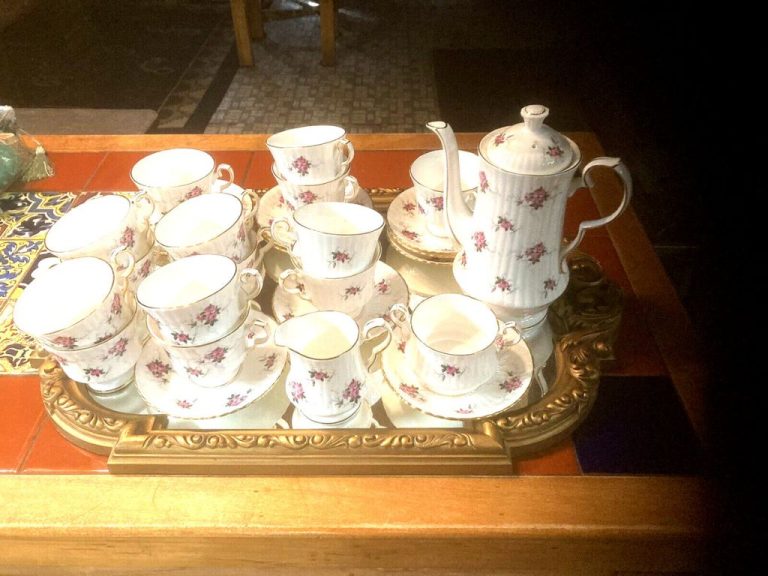
Displaying Sculptures
Properly displaying your clay sculptures can enhance their appearance and allow viewers to fully appreciate your artistry. Careful consideration should be given to mounting, lighting, and overall presentation.
For mounting, sculptures can be placed on pedestals, shelves, or in display cases. Ensure sculptures are securely attached to their bases using museum wax, clay, or other reliable methods. The height of the sculpture and eyeline of the viewer should guide the pedestal or shelf height. Display cases with adjustable glass shelves work well for protecting fragile pieces.
Lighting can make or break a sculpture display. Spotlights, track lighting, flood lights and natural light all create different effects. Play with the angle, intensity and color temperature of lighting to highlight textures, forms and colors. Shadows and contrasts add interest. Reflective surfaces also bounce light in creative ways.
Presentation includes the surroundings and arrangement of your displayed sculptures. A cohesive theme or style looks more polished. Group related pieces together through consistent bases, risers, backgrounds etc. Allow adequate space between sculptures so they don’t feel cluttered. A clean, distraction-free environment keeps the focus on your amazing creations.
With attentive mounting, strategic lighting and artful presentation, your sculpting skills will really shine. Follow museum and gallery displays for inspiration on elevating your artwork. Proper displays let clay creations make a powerful visual impact.