Can You Get Red Wood Stain?
Wood stain is a paint product used to add color and provide protection to wooden surfaces. It contains pigments and/or dyes suspended in a liquid vehicle or solvent 1. Wood stain penetrates into the wood pores to accentuate the natural grain pattern and color of the wood. It helps highlight the unique visual characteristics of wood while providing a layer of protection from weathering, moisture damage, and UV radiation.
The main purposes of wood stain are:
- Enhance the natural beauty of wood by infusing color
- Protect wood from damage caused by moisture, sun exposure, and normal wear
- Provide a durable, long-lasting colored finish on wood
- Allow for customization of the wood’s appearance through selection of stain color
With proper preparation and application, wood stains can dramatically enrich the look of wood while preserving it. Woodworkers use it on furniture, flooring, cabinetry, doors, decking, fencing, and more. It offers a versatile way to finish and protect wood surfaces with the desired aesthetic.
Types of Wood Stain
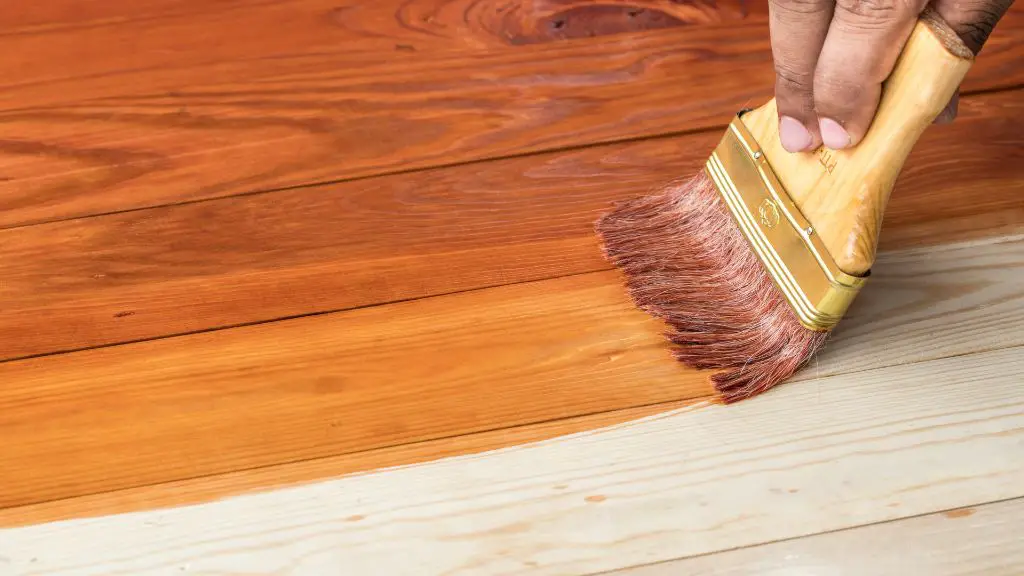
There are two main categories of wood stains: dye stains and pigment stains. Dye stains contain colored dyes that penetrate into the wood, allowing the natural grain to show through while adding color. Pigment stains contain pigments suspended in a vehicle like oil or water that leave color sitting predominantly on the wood’s surface.
According to Home Depot, dye stains are best for soft or porous woods like pine, maple, birch, and redwood, as the dye can soak deep into the wood (source). The natural grain remains visible and the color outcome is translucent. Pigment stains work better on dense hardwoods like oak or mahogany where dye absorption is lower. The pigments adhere to the surface and obscure more of the grain. The color effect is more opaque than dye stains.
When choosing between dye vs. pigment stains, consider the wood type, desired transparency, and color tone. Dye stains enhance wood grain while pigment stains cover it. Most commercial stains contain both dyes and pigments in varying ratios.
Color Options for Wood Stains
When staining wood, there are many color options to choose from. Some of the most popular stain colors include various shades of brown, black, and red.
Brown wood stains are a popular choice as they allow the natural grain of the wood to show through while still providing rich, warm color. Popular brown stain shades include Dark Walnut, Provincial, Early American, and Special Walnut. These shades range from reddish browns to deeper chocolate hues. Brown stains pair well with many wood types and design styles.
For a more dramatic look, black wood stain is a bold option. Stains like Ebony create an extremely dark finish that obscures the natural wood grain. Black stain can create a sophisticated, modern aesthetic on the right wood species and project.
Red wood stains also make a statement. Shades like Cherry or Mahogany inject vibrant color into wood while allowing some of the natural pattern to show through. Red stains work well on rich woods like oak, walnut, and maple. They bring warmth and accentuate wood grains.
No matter what shade you prefer, it’s important to test stains on scraps first to ensure you achieve the right color saturation and results. Red, brown, and black wood stains open up endless design possibilities.
How to Apply Red Wood Stain
Applying a red wood stain well requires proper preparation and technique. Here are some tips for getting the best results:
Surface Preparation:
– Make sure the wood surface is clean and smooth. Sand the wood lightly with fine grit sandpaper to remove any dirt or old finish.
– Wipe away sanding dust using a dry cloth or tack cloth.
– If staining new wood, seal it with a wood conditioner or pre-stain first to help the stain absorb evenly.
Application Tools:
– Use a high-quality natural bristle brush to apply the stain. Foam brushes can leave bubbles and streaks.
– You can also apply stain with a clean lint-free cloth or applicator pad.
– Always stir the stain thoroughly before and periodically during use.
Number of Coats:
– For light woods like pine or maple, apply 2-3 coats of red stain for good color depth.
– On darker woods like walnut or cherry, 1-2 coats is usually sufficient.
– Allow each coat to dry completely before adding another. Lightly sand between coats for maximum adherence.
Take your time with each step for best results. Multiple thin, even coats of red stain will soak into the wood and give a rich color.
Tips for Staining Wood Red
When staining wood red, it’s important to follow some key tips to achieve the best results. First, always test the stain on a scrap piece of wood before applying it to your actual project. Wood stain can look very different depending on the type of wood, so testing first helps avoid surprises.
Apply an even coat of red stain using a rag, brush, or foam applicator. Apply stain with the direction of the wood grain for the most natural look. Let the stain dry completely between coats as recommended by the manufacturer, usually at least 8-12 hours. Multiple thin coats allow the stain to fully penetrate into the wood rather than pooling on the surface.
Sand lightly with fine grit sandpaper between coats to help achieve an even color. Thinner stain tends to absorb more deeply into the wood, so consider thinning the first coat with mineral spirits if using a thick gel stain. Always allow proper drying time between coats.
Work in sections when staining large surfaces, stopping at natural breaks to maintain a wet edge. Work quickly and systematically to prevent lap marks. Finish the entire project before assessing the color, as it will appear lighter until fully cured. With careful prep and patience, you can successfully stain any wood project a striking shade of red.
Source: https://www.minwax.com/en/how-to-finish-wood/wood-stain/wood-staining-tips-dos-and-donts
Red Wood Stain Brands
When it comes to red wood stain, some of the most popular and highest quality brands include:
Minwax [1] – Minwax has a long history of producing quality wood stains and finishes. Their Wood Finish stain in Red Mahogany is a rich, warm red that enhances the natural beauty of wood.
Varathane [1] – Varathane makes the popular Premium Wood Stain in Red Mahogany. It provides deep color penetration and allows the wood grain to show through. They also offer polyurethane stains that protect and color in one step.
General Finishes [3] – General Finishes is known for their oil-based wiping wood stains. Their Red Mahogany stain has vibrant red undertones that work well on redwood and cedar. It allows for easy application and clean up.
Some other reputable brands for red wood stains are Cabot, Behr, Thompson’s WaterSeal, Olympic, and Penofin. When choosing a brand, consider the color, ease of application, protection level, and overall quality of the product.
Project Ideas with Red Wood Stain
Red wood stain can add a warm, rich look to many DIY and remodeling projects around the home. Here are some popular ways to use red stain for wood projects:
Outdoor Furniture – Staining outdoor furniture like patio chairs, picnic tables, or porch swings is a great way to protect the wood while adding color. Red stained outdoor furniture has a classic, timeless look. Be sure to choose an exterior-rated stain.
Kitchen Cabinets – Red wood stain can transform the look of outdated kitchen cabinets. Sand and prep the cabinet doors and frames, then apply two coats of red stain for dramatic results. Finish with a protective clear coat.
Flooring – Hardwood floors stained a deep red color add warmth and character to any room. Red oak is a popular choice, though many wood species take red stain beautifully. Be sure to use a stain formulated for floors.
Caring for Red Stained Wood
Proper care is essential for preserving the beauty of red stained wood over time. Using a protective topcoat and avoiding excess moisture are two key ways to keep red stained wood looking its best.
Applying a clear topcoat like polyurethane or lacquer is highly recommended after staining wood red. The topcoat seals and protects the wood stain underneath. According to experts, 2-3 coats of a satin or semi-gloss topcoat will provide good protection for red stained wood used for furniture, cabinets, floors, and more. Reapply the topcoat every 1-2 years or as needed to renew the protective barrier.
Red stained wood should also be shielded from excess moisture. Water can cause the wood grains to swell and the red stain to fade or discolor. Quickly wipe up spills and leaks to keep wood from absorbing moisture. Avoid placing red stained wood surfaces near sinks, tubs, dishwashers or other wet areas. Use coasters under glasses and potted plant saucers. Maintain proper humidity levels in your home to reduce condensation on wood.
Common Problems with Red Stains
When working with red stains on wood, there are a few common problems that can occur:
Fading
Red stains, especially lighter reds, can be prone to fading over time when exposed to sunlight. To help prevent fading, make sure to apply a UV-protectant clear coat over the red stain. Reapplying the red stain annually can also help retain the color. According to this woodworking forum, faded red stain issues are common with softer woods like red oak.
Blotchiness
Some woods, like pine, cherry, and birch are prone to blotchiness when stained red. Using a pre-stain wood conditioner can help prevent an uneven, splotchy appearance. Proper sanding and surface preparation are also key for avoiding blotches. According to this article, applying red stain too heavily can also cause blotchiness.
Improper Prep
For the best results, proper sanding, cleaning, and wood conditioning is essential before applying a red stain. Rushing the surface prep stages can lead to problems like blotchiness, uneven absorption, and poor adhesion of the stain. It’s important to patiently follow each preparation step.
Conclusion
Red wood stain can add a warm, rustic look to your woodworking projects. As we’ve covered, there are oil and water-based options for staining wood red, with oil-based providing more vibrant saturation. Careful preparation and application are key for avoiding blotchiness. Allow for full drying time before adding topcoats. With proper maintenance, red stained wood can look beautiful for years.
When choosing a red wood stain, consider the look you want to achieve and the type of wood. Test samples first. Apply thin coats, following the direction of the grain. Proper prep work, like sanding and conditioning, helps the stain absorb evenly. Add a sealant after the stain has fully cured. With patience and care, red wood stain can give any project a striking, rich finish.


