Clay Exploration For Kids: Fun And Educational Activities
Clay is a fun, versatile, moldable material that provides a wide range of benefits for children’s development and creativity. Clay is made from natural minerals, oils, and pigments that allow it to be easily shaped, molded, squished, or sculpted. The tactile nature of clay makes it a great medium for sensory play and exploration. Scientists have found evidence of clay being used for artistic expression dating back over 20,000 years to prehistoric humans.
Playing with clay offers many benefits for a child’s growth and learning. Molding clay improves fine motor skills, hand-eye coordination, and dexterity. The resistance of the clay builds strength in little hands and fingers. Clay play also promotes focus, creativity, problem solving, and self-expression. Additionally, clay relieves stress and anxiety through its calming, therapeutic nature. Socially, clay activities facilitate collaboration, turn-taking, and confidence in sharing creations.
In this article, we will cover different ways for kids to explore clay through various engaging activities. First, we will discuss gathering and preparing clay. Next, we will go over essential clay tools and sensory clay play. Other sections will cover shaping clay, sculpting objects, making prints, forming letters/numbers, and clay science experiments. Finally, we will provide tips on drying and storing kids’ clay creations.
Gathering Clay
Clay can easily be found at most arts and crafts stores, big box stores, and online retailers. Popular and kid-friendly clay options include:
- Play-Doh – This classic modeling clay is non-toxic and comes in a variety of bright colors. Play-Doh can be rolled, shaped, and molded but doesn’t permanently harden. A great option for open-ended creativity. Sold at most retailers including Amazon, Walmart and more.
- Air-Dry Clay – Air dry clay starts out soft and malleable but hardens as it dries out over time. It can be shaped into detailed sculptures and keeps its form once dry. A great option for projects that you want to keep. Brands like Crayola Model Magic are non-toxic and sold at many major retailers.
- Polymer Clay – Polymer clay can be shaped when soft, then hardened by baking in a standard oven. Sculpey and Fimo are popular brands, available in tons of colors. Baking polymer clay makes it into a strong, permanent sculpture. Find at craft stores like Sculpey.com and more.
Look for clay that is labeled non-toxic. Stay away from real potter’s clay, as the materials can be messy and harder to work with for kids’ hands. Buy an assortment of clay colors and textures for plenty of creative options.
Clay Tools
Clay is an incredibly versatile art material that can be shaped, sculpted, and molded using just your hands. However, having a few dedicated clay tools on hand can make the clay sculpting process easier and expand the creative possibilities. Basic clay tools allow you to add finer details, textures, cut shapes, scrape, smooth, and imprint your clay creations. Thankfully, you don’t need fancy or expensive supplies when working with clay.
Many common household items can be repurposed as clay sculpting tools for kids. A butter knife or plastic picnic knife work nicely for cutting clay. A ruler or lid can be used as a straight edge. Toothpicks make great clay carving and detailing tools. Popsicle sticks or paint stirrers are handy for sculpting and smoothing clay. Bottle caps imprint fun patterns and textures. Shoelaces, straws, sponges, and paint brushes each have unique uses when working with clay.
When ready to purchase dedicated clay tools, opt for an affordable beginner’s set made from wood, plastic or silicone. Look for tool sets that include a variety of different shaped sculpting tools, loop tools, sponge, cutting wire, wood knife, texture tools, rolling pin, and modeling tools. Sets with double-ended tools offer even more variety for sculpting. With just a handful of kids clay tools, young artists will be set up for success in their clay creations.
Clay Sensory Play
Playing with clay offers numerous sensory benefits for young children. The tactile experience of squishing, pounding, rolling, and shaping clay helps promote fine motor development as children use their hands and fingers to manipulate the clay (Source). The resistance of the clay provides proprioceptive input, helping children become more aware of their bodies and build muscle strength.
Using tools with clay adds another dimension to sensory play. Cookie cutters, playdough tools, and household items like spoons or bottle caps can be pressed into clay to create imprints and textures. Poking clay with fingers or sticks boosts hand-eye coordination. The impressions left in the clay give visual and tactile feedback as children explore cause and effect. Allowing kids to freely experiment with tools encourages open-ended creativity and problem solving.
Clay’s soft, malleable texture also has a calming, therapeutic effect for many children. The repetitive motions of smoothing, flattening, or rolling clay can be regulating. The sensory qualities make clay an engaging, screen-free activity that focuses attention and concentration.
Clay Shaping
Shaping clay helps develop children’s fine motor skills. As they mold and manipulate the clay into different forms, they build strength and dexterity in their hands and fingers. Start with simple shapes like balls, snakes, and pancakes to get kids used to handling the clay. Encourage them to roll and flatten balls of clay into pancakes using their palms. Show them how to roll snakes by rolling clay between their hands and lengthening it. Let them experiment with combining shapes to make objects like flowers, animals, or imaginary creatures. The tactile experience helps improve sensory perception and hand-eye coordination.
According to one study, clay play encourages the development of motor skills and coordination (Why Playing with Clay is Great for Your Child’s Development). As children mold, squeeze, pound, roll, and shape the clay, they build strength and dexterity. Making simple shapes like balls, snakes, and pancakes helps develop fine motor control. The open-ended nature of sculpting with clay allows for endless creativity and problem solving.
Clay Sculpting
Sculpting with clay is an exciting and creative activity for kids. There are several basic techniques that are fun and easy for children to master:
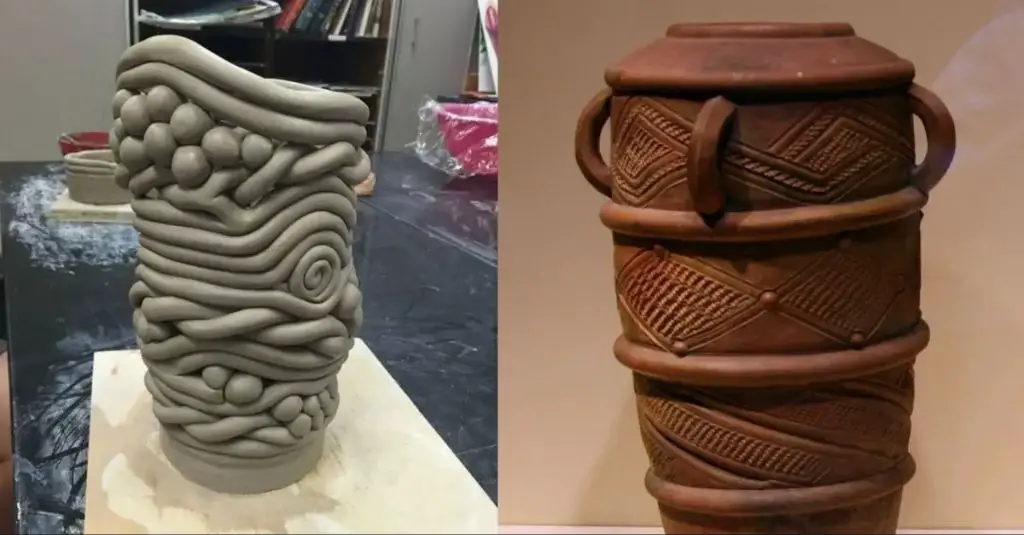
Coiling
This technique involves rolling clay into long coils or snakes and then stacking them to build 3D structures. Coiling is great for making pots, bowls, and vases. Just roll coils of varying thicknesses and gradually build up the sides by laying coils on top of each other. Smooth the coils together with your fingers or a clay tool.
Pinching
Pinching clay is done using your fingers to mold shapes. Start with a ball of clay and pinch sections to pull up peaks or indentations. Pinching is useful for making simple objects like bowls, animals, or faces. Smooth the pinched clay gently with your fingers.
Smoothing
Use your fingers or clay sculpting tools to blend and smooth the surface. This helps refine the overall shape and meld sections together. Smooth gently and avoid overworking the clay which can distort shapes.
Simple clay sculptures kids can make include animals like snakes, turtles, or bears. Figures of people or faces are also fun. Let their imagination run wild!
Source: https://artforkidshub.com/sculpting-for-kids/
Making Clay Prints
Making prints in clay is a fun sensory activity that allows kids to explore textures and shapes. Start by rolling out some air dry clay to about 1/4 inch thickness on a flat surface. Kids can press different objects into the clay to create imprints and designs. Small natural items like leaves, flowers, pinecones, seashells, sticks, and stones work well for making prints. Fabric pieces and cookie cutters also make interesting textures and patterns.
After making prints in the clay, carefully peel it off the work surface and let it air dry for 24-48 hours until hardened. Then paint the clay with acrylic paint or use oil pastels to color the prints. The clay can also be left natural. Once the paint is dry, the kids can gently press their clay prints onto pieces of paper to transfer the designs. Making prints in clay engages fine motor skills, creativity, and sensory exploration for kids.
For more kids clay printing ideas, see this tutorial video: Easy Art for Kids: Nature Prints in Clay – YouTube (1)
Clay Letters and Numbers
Working with clay letters and numbers provides a fun, hands-on way for kids to learn. Forming letters out of clay engages their sense of touch and fine motor skills. As children manipulate and shape the clay into the different letters or numbers, they gain physical experience with the shapes, which helps support recognition and memory.
One engaging clay activity is making an “alphabet snake.” To create an alphabet snake, roll clay into 26 balls, one for each letter of the alphabet. Flatten each ball into a rectangle shape. Use a toothpick to etch the letter onto each clay rectangle. Then connect the rectangles together in alphabetical order to form one long snake.
As kids build the snake, they can say each letter aloud. Once the full alphabet snake is constructed, children can run their fingers over the letters in order, reinforcing letter recognition. For more ideas on using clay letters and numbers, see this source.
Clay Science
Clay science experiments involve mixing clay with different materials and observing the results. Here are some fun clay science activities to try with kids:
Make clay floaters – Roll pieces of clay into balls or boats and place them in bowls of water. Observe if they sink or float. Try reshaping the clay and see how that affects buoyancy (source).
Create clay fossils – Press seashells, leaves, or toys into clay to make imprints. Remove the objects and let the clay fossils dry. Examine the imprints left behind (source).
Mix clay with baking soda or cornstarch. Notice how the texture and consistency changes. Try molding the mixtures into different shapes.
Make bouncing balls by mixing clay with borax solution. Shape into balls and observe how high they bounce.
Kids can explore concepts like states of matter, chemical reactions, buoyancy, and fossils with simple clay science experiments. It’s a fun hands-on way to learn!
Drying and Storing Clay Creations
After kids have finished sculpting and playing with clay, their creations will need to fully dry and harden before being completed. There are two main types of clay that require different drying methods – air dry clay and baking clay.
Air dry clay will harden and cure over time simply by being exposed to air. Keep air dry clay creations in a dry, room temperature area out of direct sunlight. Allow 1-2 days for small pieces to fully cure. For larger pieces, drying could take 1 week or longer. While drying, air dry clay must be stored carefully so it does not become misshapen. Drape pieces lightly with a paper towel or clean cloth. Or, store pieces in resealable plastic bags with a small damp paper towel to keep the clay flexible. Check pieces periodically and gently reshape if needed while drying.
Clay that requires baking must be completely dried before placing in the oven. Allow pieces made from baking clay to air dry for 24 hours. Then bake pieces according to package instructions, typically at 225°F – 275°F for 10 – 30 minutes. After baking and cooling, these clay pieces will be durable and long-lasting. Store finished, baked clay pieces in open containers or display them proudly!
Unfinished clay pieces can be stored for months while kids take a break between projects. Place the clay in an airtight container or plastic bag to prevent drying out. For long-term storage, consider wrapping clay tightly in plastic wrap as well. Store clay in a cool, dry area away from direct sunlight. When ready to continue working, knead or wedge the clay briefly to restore flexibility.