Clay Modeling Techniques For Beginners
Clay modeling refers to the art of manipulating and shaping clay to create 3D artworks and figures. It dates back thousands of years, with early humans using clay for pottery and religious idols. Today, clay remains a popular art medium, allowing artists to sculpt creative works in a tactile, hands-on way.
There are several types of modeling clays used by artists and hobbyists today. Polymer clay contains polymers, fillers, and pigments that allow it to be shaped when warm and harden when cooled. It doesn’t require baking and comes in a variety of colors. Pottery clay, or ceramic clay, requires firing in a kiln to permanently harden. Earthen clay comes directly from the earth and also needs firing. Commercial modeling clay is an oil-based substance that never fully hardens and can be reused.
Basic supplies for clay modeling include clay (polymer, ceramic, or other), clay sculpting tools, a surface to work on, and optional materials like acrylic paints or glazes. Tools can include sculpting knives, loop tools, ribs and ribs, cutters, stamps, and more specialized items. A work surface like wood, glass, or silicone can make sculpting easier.
Clay Modeling for Beginners
Starting clay modeling as a beginner can seem daunting, but with some basic knowledge it can be easy and fun to get into. Here are some tips for beginning your clay modeling journey:
Focus first on learning wedging and kneading techniques to prepare your clay. Kneading helps remove air bubbles and makes the clay soft and workable. Check out this helpful wedging tutorial video: Learn Basic Clay Modelling With Apfet – YouTube
Start with simple shapes and forms. Balls, coils, slabs – these basic shapes are the building blocks for any clay model. Simple animals like snakes, worms, and fish are great novice projects according to CLAY SCULPTURES. Creating basic vessels like bowls, cups and vases will also help you master fundamental techniques.
Focus on small sculptures, 2-6 inches tall. Large clay sculptures can get heavy and fragile for beginners. Scale down your projects until you gain experience.
Learn to use basic sculpting tools like loop tools, wooden modeling sticks, and paint brushes. These will enable you to refine details and reach trickier areas as you sculpt.
Start with an air-dry clay before moving to firing and glazing. Air-dry clays like Model Magic are forgiving for new modelers and do not require special tools, glazes, or kilns.
Be patient and keep practicing. Clay modeling takes time and experience to master. Don’t get discouraged – the more you practice, the better your skills will become.
Preparing Your Clay
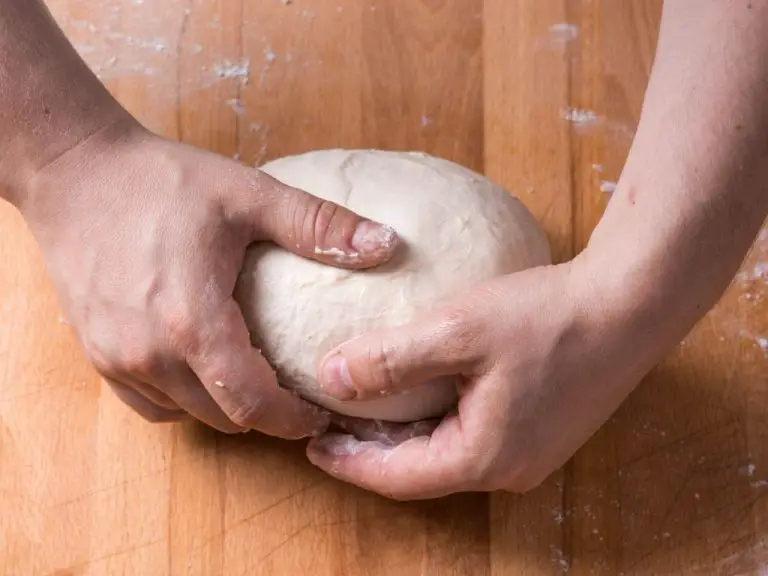
Before you can start sculpting, you need to properly prepare the clay. Kneading clay is a crucial step, as it warms up the clay and makes it soft and pliable for sculpting.
Start by taking a chunk of clay and repeatedly pressing down and folding the clay over itself. Use the palms of your hands and really work the clay vigorously to soften it up. Knead for 5-10 minutes until the clay is smooth, soft, and free of lumps. If the clay is too stiff, you can add a few drops of water while kneading to help condition it.
Aim for an evenly mixed clay with a smooth, plasticine-like consistency that’s not too stiff or sticky. Well-kneaded clay should be malleable enough that you can easily press into it with your fingers or sculpting tools. Test the consistency by poking the clay. Properly kneaded clay will slowly pop back into shape without cracks.
Kneading helps remove air bubbles and allows the molecules in the clay to bond together through friction. When satisfied with the consistency, your clay is ready for sculpting!
Source: https://communityartcollab.wordpress.com/2013/01/18/clay-modeling-tutorial/
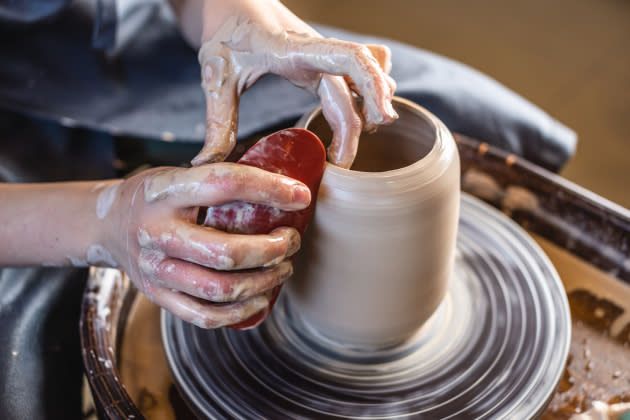
Sculpting Methods
There are several common sculpting methods used in clay modeling for beginners:
Pinching
Pinching is one of the most basic sculpting techniques. It involves using your fingers and thumb to manipulate the clay into different shapes. Start with a ball of clay and pinch it to form general shapes like bowls, cups, and vases. Pinch the clay slowly and gently to avoid cracks and tearing.[1]
Coiling
Coiling involves rolling clay into long, snake-like coils, then stacking and bonding the coils together to build up 3D forms. Make coils of consistent width and thickness. Attach each new coil to the previous one using water or slip. Coiling allows you to build taller, slender sculptural forms.[2]
Slab Building
Slab building requires rolling out flat, even clay slabs using a rolling pin. Cut and attach the slabs to construct forms. You can make straight-sided shapes like boxes and cylinders. For curves, bend and mold the clay slabs when soft and wet. Let slabs firm up slightly before joining to avoid cracking.
Carving
Carving starts with a solid block or form of clay. Using loop tools, skewers, or knives, chip away and subtract clay to reveal shapes. Work carefully and deliberately when carving to shape details and add texture. Let the clay firm up a bit before carving to avoid distortion.
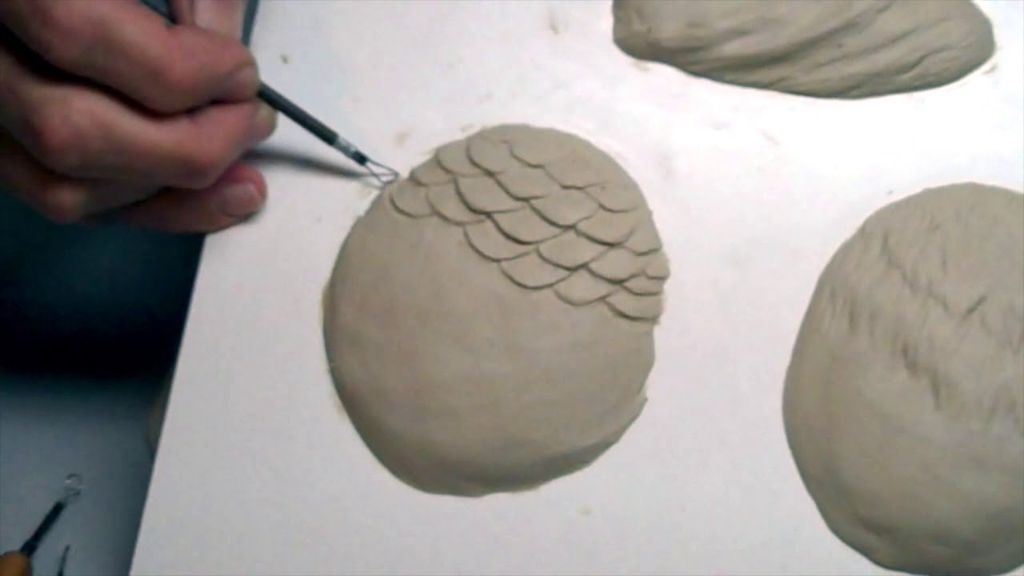
Creating Textures
Adding unique textures to clay models can make them more visually interesting and realistic. There are many techniques and tools that can be used to create different textures on clay surfaces. Here are some of the most common methods:
Clay Texture Tools
Specialized texture tools are available for applying patterns to clay. Texture mats or rollers can impress designs like scales, waves, wood grain, etc. into the surface. Clay texture stamps come in endless shapes to press into the clay, mimicking textures found in nature. Roller tools with ridges and patterns are another option for marking the clay.
Found Objects
Household items can be used to texture clay for free. Things like bubble wrap, sponges, plastic nets, sequins, gears, mesh, springs, and more can be pressed into the surface. Get creative with whatever objects you have on hand to make unique designs.
Carving and Scratching
Textures can be carved and etched directly into the clay. Use kitchen skewers, toothpicks, pencils, knives, or specialized clay tools to scratch, poke, and cut patterns. This allows for total control over the look of the texture.
Brushwork
For softer organic textures, use paint brushes, sponges, and rags. Brush swirling patterns in slip to create effects like fur, scales, weathered stone, water, etc. Brush slip onto textured fabrics and press into the clay for instant designs.
Smoothing and Refining
Once you have finished sculpting your clay model, the next step is to smooth and refine the surface to achieve a polished look. Here are some techniques for smoothing clay:
- Use your fingers or a silicone clay shaper to gently blend edges and eliminate fingerprints. Apply light pressure in small circular motions. Be careful not to distort the form.
- Lightly brush the surface with a soft paintbrush to remove debris and even out textures. Work in long strokes following the contours of the sculpture.
- Use rubbing alcohol on a cotton swab or soft cloth to smooth fingerprints and light marks. Let the alcohol fully evaporate before continuing.
- Spray water on the sculpture and gently smooth with your fingers. The water will soften the clay slightly. Allow to dry fully before additional smoothing.
- Consider a clay roller tool to roll over the surface and compress clay for a smooth look. Apply minimal pressure to avoid flattening details.
There are also some tools that can help refine the details:
- Clay shapers in different shapes and sizes can be used to sculpt fine details and reach small areas.
- Metal sculpting tools like loop tools and ribs can refine edges and create clean lines.
- Needle tools can add fine details like textures and pores.
- Sandpaper or emery boards can be gently used to smooth rough areas and remove excess clay.
Take your time with the smoothing and refining stage to achieve the highly polished finish you want for your clay sculpture. Checking for flaws in raking light will help identify areas that need additional attention. Refine until your sculpture has a smooth, professional look.
Source: https://www.instructables.com/Finishing-and-Detailing-a-Sculpey-Polymer-Clay-Scu/
Baking Clay Models
Properly baking clay models is an essential step to ensure the clay hardens and maintains its shape. When baking clay, it’s important to follow the recommended baking temperature and times for the specific clay type. Most polymer and oven-bake clays require baking at 275°F for 10-15 minutes per 1⁄4 inch of thickness.
Allow time for the clay to come up to baking temperature before starting the timer. Bake sculpts in the center of the oven, and avoid opening the oven door until completed. Check packaging instructions, as specialty clays may require lower or higher baking temperatures.
After baking, turn off the oven and allow the sculpture to cool down slowly inside. Do not remove it until it has fully cooled to prevent cracking or warping from temperature changes. Cool for at least 30 minutes before handling baked clay pieces. Letting it cool completely overnight is ideal.
Proper baking and cooling helps clay models fully harden while maintaining their shape and details. With the right baking process, clay sculpts will be strong and durable.
(Source: https://www.youtube.com/watch?v=XTsNHeJNQXE)
Painting Clay
One of the most enjoyable parts of clay modeling is bringing your creation to life with color. Painting adds detail, realism, and personality to clay sculptures. While acrylic and oil paints can be used on polymer clay, there are specialty clay paints designed to adhere better and flex with the clay.
Types of Paints
Clay paints come in a variety of finishes:
- Matte – flat, non-shiny finish
- Gloss – high shine finish
- Metallic – imitation metal coloring
- Pearlescent – irridescent, shimmery finish
- Neon – bright, intense colors
Most clay paints are water-based acrylics. Avoid oil-based paints as they may react poorly with the clay. Specialty clay paints like Genesis heat-set oils allow baking painted pieces in the oven to set the colors.
Prepping for Painting
Proper preparation is key for the paint to adhere correctly to the clay:
- Sand any rough areas with fine grit sandpaper.
- Wipe away dust with a tack cloth.
- Apply a primer coat to help the paint stick.
- Allow primer to fully dry before painting.
Painting Techniques
There are many creative ways to apply paint:
- Brushes – Use synthetic brushes for acrylic clay paints. Soft bristle brushes work best.
- Sponges – Dab paint on for a mottled, textured look.
- Cotton swabs – Allow precise control for fine details and edges.
- Airbrushing – Requires an airbrush tool but offers a smooth, flawless finish.
Consider painting in layers, allowing each coat to dry fully. Thin coats prevent dripping and uneven coverage. Don’t forget to seal painted pieces with varnish to protect the finish!
Finishing Touches
Once your clay sculpture is complete, you’ll want to add some finishing touches to help preserve and display your artwork. Here are some tips for varnishing, sealing, and displaying your finished clay models:
Varnishing
Applying a varnish is highly recommended for clay sculptures. Varnish creates a protective coating that will help prevent your clay from cracking, chipping, or fading over time. There are many types of varnishes to choose from. Polyurethane varnish provides a high gloss shine, while matte varnish has no shine and keeps the natural look of the clay. Make sure to use an acrylic varnish formulated for clay and ceramics.
Before varnishing, ensure your sculpture is fully cured, clean, and dry. Apply the varnish in a well-ventilated area using even, thin coats. Let each coat fully dry before adding additional coats. Two to three thin coats are usually sufficient.
Sealing
For an extra protective measure, you can seal the sculpture after varnishing. This will help protect it from moisture and everyday handling. An acrylic sealer spray is a good option. Carefully follow the directions on the sealer can, using light even coats.
Display Stands
Consider placing your finished clay sculpture on a display stand or base. This adds a polished, professional look for displaying your artwork. Simple cylindrical plinths or square blocks work well for small to medium sized sculptures. For larger pieces, consider using an armature or wire frame base. Display stands are available at most art supply stores. DIY options include wood blocks, tile, or pieces of finished wood.
Be sure the stand is sturdy enough to securely hold the weight of your sculpture. Felt furniture pads can be used to prevent slipping. Position your sculpture on the stand in a way that highlights its most interesting angles and features.
Advanced Techniques
Once you have mastered the basics of clay modeling, you can move on to more advanced techniques to create even more detailed and intricate pieces. Here are some of the more complex methods that experienced clay modelers use:
Portraits – Sculpting realistic portraits takes patience and an eye for detail. You must carefully sculpt each facial feature in proportion and with subtle detailing to capture a likeness.
Full bodies – Sculpting a full human figure or animal requires an understanding of anatomy and how to portray realistic poses and proportions.
Texture effects – You can use various tools and techniques to create realistic looking textures like scales, fur, wood grain, etc. This adds visual interest.
Armature – For large or complex sculptures, you may need an internal metal armature for structural support. The armature gets shaped first before applying clay.
Mold making – To reproduce your original sculpture, a mold must be made from it. The sculpture gets covered in silicone rubber to capture all the detail.
As you can see, there are many advanced methods to explore as you progress in your clay modeling journey. This provides just a glimpse of the possibilities. Stay tuned for more in-depth tutorials on these techniques coming soon!