Clay Playdate: Exciting Projects For Kids To Make And Share
Clay playdates provide a fun, creative activity for kids to get together and make exciting projects using modeling clay. Whether it’s a small gathering with a few close friends or a larger party, a clay playdate allows kids to express themselves through art while socializing and collaborating. This type of hands-on play encourages imagination, fine motor skills, and open-ended play. Kids can make clay animals, jewelry, dishes, imprint art, and more, then share their unique clay creations with each other. The process of designing, sculpting, and displaying their artwork boosts self-esteem and a sense of pride. A clay playdate theme offers a memorable way for kids to spend quality time together.
Types of Clay
When it comes to clay for kids, there are a few main types to consider: play clay, modeling clay, and air-dry clay. Each has their own properties and are good for different projects.
Play clays like Play-Doh are great for open-ended sculpting and creative play. They don’t harden so creations can be reshaped again and again. Play clays are non-toxic but not meant to be permanent works of art.
Modeling clays such as plasticine and polymer clay stay malleable until you bake them in the oven to harden them. Polymer clays like Sculpey and Fimo can be used to make detailed sculptures, beads, buttons, and figurines. Once baked, polymer clay creations become durable, finished art pieces. https://eduart4kids.com/types-of-clay/
Air-dry clays start out soft and moldable but harden naturally as they dry out over time. Brands like Crayola Model Magic are lightweight clays perfect for crafts with kids. Air-dry clay creations can be painted once dry for extra color and creativity. Compared to play clay, air-dry clay makes semi-permanent sculptures and projects.
Clay Playdate Ideas
Kids will have a blast making fun clay projects together at a clay-themed playdate. From animals to jewelry, there are endless creative possibilities. Here are some great clay playdate ideas to try:
Making Clay Animals
Crafting miniature animals out of clay is one of the most popular kids’ projects. Let their imaginations run wild sculpting their favorite pets or wildlife creatures. Simple pinch pot techniques work great for making basic animal shapes that they can decorate. Encourage them to add details like tails, ears, noses, scales or feathers to give each creature a unique personality. See examples at https://artfulparent.com/15-amazing-crayola-air-dry-clay-art-projects-for-kids/.
Making Clay Jewelry
Kids will love styling their own customized clay jewelry. Making beads, pendants and bracelets gives their designs a wearable purpose. Roll out clay ropes, beads and shapes which can be linked together and strung when dry. Add fun textures by pressing designs into the clay. Let them paint their pieces with acrylics when finished. See more jewelry ideas at https://www.pinterest.com/lezleehustad/clay-projects-for-kids/.
Making Bowls and Containers
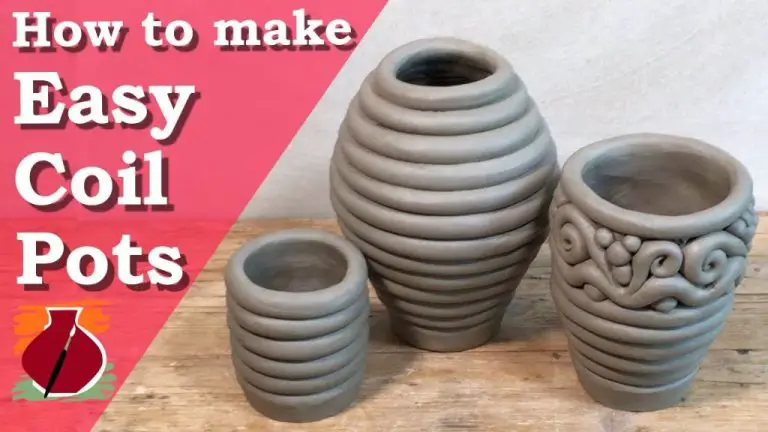
Coil pots are a great way to build bowl and vase forms. Show how to roll out and stack clay coils on top of each other gradually making the walls wider. Add texture by marking patterns into the coils before they’re stacked up. When complete, smooth the inside with a craft stick. Kids can create lovely decorative objects. Consider nesting different sized bowls together as a set.
Clay Imprint Art
Pressed flower and leaf art makes stunning designs in clay. Collect leaves, ferns, flowers and other natural finds outside. Press them gently into a rolled out slab of clay to transfer the shapes, textures and patterns. Carefully peel away the plant matter to reveal beautiful imprints. Add painted details or display as is for a lovely organic art piece.
Clay Tips and Tricks
Knowing how to properly store clay is essential for keeping it soft and workable for craft projects. Here are some key tips on clay storage:
Clay dries out quickly when exposed to air. To prevent clay from drying out, it’s important to store it in an airtight container or plastic bag. Seal clay tightly in plastic wrap or a Ziploc bag when not in use. Squeeze out excess air before sealing to prevent air pockets which can dry out the clay (Bailey Pottery).
Store clay in cool, dark places. Heat and light will dry out clay faster. The best storage places are cupboards, closed boxes, or the basement. Refrigeration can also keep clay soft, but allow it to warm to room temperature before use.
Clay can absorb odors and moisture, so store away from food, trash, chemicals, etc. Avoid temperature fluctuations like garages or sheds. Use plastic bins or heavy duty bags designed for clay storage. Label clay properly and track how long it’s been stored (Pottery Crafters).
Making Clay Animals
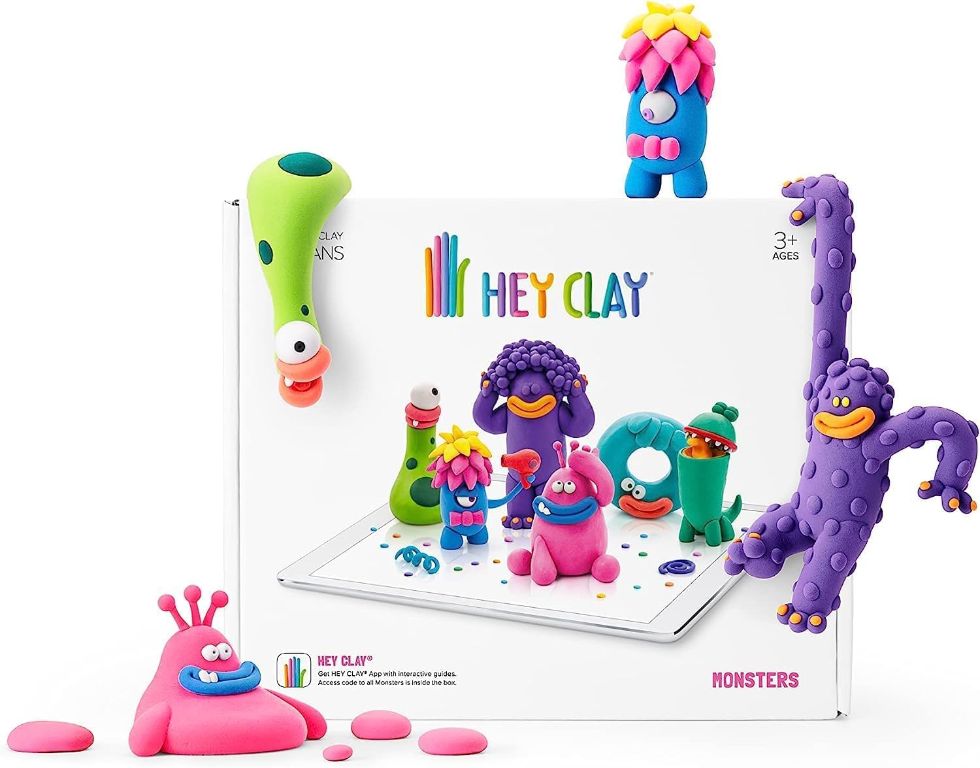
Making animals out of clay is an enjoyable creative project for kids to tackle. Animals can be made in all shapes and sizes out of readily available air-dry or polymer modeling clay. With just a little bit of clay, tools, and a vision in mind, kids can sculpt their favorite animal creations.
When making clay animals, start by visualizing the basic shape of the animal’s body in your mind. Then form the clay into this general shape. For example, many animals such as dogs, cats, horses, and bears can begin as a rounded shape for the body. Use your fingers to further mold and shape the details of the animal taking shape.
Pay attention to textures like fur, feathers, scales, or wrinkled skin on animals. These textures can be created by imprinting the clay with textured items or by carefully carving patterns into the clay with tools. Try pressing leaves, netting, feathers, sequins, beads, sieves or other items into the clay to make textures.
Facial features like eyes, ears, nose, and mouth can be shaped with fingers or loop tools. Details can be added with toothpicks or skewars. Use small pieces of clay for details like tails, legs, ears, horns, etc and attach them to the main body.
Bake or air dry your clay animal based on package directions. Once hardened, animals can be brought to life with paint. Consider using a sealer if the animal will be handled frequently. With a bit of practice, impressive clay animals can come to life at your next clay playdate!
Source: https://www.wikihow.com/Create-Clay-Animals
Making Clay Jewelry
Jewelry made with clay allows for lots of creativity and personalization. Kids can shape clay into beads, pendants, and charms then string them together to create unique necklaces, bracelets, and more. When working with clay, it’s important to condition it first by kneading and softening. This makes the clay easier to shape and mold. Here are some fun clay jewelry projects to try:
Shaping beads – Roll pieces of clay into balls for round beads, or press into molds for shaped beads. Let beads air-dry or bake according to package instructions. Thread onto elastic or cord to make necklaces and bracelets. Get creative with colors and textures by mixing clays or adding glitter.
Making pendants – Cut clay into fun shapes using cookie cutters, then use a toothpick to add holes for stringing. Or press clay into pendant trays or molds for designs like hearts, stars, and flowers. Let pendants dry fully before stringing on cord or chain.
Baking vs. air-drying – Polymer and some natural clays require baking to harden, while air-dry clays will dry and harden at room temperature. Follow package instructions, and bake hardened clay pieces according to recommended time and temperature.
Decorating – Add interest to clay jewelry by rolling beads in glitter or pressing designs into the clay using stamps, texture plates, or found objects. Paint dried clay pieces with acrylic paints or use markers to add color and patterns.
Finishing – After shaping and decorating, finish jewelry by threading pieces onto elastic, cord, ribbon, or chain. Add clasps, crimp beads, and spacers as desired. Clear glaze can be applied over dried pieces for added shine and durability.
With imagination and some simple techniques, clay is a fun, flexible material for making wearable DIY jewelry creations. For more ideas and beginner techniques, check out this guide: https://www.pinterest.com/muey/clay-jewelry/
Making Bowls and Containers
Making bowls, cups, and containers out of clay is a fun and creative way for kids to get their hands dirty. There are a few techniques that can be used to sculpt clay vessels.
One method is handbuilding by coiling. To make a coiled bowl, start with a flat circular clay base. Then, roll out “snakes” of clay into long coils. Attach the coils to the outer edge of the base, building up the sides. Smooth the coils together with water and your fingers. Continue coiling until the desired height is reached. Let the clay bowl dry completely before firing (see https://amysadlerdesigns.com/how-to-make-a-clay-bowl-by-hand/).
Another technique is pinch pots. Have kids start with a ball of clay and push their thumbs into the center, slowly pinching and rotating the clay to form the pot shape. Pinch pots can be smoothed and sculpted into simple bowls, cups, and containers.
No matter the technique, smoothing the clay with a bit of water is key for getting a nice finish. Once shaped, bowls and vessels should be allowed to air dry fully before firing or painting. Consider glazing or staining finished pieces for added color and shine. See this guide on handmade clay bowls for more tips: https://www.gatheringbeauty.com/blog//2014/06/diy-stamped-clay-bowls.html.
Clay Imprint Art
Clay imprint art is a fun and creative way for kids to make prints and textures in clay. It involves pressing objects into soft clay to leave an imprint. There are lots of everyday items that can be used to make imprints:
- Leaves, flowers, ferns, or other natural materials
- Toy cars, action figures, or other toys
- Kitchen utensils like forks, spoons, whisks
- Coins, buttons, shells, beads, marbles
- Letter stamps or alphabet blocks
- Rubber stamps
Let kids’ imaginations run wild as they search for objects to press into the clay. Encourage them to experiment with making patterns by alternating different objects. Layering imprints can create interesting textures too. Remind kids to press firmly and evenly into the clay to get a clear imprint.
Imprinting works best with soft clay that still retains its shape. Once the imprints are made, let the clay air dry fully. Prepare to be amazed by the designs and textures kids can create with this simple technique! For extra inspiration, check out these clay imprint art ideas: https://www.pinterest.com/artsignals/clay-impressions-clay-imprints/
Clay Games
Clay games can be both a fun way to encourage creativity and build social skills. Here are some clay game ideas to enjoy with kids:
HEY CLAY has a variety of virtual clay modeling games that kids can play. They get to make their own clay creations and animate them in fun minigames.
For in-person clay play, clay charades is a great activity. Have kids take turns molding clay creations and acting out what the sculpture is meant to represent. The other players try to guess what it is.
Clay storytelling is another engaging game. Going around in a circle, each child crafts a clay item that contributes to a collaborative story. Expand on each other’s ideas for a creative narrative.
There are endless possibilities for inventing new clay games. Get creative and let kids’ imaginations run wild!
Sharing Clay Creations
Kids take great pride in the clay pieces they make, and sharing their creations with others can be a rewarding experience. Here are some fun ways for kids to show off their clay art:
Display it at home. Find a special spot to exhibit your child’s clay sculptures, jewelry, and dishes. Install shelves, use wall hooks, or place pieces on windowsills or counters. Rotation displays let kids showcase new projects.
Gift clay art. Clay creations make heartfelt gifts for family and friends. Attach a personalized gift tag or label for a special touch. Clay jewelry, cups, and figurines often delight gift recipients.
Host a clay party. Gather friends together for a clay playdate. Set out tools, clay, paints, and beads so kids can make their own projects. After creations dry, hold an art show and let each child describe their work. Serve clay-themed treats like dirt cups or worm burgers.
Organize displays. For class or club projects, organize a themed clay exhibit. Invite families to view the collection and vote on favorites. Award handmade clay medals or ribbons to winners.
Clay projects allow kids to practice fine motor skills, creativity, and self-expression. Sharing their unique art pieces boosts confidence and gives young artists a sense of fulfillment. With imagination and some simple materials, clay provides endless fun and learning for budding makers. For more clay craft ideas see: https://www.sculpey.com/blogs/blog/10-cute-clay-projects-for-kids


