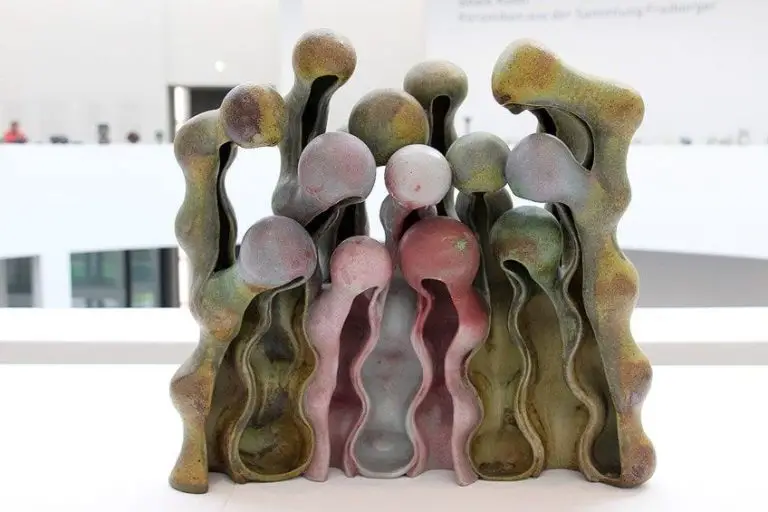
Clay Sculpting Basics: A Beginner’S Guide
Clay sculpting is the art of shaping malleable clay into three-dimensional forms and figures. As one of humankind’s oldest and most widespread art forms, the origins of sculpting with clay can be traced back over 25,000 years to some of the earliest human civilizations (Source). Archeological evidence shows that prehistoric cultures fashioned simple clay figurines, beads, and pottery. Over the centuries, ceramic arts evolved across many cultures into refined sculptural techniques.
Clay is an incredibly versatile, responsive, and forgiving artistic medium. It can be endlessly manipulated and shaped into limitless forms. The sensory, hands-on process of sculpting with clay is meditative and theraputic. Creating sculpture in clay is an immersive experience that exercises creativity and visual-spatial skills. From simple pinch pots made by children to intricate professional sculptures, clay provides a direct connection of the artist’s hands to the material.
Clay sculpting allows complete artistic freedom and self-expression. It develops key skills including observation, patience, fine motor skills, and spatial reasoning. The artform also builds confidence and pride in craftsmanship. Whether working figuratively, abstractly, symbolically, or representationally, sculpting in clay is an enlightening creative journey. As a versatile, accessible, and profoundly human art medium, clay sculpture continues to captivate artists across time and culture.
Types of Clay
There are three main types of clay used for sculpting:
Polymer Clay
Polymer clay is made from PVC resin mixed with various color pigments and plasticizers. It comes in a wide variety of colors and can be molded when soft but hardens when baked in a regular oven (https://www.sculptureatelier.com/blog/what-clay-should-i-use-to-start-sculpting). Polymer clay is lightweight, doesn’t dry out, and produces bright, durable sculptures. It’s great for detailed work and doesn’t require any special tools. However, polymer clay sculptures are fragile and temperature sensitive.
Oil-Based Clay
Oil-based clays like plasticine are made of oils, waxes, and clay minerals. They stay soft and pliable, allowing sculptors to rework pieces multiple times. Oil-based clays don’t dry out but remain sticky. Finished sculptures made from oil-based clays aren’t durable. This type of clay is often used for animation or temporary work.
Water-Based Clay
Water-based clays include pottery clay and ceramic clay made from natural earth minerals. When wet, water-based clays are very malleable and hold fine detail well. The sculptures harden as the water evaporates. Finished pieces can be fired in a kiln to increase their durability. Water-based clays are inexpensive and readily available.
Clay Sculpting Tools
There are two main categories of tools used in clay sculpting: basic hand tools and equipment. The basic hand tools include:
Knives – Used to cut, trim, and slice clay. Common types include pottery loop knives, ribbon knives, and needle tools. These allow sculptors to refine edges and details.
Loop tools – Shaped in a U or V with wire or wood loops on the end. The loops are stroked across the clay to smooth surfaces, add texture, and blend seams. Useful for refinements.
Ribs – Made of wood, rubber or metal with a flat beveled edge. Used to compress and smooth soft clay. Creates a polished look.
Cutters – For removing excess clay. Hand cutters, trimmers and hole cutters help manage waste and create openings.
The equipment includes:
Sculpting stands – Hold the clay upright while sculpting. Some rotate to access all angles.
Armatures – Central structures made of wire that support a sculpture. Provide stability and reference.
Clay wire tools – Wires bent into curves or loops shape the clay and create line. Useful for detailing.
Clay Preparation
Properly preparing clay is an essential first step before sculpting. There are two main techniques for preparing clay – wedging and kneading. Wedging involves cutting the clay in half, slamming it back together, and repeating. This process removes air bubbles and makes the clay uniform in consistency. Kneading is done by continuously pressing, folding, and stretching the clay with your palms. Kneading blends the clay and makes it smooth, firm, and elastic.
The desired clay consistency depends on your sculpting needs. For detailed, precisely sculpted pieces, a firm clay is best. For large or hollow sculptures, a softer more pliable clay prevents cracking and collapse. Add water to dry clay a teaspoon at a time until reaching the right consistency. Let the clay rest 10 minutes after wetting to fully absorb the water. For moist clay, wedge in a dry material like grog or sawdust. Finally, store unused clay in airtight containers to maintain its consistency between sessions.
With the clay properly wedged and kneaded, it’s now ready for sculpting. Remove any remaining air bubbles and make sure it’s uniform before starting to sculpt. Taking time to correctly prepare the clay will lead to a smoother, easier sculpting process.
Sculpting Techniques
There are several fundamental sculpting techniques to learn when working with clay. Mastering these basic techniques allows you to create a wide range of sculptural forms.
Pinching
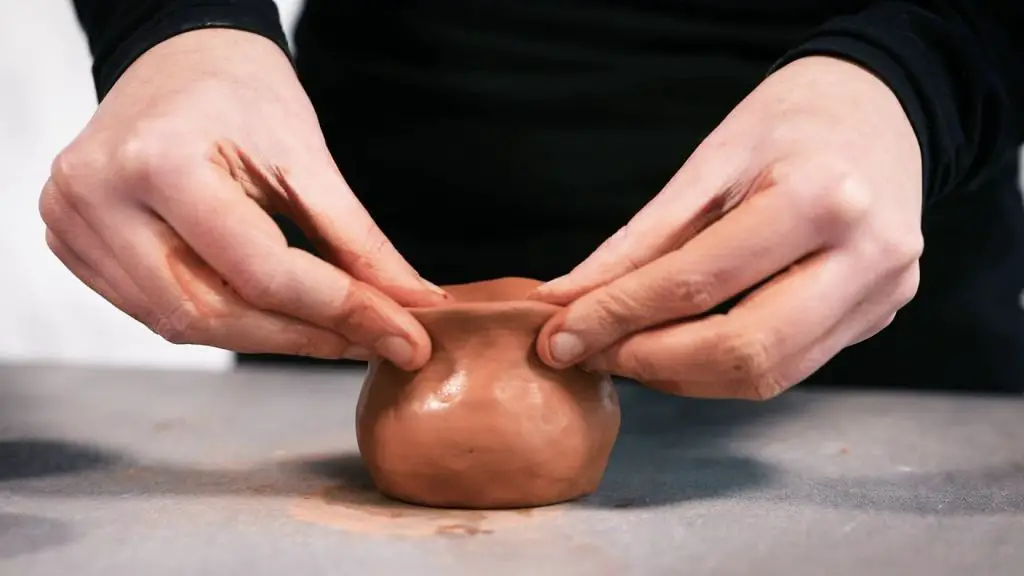
Pinching is likely the most basic clay sculpting technique. It involves pinching and pulling the clay with your fingers and thumbs to form simple shapes like bowls, pots, and figures. Pinching works well for smaller sculptures and details. It gives great control for subtle shaping.
Coiling
The coil technique involves rolling out “snakes” of clay into long coils, then stacking and joining the coils to build up a sculpture. Coiling is great for making taller, hollow forms like vases and vessels. It can also be used to create relief panels by laying coils side by side.
Slab Building
Slab building involves rolling out flat “slabs” of clay and then cutting and assembling them to create sculptures. The slabs can be cut into shapes and joined by pressing and smoothing the seams. Slab construction is ideal for making free-standing sculptures with flat surfaces and straight lines.
Carving
For carving, you start with a solid block or form of clay. Then using various tools, you carve away excess clay to reveal your design. Subtractive carving allows you to create concave shapes and intricate details not possible with the additive techniques. However, it also requires removing lots of clay.
Joining and Smoothing
Most clay sculptures combine multiple pieces that must be joined. Clay parts can be joined by scratching the surfaces and pressing them together firmly or by applying liquid “slip.” Once joined, any cracks and seams must be carefully smoothed. Proper joining and finishing ensures fired pieces hold together.(Source)
Sculpting the Human Figure
When sculpting the human figure in clay, understanding proper body proportions and having reference materials are key. The average adult figure is 7-8 heads tall. Refer to reference images or life models to understand the relationships between different body parts. Capturing realistic poses and expressions takes practice. Work from general forms to fine details. Exaggerate angular or curved forms to bring out the essence of the pose.
This guide provides step-by-step instructions for sculpting the human figure in clay: How to Sculpt the Human Figure in Clay. Start with a wire armature to support the clay. Add thick cylinders for the torso, spheres for joints. Refine the proportions and forms. Use clay sculpting tools to define musculature. Pay attention to gesture, weight, and anatomy. Add facial features last. Let the clay firm up between work sessions.
With practice and observation from life, an artist can capture the human form in clay. Reference materials are helpful for understanding proportions. Work from large forms to small details to bring the sculpture to life.
Sculpting Animals
Creating realistic animal sculptures with clay requires understanding the anatomy and movement of the animal. When sculpting animals, it’s important to focus on the major muscle groups and how they shift as the animal moves. Pay close attention to the proportions of the head, legs, and torso.
To achieve a realistic fur texture, use various clay sculpting tools. Loop tools can create wavy fur patterns. Clay shapers are helpful for smoothing and detailing fur. You can also use a knife or needle tool to add texture by engraving or scratching the clay surface. Work in small sections when texturing the fur to maintain control.
When sculpting smaller animals like cats, opt for an armature made from lightweight materials like aluminum wire so the sculpture doesn’t become too heavy. Reference photos are very helpful when sculpting animals. Look for images that show the animal from multiple angles so you can accurately recreate the form. Focus on capturing the animal’s unique gestures and poses.
According to this article, when sculpting animals it’s important to dry the sculpture slowly to avoid cracking. Covering it with a cardboard box allows moisture to dissipate gradually. With patience and practice, you can create remarkably lifelike animal sculptures out of clay.
Creating Natural Elements
When sculpting natural elements like rocks, trees, and flowers in clay, it’s important to focus on recreating the proper forms and textures found in nature. Here are some tips:
For sculpting rocks, pay close attention to the irregular shapes and textures of real rocks. Use tools like loop tools and wire brushes to indent, carve, and add rough textures to the clay. Add interesting crevices, bumps, cracks, and variations to mimic natural rocks. Referencing photo references can help capture realistic rock details.
For trees, look at photos and real trees to analyze the branching patterns, bark texture, and overall tree shapes. Use rolled coils of clay for thick tree trunks and branches, blending and smoothing joints. Use loop tools to add bark by making long grooves and indentations. Add smaller coils for thinner branches and twigs extending from the main trunk and branches.
Sculpting flowers involves carefully shaping each part of the flower – the petals, center, stem and leaves. Pay attention to the curve, ruffling and unique details of flower petals. Use thin clay slabs cut into petal shapes. Use a soft clay blend to allow blending and shaping the petal edges. Pinch and ruffle the clay to mimic natural flowers. Use references to recreate accurate flower forms like roses, tulips, daisies, etc. Add details like pistils and stamens in the flower center.
When sculpting any natural element, consider the overall form, variation of detail and textures found in nature. Observe and reference real samples to recreate realistic natural clay sculptures.
Finishing and Firing
Once your clay sculpture is complete, there are a few more steps before it is fully finished. Proper finishing and firing are crucial to ensuring your sculpture lasts.
Drying
Before firing, clay sculptures must be thoroughly dried to remove any moisture. Air drying takes 1-2 weeks. You can speed drying by placing the sculpture next to a fan or dehydrator. Dry slowly to prevent cracking.
Bisque Firing
The first firing is called bisque firing. This converts the clay into a permanent ceramic material by heating to over 1000°F. Use a kiln or specialized oven for bisque firing. Firing too fast can cause cracking.
Glazing
Glazes are glass-like coatings applied before the final firing. They come in various colors and finishes like glossy, satin, or matte. Brushing, dipping, or spraying glaze provides an extra layer of beauty and protection.
Some common glaze types include:
- Celadon – pale green colors
- Raku – metallic crackled effects
- Crystalline – crystalline finishing
Final Firing
The final firing melts the glaze onto the sculpture. Temperatures reach over 1200°F. The glaze becomes smooth, shiny, and fully hardened. Handle carefully after final firing since the sculpture is more fragile.
Let cool completely before removing fired pieces from the kiln.
Displaying and Caring for Sculptures
Properly displaying your finished clay sculptures can enhance their beauty while also protecting them. Consider mounting sculptures on bases or in cases to avoid direct contact that could cause chips or scratches. Opt for neutral-colored bases that don’t distract from the sculpture itself. Spotlighting or track lighting can create dramatic shadows and highlights on your artwork. For small sculptures, glass display cases help control dust buildup and prevent accidental damage.
When handling clay sculptures, always wear clean gloves and wash hands first to prevent oils from skin transfering onto the surface. Gently pick up pieces by the base or underside if possible. Avoid dragging sculptures across tables or shelves, which can lead to scratches. Store pieces securely on soft surfaces like foam or cloth when not on display.
For cleaning, gently blot with a slightly damp microfiber cloth. Avoid submerging sculptures in water or using liquid cleaners, which can degrade the clay. A very mild diluted dish soap can occasionally be used for stubborn dirt if rinsed thoroughly after. Check with the artist for any special care instructions. With proper display and handling, fired clay sculptures can provide enjoyment for many years.