Clay Techniques Made Easy For Beginners
Clay is one of the most versatile and widely used materials for making art, with evidence of clay vessels dating back over 20,000 years. Clay’s plasticity allows it to be molded into endless forms, making it ideal for pottery, sculpture, tiles, and more.
Clay originates from the earth itself, formed from weathered rock over long periods of time. Archaeological evidence shows that clay has been used to create pottery and figurines since the Paleolithic era. Ancient cultures in places like Mesopotamia, China, Greece, and Central America all independently discovered the unique properties of clay and developed rich traditions around ceramic arts and pottery.
There are several main types of clay used in pottery today. Earthenware clay contains lots of minerals and is porous when fired. Stoneware clay is denser with a tighter molecular structure, making it less porous than earthenware. Porcelain clays are even finer and denser than stoneware, giving porcelain its glass-like quality after high temperature firing. Other clays used in pottery include terracotta, buff clay, red clay, and white clay.
Getting Started
To get started in clay work as a beginner, you will need to gather some basic supplies and tools. Some essential items you will need include:
- Clay – There are many types of modeling and pottery clay to choose from such as earthenware, stoneware, and porcelain. Consider factors like firing temperature, workability, and your desired end product when selecting clay. Popular beginner choices include pottery clay and polymer clay.
- Basic clay tools – Helpful starter tools include wooden sculpting sticks, loop tools, ribbon tools, metal sculpting tools, sponges, and cutting wire. Refer to guides on basic pottery tools to select tools for tasks like shaping, smoothing, and detailing.
- Work surface – This can be as simple as a table covered in canvas or butcher paper. You’ll want an easily cleanable surface.
- Water containers – Have some water on hand for smoothing and joining clay.
Before beginning a clay project, it’s important to properly condition your clay. Take some time to wedge, knead, and press your clay to homogenize it and remove air pockets. This will make the clay more pliable and prevent cracking and explosions during firing. Consult clay instructions for preparation tips.
Handbuilding Techniques
Handbuilding is an approach to working with clay that involves constructing pieces by hand rather than using a pottery wheel. There are three primary handbuilding techniques that beginners should start with:
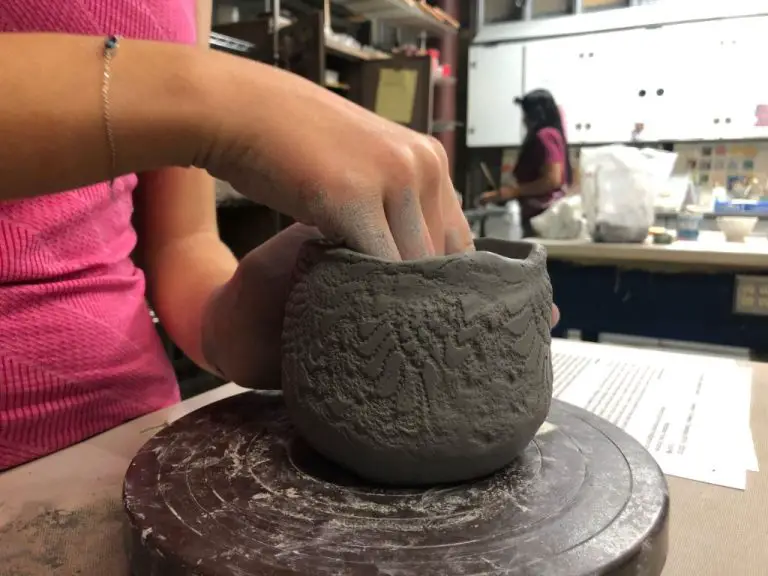
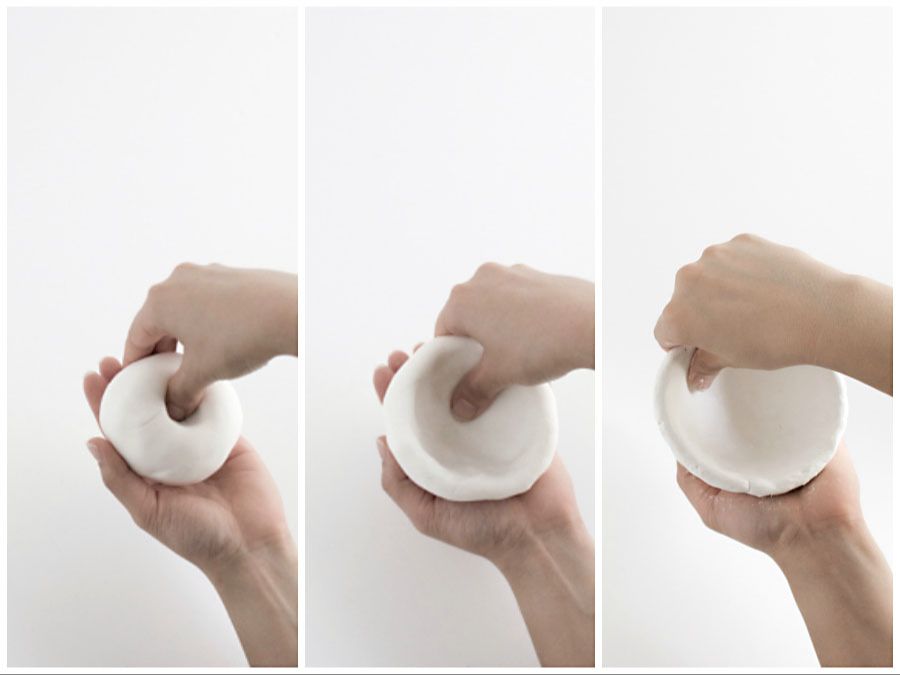
Pinch Pots
Pinch pots are one of the most basic and ancient pottery techniques. To make a pinch pot, start with a ball of clay and use your fingers and thumbs to pinch and pull the clay outwards while rotating (source). This technique can create simple pots and bowls. Pinch pots are great for beginners to get a feel for molding clay.
Coil Building
Coil building involves rolling clay into long coils or ropes, then stacking and smoothing the coils together to build up the walls of the piece (source). Coils can be used to create both functional pieces like jars and free-form sculptural works. Coiling is versatile and allows building asymmetric and large-scale works.
Slab Construction
Slab building requires rolling out flat, even pieces or “slabs” of clay and then joining them to construct forms. Slabs can be cut into shapes and decorated. Extra clay or coils can be used to attach and blend slabs. Slab construction is great for making flat items like tiles or plaques as well as boxes and containers.
Sculpting
Sculpting with clay involves both additive and subtractive techniques. With additive sculpting, you gradually build up a form by adding more clay. This allows you to work freely and intuitively. Subtractive sculpting involves carving away clay from an existing block to reveal the desired form. This requires more planning and vision of the end result.
Sculpting heads and figures in clay utilizes both techniques. It’s common to start with a basic armature or rough shape using additive sculpting. Once the major forms are blocked out, you can refine the shapes by carving away unwanted clay. Facial features, muscles, clothing folds are defined using a combination of adding and subtracting clay. Having proper sculpting tools like loops, ribs, and wire cutters helps remove clay easily and precisely.
When sculpting heads, it’s important to maintain proper anatomy and proportions. Study the underlying skull structure and muscle shapes. Figures require careful attention to posture, weight distribution, and flow of clothing. Take pictures of models in varied poses for reference. Allow your clay sculpture to slowly develop through an iterative process of building up and refining the forms. Work across the entire piece to maintain continuity and harmony of shapes.
Decorating and Texturing
Decorating and texturing clay adds visual interest and can really make pieces stand out. Some common techniques for beginners include incising and sgraffito, sprigging and applique, and slip trailing.
Incising involves using sharp tools to cut into leather-hard clay to create designs and patterns. Common incising tools include wooden sticks, knives, and various clay tools with sharp edges The Pottery Wheel. Sgraffito is similar to incising but involves scratching through a layer of colored slip to reveal the clay color underneath. Incising and sgraffito allow you to add simple or complex patterns to leather-hard pieces.
Sprigging and applique involve attaching decorative elements made of clay onto leather-hard pieces using slip. Sprigs are 3D clay decorations that can be cut out using cookie cutters or hand sculpted. Appliques are flat clay cutouts attached to the surface. Both sprigging and applique add interest and texture Ceramic Arts Network.
Slip trailing involves using liquid clay slip to draw directly onto leather-hard pieces. Slip trailing can be done freehand or using tools like pipettes for fine lines. Simple slip trailing designs like dots, waves, spirals, and shapes are very effective. Let the slip trail designs dry completely before continuing to decorate or fire.
Glazing and Firing
Glazing is an important step in finishing pottery pieces. Glaze types commonly used by beginners include underglazes, dipping glazes, and brush-on glazes. Underglazes are applied directly on raw clay before bisque firing. Dipping glazes can be quickly applied by dipping bisque-fired pieces into buckets of glaze. Brush-on glazes allow for more control and are painted onto bisque ware. It’s best to apply multiple thin layers of glaze rather than one thick layer (Soul Ceramics).
Before glazing, pottery must go through an initial bisque firing to harden and prepare the clay. Bisque firing is done slowly, reaching peak temperatures around cone 04-06 (approximately 1885-1915°F). Faster temperature increases can cause cracking. Allow pieces to cool slowly as well. Once glazed, pottery undergoes a final firing at higher temperatures, usually between cone 4-10 (1945-2345°F) depending on the glaze used. Specific glaze manufacturer instructions should be followed for best results (The Crucible). Carefully control the final firing by slowly raising to peak temperature, holding, then slowly cooling.
Troubleshooting Issues
Clay work can be frustrating when projects don’t turn out as expected. Here are some common issues that arise and how to address them:
Cracking
Cracking occurs when clay dries too quickly or unevenly. To prevent cracking:
- Allow clay projects to dry slowly, wrapping in plastic if needed.
- Avoid thick and thin sections close together which dry at different rates.
- Wedge clay thoroughly to remove air pockets.
- Don’t let clay dry out too much before working.
Bubbling
Bubbles under the glaze surface are caused by trapped gases during firing. To prevent bubbling:
- Allow glazed pieces to dry completely before firing so glazes release any pinhole gases.
- Fire at the ideal temperature for your glaze.
- Allow sufficient heatwork to fully melt the glaze.
Glaze Defects
Glaze defects like crazing, crawling, and shivering can ruin an otherwise beautiful piece. Common glaze problems and solutions include:
- Crazing – Increase clay silica or decrease glaze alumina. See: Correcting Common Glaze Defects
- Crawling – Add a crawler aid like MgO or ZnO. See: Glaze Problem Solutions
- Shivering – Increase glaze flux or lower clay silica. Test compatibility.
Clay Projects
Here are some simple clay projects that are great for beginners to try:
Simple Vessels and Bowls
Bowls and cups are some of the most basic clay projects. They are easy to handbuild by pinching, coiling, or using slab techniques. Beginners can start with small bowls, cups, or vases. These allow you to practice shaping clay and getting clean lines before moving on to more complex forms. Simple glazing techniques like solid colors or basic patterns work well. Some ideas are mugs, bowls, vases, teacups, etc. (https://www.skillshare.com/en/blog/simple-things-to-make-with-clay/)
Decorative Tiles
Tiles are fun beginner projects because they are flat and easy to decorate. You can press textures into clay slabs to create patterns. Tiles can be painted with glazes and fired. Hang them on the wall or create trivets. Make a set of coasters by cutting small squares.Stamped patterns like animals, leaves, letters, or shapes work well. (https://theartandbeyond.com/air-dry-clay-project-ideas/)
Figurines
Sculpting simple figurines allows beginners to practice shaping clay into 3D forms. Start with pinch pots, balls of clay, or coils to form the body. Add details like eyes, noses, and other features. Small animals, creatures, and characters are fun to sculpt. Let beginners explore their creativity. Figurines make great gifts after firing and painting. (https://theartandbeyond.com/air-dry-clay-project-ideas/)
Advanced Techniques
Once you have mastered the basics of working with clay, you can move on to more advanced techniques to take your pottery skills to the next level. Here are some key advanced techniques to be aware of:
Wheel Throwing
Wheel throwing allows you to create symmetrical pottery pieces with thinner walls and smooth surfaces. To take wheel throwing to the next level, try techniques like altering thrown forms, combining thrown and handbuilt elements, or adding textures like ribs or paddling (Source). You can also experiment with unconventional thrown forms like teapots, vases, or non-circular shapes.
Mold Making
Mold making lets you reproduce the same ceramic piece multiple times. To make molds, press your original clay piece into plaster to create a negative mold. Then pour liquid clay into the mold and allow it to set before unmolding. Using molds allows for consistency and efficient production of intricate pottery items.
Clay Substitutions
While ceramic clay is ideal, you can also experiment with clay substitutions using materials like paper clay, salt dough, or air-dry clay. These alternative clays have different properties, but allow creativity on a budget (Source). Test how they work before substituting clays for important projects.
Conclusion
Working with clay offers numerous benefits beyond creating beautiful pieces of art and functional pottery. Studies have shown that working with clay can provide mental health benefits, including reducing stress, anxiety, and depression. The tactile nature of clay allows one to achieve a meditative state while sculpting. Pottery also encourages creative thinking and self-expression. In addition, the physical nature of working with clay provides exercise for the hands, wrists, and arms.
For those interested in continuing to develop their clay skills, there are many options available. Local colleges or community centers often offer pottery classes at night or on weekends. These allow you to get instruction and feedback from experienced teachers. Another option is to join a clay co-op or studio that provides shared studio space, equipment, and fellow pottery enthusiasts to learn from. Attending workshops and conferences to learn specialized skills and techniques from masters in the field is another great way to improve. Entering local art shows and competitions can provide motivation along with valuable exposure for your work.
The world of pottery and ceramics is endlessly fascinating, with limitless room for creativity. Working with clay is an immensely rewarding craft that provides a balanced experience of physical exertion, artistic expression, and mental engagement. After learning the basics, one can continue growing their skills over a lifetime.