How Can I Strengthen Air Dry Clay?
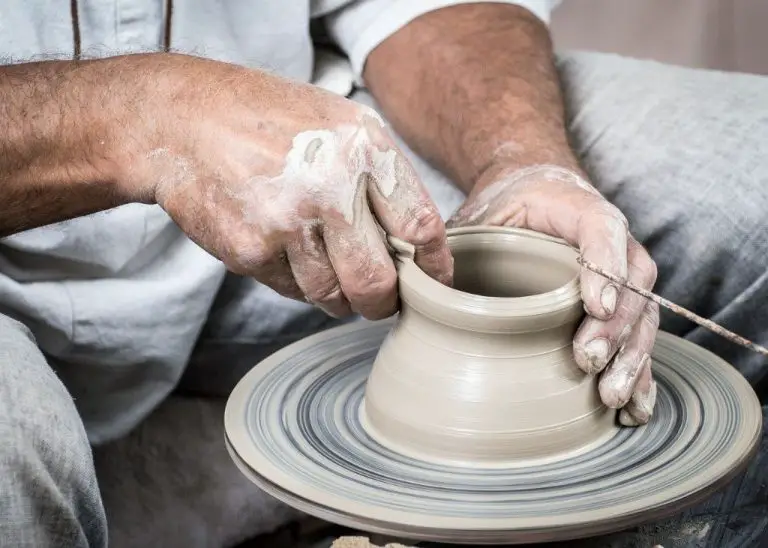
Air dry clay, also called “no-bake clay”, is a modeling material made primarily from clay and water. Unlike traditional pottery clay, it does not require heat to harden and dry. As the name suggests, air dry clay dries and cures at room temperature through evaporation. The water in the clay slowly evaporates over time, leaving the clay particles to bind together.
Air dry clay is valued for its accessibility and ease of use. It is inexpensive, easy to work with, and requires no specialized tools or equipment like a kiln. This makes it ideal for arts and crafts projects, kids’ activities, prototypes and hobby work. It comes in bright colors and can be molded into endless shapes and figures.
However, air dry clay has some inherent weaknesses that prevent it from being suitable for all applications. The main issue is strength and durability. Because it air dries rather than firing at high temperatures, the finished pieces can be brittle and fragile. They may break or crumble easily during handling or over time. There are several methods to strengthen and reinforce air dry clay to make it more viable for detailed sculptures, jewelry, decorative objects, and other sturdy creations.
Weaknesses of Air Dry Clay
Air dry clay is beloved for its accessibility and ease of use, but it does have some inherent weaknesses compared to other clays. The three main issues to be aware of are brittleness, low durability, and susceptibility to cracking.
When air dry clay dries, it can become quite brittle and fragile. Thinner pieces in particular are prone to cracking and breaking easily during handling or if subjected to any force. The clay lacks the strength and plasticity of clay that has been fired in a kiln.
Similarly, pieces made from air dry clay tend to have lower durability than those made with other clays. They can degrade faster over time, especially if exposed to moisture or changes in temperature or humidity. The clay remains somewhat porous after drying, which reduces its longevity.
Lastly, air dry clay’s tendency towards brittleness also makes it very prone to cracking as it dries and even after it has dried fully. Cracking can occur during the drying process itself or later if a finished piece is stressed or dropped. These cracks can reach quite deep into the clay and be difficult to repair.
Strengthening With Additives
One of the easiest ways to strengthen air dry clay is by mixing in various additives and mediums. These can reinforce the clay structure, reduce cracking and make the finished piece more durable and water resistant.
Some of the most effective additives to use include:
- PVA glue – This white glue acts as a binder to hold the clay together. Mix in a 50/50 ratio with the clay for best results.
- Varnish – Adding a coat of varnish or polyurethane sealant makes the clay more flexible and less prone to cracking and chipping. Brush or spritz varnish over the finished piece.
- Acrylic mediums – Acrylic mediums like gloss or matte medium can be mixed into the clay. They extend the drying time while increasing bonding and flexibility.
Be careful not to add too much additive or the clay may become sticky or take much longer to dry and cure. Test on a small amount first to ensure the mixture retains a clay-like texture.
Baking Air Dry Clay
Baking air dry clay is one of the most effective ways to strengthen it for more durable finished pieces. The baking process helps set the clay by evaporating the water content and causes a chemical reaction that hardens the material. There are several advantages to baking air dry clay:
Hardens the Clay. Baking will harden the clay completely so it becomes much more durable and less prone to dents, cracks or scratches. This is important if you want a finished piece that will hold up well over time.
Prevents Later Weakness. Some air dry clays can begin weakening again over time if left in the open air. Baking helps lock in the strength even after the clay has dried.
Less Shrinkage. As air dry clay dries, it tends to shrink slightly. The baking process minimizes the shrinking so the final piece will be closer to the original shape.
For best results, bake air dry clay at 275°F for 10-15 minutes per 1/4 inch of thickness. You can use a standard oven or a small countertop toaster oven. Low temperatures and shorter baking times are usually sufficient. It’s important not to over-bake the clay, which can cause cracking or scorching. Allow the piece to cool completely before handling.
Reinforcing the Structure
One of the best ways to strengthen air dry clay is by reinforcing its structure. This helps support the clay and prevent cracking, sagging, or collapsing as it dries or if weight is applied. There are two main methods for doing this:
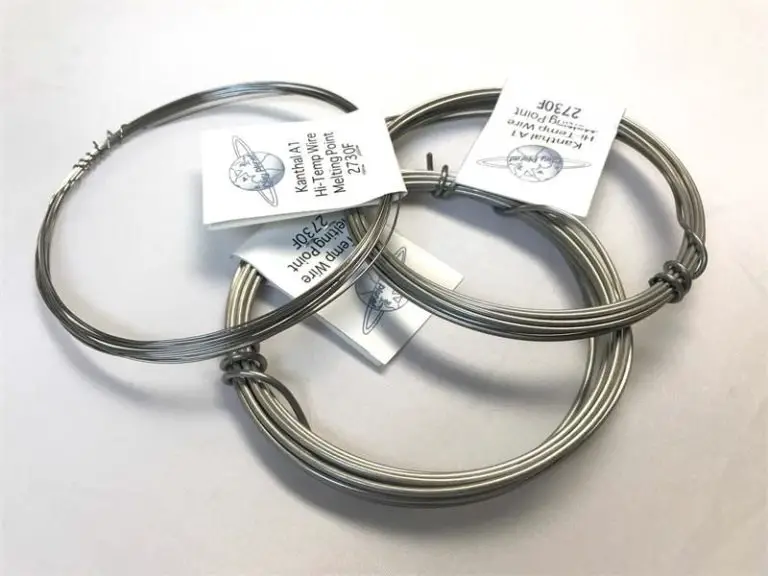
Armatures
An armature provides an interior framework that air dry clay can be built around. This is ideal for sculpting figures, animals, or anything with protruding limbs. The armature acts like a skeleton to add stability and structure. Common materials for armatures include wire, wood, aluminum foil, and even crumpled newspaper or plastic bags.
To make an armature, cut and bend the wire or other material into the basic shape needed. Make sure to extend the framework into any thin or elongated sections to reinforce them. Then gradually add clay over the framework, working it into all the crevices and building up the form. The interior armature, such as wire, will provide excellent strength and support.
Wire Frames
For items like bowls, vases, wall plaques, or boxes, simple wire frames can help reinforce the structure. Bend wire into the outline shape desired, leaving a few inches extra at the ends. Press the wire frame into the center of the clay item halfway through the sculpting process. Make sure the wire fully adheres to the clay. Leave the ends sticking out to create “handles” – these can be blended into the design or folded over and pressed into the underside or back.
The embedded wire frame helps shore up the form, preventing sagging or cracks in projects with overhangs or large flat expanses. The wire along the rim and sides strengthens thin areas and maintains the shape through drying and handling. Wire frames are quick and easy internal supports for all kinds of air dry clay pieces.
Sealing the Surface
One of the most effective ways to strengthen air dry clay is to seal the surface with a protective coating. This helps make the clay more durable and water resistant. Some common options for sealing air dry clay projects include:
Paints
Acrylic paints work very well for sealing air dry clay. They soak into the surface and create a flexible, protective seal. Acrylic paints come in tons of colors, so you can also add color while sealing the clay. Make sure to use an acrylic sealer as a top coat for maximum protection.
Varnishes
Polyurethane, polyacrylic, and epoxy resin varnishes all work to seal and strengthen air dry clay. Brush multiple coats over the clay, allowing it to fully dry between each application. This will waterproof the clay and make it more durable.
Waxes
Waxes like paraffin, beeswax, and carnauba wax can be melted and brushed over air dry clay to seal and strengthen it. The wax soaks in and gives the clay a nice sheen while also making it firmer and more rigid. Waxes are easy to apply and buff out.
Handling and Storage
Proper handling and storage of air dry clay is crucial to prevent cracking or breakage. Here are some tips:
Proper Drying: Air dry clay needs time to fully dry and harden. Avoid drying too quickly near heat sources like radiators or in direct sunlight. Dry flat projects in a single layer, avoiding contact between pieces. For 3D projects, turn regularly so all sides dry evenly.
Preventing Breakage: Always handle projects gently until completely dry, as air dry clay is fragile when damp. Don’t move or flip projects before they develop hardened outer layers. Let projects dry fully for days or weeks before sanding or painting.
Storage Conditions: Store unused clay in airtight containers away from heat and moisture. While drying, keep projects in clean, dry areas with good airflow and room temperature. Once fully dry, finished pieces can be displayed without climate control.
Examples of Strengthened Projects
Air dry clay can be used to create a variety of decorative and functional projects once it has been strengthened. Here are some examples of projects that work well with strengthened air dry clay:
Jewelry
Strengthened air dry clay is an excellent choice for making jewelry such as earrings, pendants, beads, and bracelets. The clay holds fine details well, allowing you to create intricate designs. Once cured and sealed, strengthened clay jewelry is lightweight, smooth, and durable for regular wear.
Figurines
From miniature animals to fairy garden statues, strengthened clay is perfect for crafting figurines. You can sculpt an endless variety of fun shapes and characters. Structural additions like wire or foil armatures allow you to create figures with limbs or elements that extend out without risk of breaking.
Decorative Bowls
Lightweight bowls, vases, and platters make lovely additions to any home when created with strengthened air dry clay. The clay can be shaped, molded, carved, or coiled into flowing organic bowl forms. Once cured, sealed, and decorated, these sturdy clay vessels can hold keys, potpourri, candles, or serve as beautiful candy dishes.
Tips for Specific Brands
Air dry clays from different brands have slightly different properties and may require customized strengthening techniques.
Creative Paperclay
Creative Paperclay is already formulated to be one of the strongest air dry clays. It can be hardened further by adding a bit of white glue or varnish. Avoid over-hardening Creative Paperclay as it can become brittle.
Makins Clay
Makins Clay has a smooth, porcelain-like finish but tends to be fragile. Mix in some white glue or liquid starch to harden it. Let Makins Clay dry fully before handling to prevent cracking.
Crayola Model Magic
Crayola Model Magic is lightweight and easy to work with but quite soft. Knead in some cornstarch or baking soda to reduce stickiness and strengthen the clay. Allow projects made with Model Magic to dry for several days before painting or handling.
Conclusion
Air dry clay is convenient to work with, but prone to breakage and other structural issues. However, with a few simple techniques, you can significantly strengthen air dry clay to make it much more durable and long-lasting for your creations.
Adding white glue, varnish, or acrylic mediums creates a protective barrier that reinforces the clay. Baking the clay makes it more rigid and less likely to warp or break. Layering the clay over wire, cardboard, or other materials gives internal support. Sealing the clay well also protects the surface from marks and damage.
However, even with strengthening techniques, air dry clay has limitations compared to polymer clay that is kiln baked at high temperatures. Air dry clay creations will not be as indestructible or able to withstand as much force. Care still needs to be taken when moving and displaying air dry clay works.
With creativity and care, air dry clay can be used to produce beautiful, sturdy creations that hold up well. Take time to properly strengthen each piece using the techniques that work best, and air dry clay can be a rewarding and effective artistic medium.