How Do You Flatten Clay Without A Slab Roller?
Flattening clay without a slab roller allows ceramic artists to create even sheets of clay for handbuilding projects in a cost-effective way. This article provides techniques and tips for flattening clay to consistent thicknesses using common household items. By the end, you’ll have several options for efficiently rolling clay slabs for your next ceramic sculpture or functional piece without needing to purchase specialty equipment.
Why Flatten Clay?
There are several benefits to flattening clay into slabs before beginning a handbuilding project. The main reason is to create an even thickness for constructing the piece (The Art of Clay: Exploring the Benefits of Slab Rollers). When clay is rolled out into a slab, it forms a uniform thickness that makes joining and assembling easier. Slabs that are an inconsistent thickness may crack or break when building the structure. Having an even slab thickness of 1/4” or 1/2” ensures the clay will hold together and provides a flat surface for adding decorative elements.
Rolling clay into a flat slab also removes any air bubbles trapped inside that could weaken the structure. Compressing the clay under pressure pushes out bubbles and consolidates the material. Flattening out the clay fully before constructing the pottery or sculpture will create a stronger finished product.
Supplies Needed
When flattening clay without a slab roller, you’ll need a few basic supplies:
Clay – The type of clay you’re working with will impact the flattening process. Polymer clay is very malleable and easy to flatten, while natural clays like stoneware or porcelain may require more effort. Make sure your clay is conditioned and kneaded well before attempting to flatten it.
Rolling Pin – A wooden rolling pin without handles works best to exert even pressure across the clay. Acrylic or metal rolling pins can also work. Choose a pin with a smooth barrel without ridges or seams. Wrap the pin in a nonstick surface like parchment paper or plastic wrap if the clay is sticking.
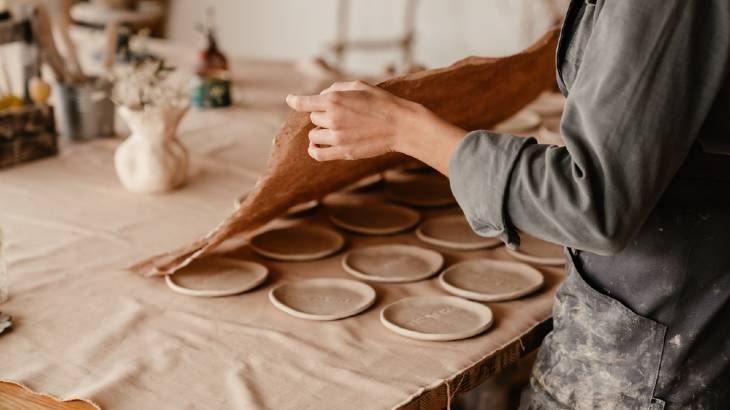
Canvas or Cloth – Laying a piece of canvas or an old cloth on your work surface provides a nonstick barrier between the clay and table. Canvas gives an ideal texture for gripping and flattening the clay. Cotton or linen fabrics work best.
Board or Slab – A wood, plastic or tempered hardboard panel larger than your flattened clay can act as a smooth, nonstick rolling surface. These provide firm, even support. Avoid porous materials like cardboard that may stick and imprint texture onto the clay.
Nonstick Spray – Cooking spray containing lecithin or silicone can help prevent sticking while rolling out clay. Apply sparingly between the clay and work surface. Too much can leave an oily residue.
Texture Sheets – Optional supplies like canvas, burlap or mesh sheets add decorative patterns when rolled into the clay. Use these to create textured slabs for craft projects.
The key is to have supplies that provide smooth, nonstick surfaces to roll against. Avoid materials that could imprint unwanted textures. With the right simple tools, clay can be flattened evenly without a slab roller.
Preparing the Clay
Properly preparing the clay is an essential first step before starting any handbuilding project. Clay comes in stiff blocks or bags when purchased. It needs to be adequately softened and wedged to make it pliable enough to sculpt and shape.
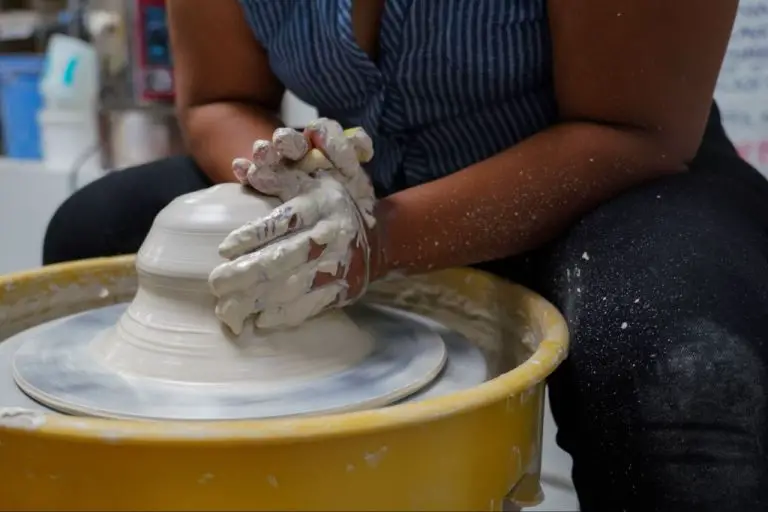
Wedging is the process of kneading and working the clay to achieve an even consistency throughout. It aligns the clay particles, removes air pockets, and makes the clay uniform in moisture content. Wedging by hand involves cutting the clay into chunks, slamming it against the wedging table, and compressing it into a ball (The Crucible). The clay should be wedged until it is smooth, elastic, and free of cracks or lines.
The amount of clay needed depends on the size and scope of the handbuilding project. For small sculptures or vessels, start with about 0.5-1 lb of clay. Larger pieces may require several pounds. Don’t take too little or too much clay to begin. Having extra clay makes wedging more difficult. The clay should be conditioned in batches sized for comfortable wedging.
Using a Rolling Pin
A rolling pin is a common kitchen tool that can be used to flatten clay (Source:https://www.baileypottery.com/store-dept-pottery-ceramic-tools/store-handbuilding-sculpture-tools/store-handbuilding-sculpture-tools-rolling.html). Rolling pins come in various materials like wood, acrylic, or metal. Look for one with a smooth surface to prevent sticking. For clay rolling, acrylic and metal pins are easiest to clean. It’s best to dedicate a rolling pin just for clay use.
Start by preparing your work surface. Use a canvas or wooden board at least 1/4″ thick to provide a stable, resilient base. The work surface should be large enough to accommodate the clay size you need. Apply a light dusting of cornstarch, rice flour, or clay release powder on the work surface to prevent sticking.
Knead the clay first to soften it and make it pliable. Form it into a ball or thick pancake. Place the clay on the prepared surface and start rolling gently but firmly, applying even pressure. Roll in different directions. Add light flour or powder as needed. Roll until the slab reaches the desired thinness, typically 1/4” or less. Work carefully to achieve an even thickness throughout.
When rolling out large slabs, take care not to let the clay hang over the edges. Support the edges with your fingers if needed. Periodically lift and rotate the clay 90 degrees to check for even thickness. Avoid overworking or overthinning areas as this can cause tearing.
Using a Pasta Machine
A pasta machine is a great tool for flattening polymer clay evenly to a desired thickness.[1] Pasta machines allow you to roll out clay very thin and uniformly, which can be difficult to achieve by hand.
To use a pasta machine to flatten clay:
- First, condition your clay thoroughly to warm it up and make it soft and pliable. Knead the clay to get rid of any air bubbles.
- Set the rollers on the thickest setting to start. Feed a chunk of clay through the top rollers, applying even pressure as it passes between the rollers.
- Fold the resulting clay sheet in half and pass it through the rollers again. Repeat this process until the clay has been thoroughly flattened.
- Gradually reduce the space between the rollers to the desired thickness. Pass the clay sheet through each progressively thinner setting twice to achieve an even thickness.[1]
- Support the clay as it comes out of the pasta machine to prevent bending or warping of the sheet.
Work slowly, allowing the clay to be gripped by the rollers. Avoid forcing the clay through. Use both hands to guide the clay and support the resulting sheet.[1] Adjust the machine settings gradually to flatten the clay without overworking it.
[1] https://www.sculpey.com/blogs/blog/polymer-clay-pasta-machine
Using a Wallpaper Smoother
A wallpaper smoother is an inexpensive and effective tool for flattening out clay evenly. These smoothers are designed for eliminating bubbles and wrinkles when installing wallpaper, but work great for clay as well. Their wide flat surface provides an ideal rolling tool.
To use a wallpaper smoother, place the clay on a flat work surface. Start at one end of the clay and apply even downward pressure as you push the smoother away from you in long straight strokes. Overlap each stroke slightly to ensure you cover the entire surface evenly.
Continue rolling until the clay is flattened to the desired thickness. Apply medium to firm pressure as you roll – too little pressure will not properly flatten the clay. Re-roll over the entire surface 2-3 more times, using consistent pressure, to help even out the thickness. Check for any uneven spots and re-roll those areas until smooth.
Wallpaper smoothers with flexible edges, like the ROMAN Wallpaper Smoothing Tool, are ideal for working with clay as their tapered edges can flatten into curves and corners.
Using Improvised Rolling Surface
If you don’t have a rolling pin or pasta machine available, you can improvise a rolling surface using materials around the house. Gl[[[link-1]]]
Glass makes an ideal improvised rolling surface for clay. Lay a large pane of glass, such as a picture frame glass, on a flat work surface. The glass provides an ultra smooth surface for rolling out clay slabs. Be sure to check the glass for any chips or cracks first. Start with a clay ball and use a dowel or rolling pin to roll out the clay, using guides underneath to achieve the desired thickness.
A wooden surface like a countertop or smooth cutting board can also work for rolling clay. Make sure the wood is free of deep grooves or gouges first. The clay may stick more on wood than glass. Try lightly dusting the surface with flour or cornstarch first. Use lighter pressure and roll slowly to prevent sticking.

Thick plastic sheets can also substitute for a real slab roller surface. Acrylic sheets work best. Roll on top of the plastic set on a hard, flat work surface. Start with a smooth clay ball and apply even pressure with a rolling pin or dowel. Adjust the thickness using guides underneath. [[[[link-2]]]]
With some creativity, you may be able to find other household items to use as improvised slab rollers. Just make sure the surface is large enough for the clay size needed, free of defects, and set on a stable work surface. Proceed slowly and adjust pressure as needed. Thoroughly clean the improvised surface after use.
Achieving Even Thickness
Getting an even thickness when rolling clay without a slab roller can be tricky. Here are some tips to help:
First, always start by kneading and conditioning the clay thoroughly. This ensures the clay has an even consistency throughout. Once conditioned, form the clay into a ball or log shape.
Next, place the clay on a clean rolling surface. Using a rolling pin, acrylic rod, or dowel, start rolling out the clay. Apply even pressure as you roll. Periodically flip the clay over and roll again from the opposite direction. This helps prevent thin or thick spots from developing.
Use ruler or measuring sticks to frequently measure thickness as you roll. Target an even 1/4 or 1/2 inch thickness. If thicker or thinner spots appear, continue rolling over those areas until uniform.
When nearing desired size, place ruler across surface and check for flatness. Roll diagonally if needed to correct. Finally, trim uneven edges with knife or cutter.
With practice and patience, slab clay can be rolled consistently without a roller through this simple flip, re-roll, and measure technique.
Conclusion
To summarize, there are several effective techniques for flattening clay without a slab roller. Using an improvised rolling surface like a tabletop or countertop can work quite well. Just be sure to cover the surface with canvas or plastic so the clay doesn’t stick. A rolling pin, pasta machine, or wallpaper smoother are also handy tools to flatten clay to an even thickness. The key things to remember are to prepare the clay properly, work methodically, and apply even pressure as you roll. With a bit of practice, you’ll be able to flatten clay smoothly for handbuilding or other clay projects. Some final tips are to avoid overworking the clay, keep your tools and work surface well-lubricated, and have patience through the process. Flattening clay without specialized tools takes finesse, but very satisfying results can be achieved with household items.


