How Do You Fuse Two Pieces Of Glass Together?
Glass fusing is the process of joining together pieces of glass by heating them in a kiln until they bond or “fuse” together. This technique allows glass artists to create unique works of art, jewelry, dishes, and more by layering, connecting, and melting compatible glass pieces into a single cohesive piece. The finished fused glass retains the color and texture of the original component pieces while melding them into one.
Fusing differs from stained glass in that the pieces are melted and bonded together rather than joined by lead came. It also differs from warm glass processes like lampworking or glassblowing, where the glass is manipulated while hot. The fusing process bonds the glass together on a molecular level, allowing for seamless joints and unlimited creative possibilities for both functional ware and artistic creations.
Safety Precautions
When fusing glass, it is important to take proper safety precautions to avoid injury. According to www.delphiglass.com/fusing-supplies/safety-supplies, you should always wear safety goggles to protect your eyes from glass shards or other debris. Work in a well-ventilated area to minimize exposure to fumes from adhesives or other chemicals. Wear proper gloves like Kevlar sleeves to protect your hands and arms when handling sharp glass. Use the appropriate tools like grozing pliers or running pliers to safely maneuver the glass. Taking simple precautions can help prevent painful cuts or other accidents when fusing glass.
Materials Needed
There are a few key materials needed to fuse glass together properly:
Glass pieces – You’ll need compatible glass that is formulated for fusing, such as art glass, sheet glass, or frit. Glass comes in a variety of colors and textures to choose from.
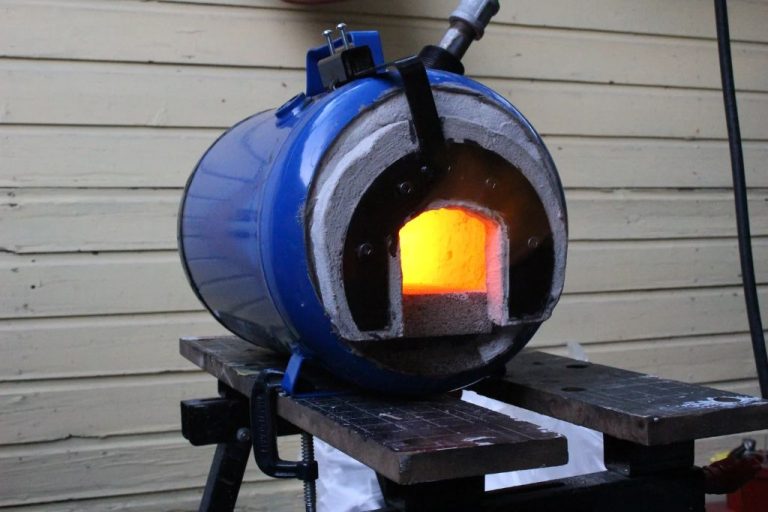
Kiln – An electric kiln is required to heat the glass to the proper fusing temperature, usually around 1400-1480°F. Kilns designed specifically for glass fusing are ideal.
Mold or shelf – A mold, shelf, or firing surface holds the glass pieces in place inside the kiln. These are made of materials like stainless steel, ceramic fiber board, or kiln furniture.
Glass cutter – A specialized cutter with an oil reservoir scores and cuts glass to the desired shape and size.
Grozing pliers – These special pliers snap off small shards of glass for shaping edges.
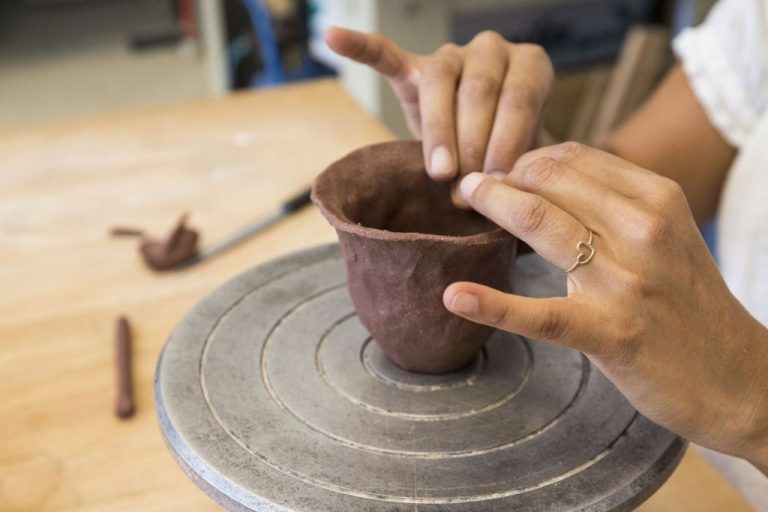
Preparing the Glass
To prepare the glass for fusing, you first need to select the type of glass. Different types of glass have different COEs (coefficient of expansion), so you want to choose compatible glass that has a similar COE or the glass may crack during fusing. Most common glass types for fusing include soda-lime glass, borosilicate glass, and 96 COE glass.
Once you’ve selected compatible glass types, the next step is to cut, grind, and shape the individual glass pieces as desired. Use a glass cutter to score and snap glass sheets into smaller pieces. Then use a grinder or silicon carbide sandpaper to smooth the edges. You can cut simple or intricate shapes depending on the design. It’s important that all edges are smooth to prevent cracks during fusing. According to the article “Ribbon and Holly Glass Dish” from Colors for Earth, glass pieces can be placed directly on a kiln shelf, kiln paper, or a prepared sagger before firing.
When cutting and grinding, be sure to wear safety goggles, a dust mask, and gloves to protect yourself from sharp edges and glass dust.
Arranging the Glass
When arranging glass for fusing, planning the design is an important first step. Consider the colors, shapes, and patterns you want to create. Make sketches or layouts to visualize how the separate pieces will fit together in the final fused piece.
Once you have a plan, place the glass pieces in a kiln mold or directly on a prepared kiln shelf. Make sure the glass pieces are positioned with enough space between them – about 1/16″ – so they don’t fuse together. Larger gaps can be left if you want more distinction between the separate pieces in the final product.
Cut glass pieces can be arranged to form patterns or images when fused. Using dichroic or iridescent glass can add interesting optical effects. The options are endless for arranging glass to create unique fused glass pieces.
When laying out the design, keep in mind how gravity, heat distribution, and the coefficient of expansion of the glass can affect the final shape and appearance of the fused piece. Planning the arrangement carefully will help achieve the desired results.
For more tips on arranging glass for successful fusing, check out this video: https://bloomingtoncreativeglasscenter.org/service-page/intro-to-glass-fusing
Firing the Kiln
Firing the kiln is one of the most important steps when fusing glass. You’ll need to program the kiln with the proper temperature cycle to slowly heat the glass pieces to the point of fusing together.
First, determine the optimum fusing temperature based on the type of glass you are using. Soda-lime glass typically fuses between 1450-1500°F while borosilicate glass requires higher temperatures around 1700°F. Refer to the glass manufacturer’s specifications.
With the target temperature identified, program the kiln with a ramp-hold schedule. Set the kiln to increase temperature at a rate of 300-500°F per hour until reaching the target fusing temperature. Then hold the kiln at that peak temperature for 15-60 minutes to allow the glass pieces to fuse together.
It’s critical to heat the glass gradually to minimize flaws and breakage. Rapid temperature changes can cause internal stresses. A slow, controlled firing schedule allows the glass to properly anneal as it approaches its fusing point.
Closely monitor the kiln during firing. Use kiln cones placed near the glass to verify when the target temperature is reached. The cones will bend and slump when the glass fusing temperature is achieved.
Once the hold time is complete, program the kiln to cool slowly at the same rate as it was heated. This annealing process relieves internal stresses in the fused glass. Rapid cooling can lead to cracking or shattering.
With a proper firing schedule, you’ll end up with a beautiful fused glass project free of defects and ready for finishing.
Annealing and Cooling
Once the glass pieces have fused together in the kiln, it is crucial to properly anneal the glass. Annealing is the process of slowly cooling the glass to relieve any internal stresses and prevent cracking or shattering (source). The fused glass should be cooled from the firing temperature down to at least 950°F at a rate no faster than 100°F per hour.
To anneal properly, cool the kiln as slowly as possible once it reaches the desired fusing temperature. Turn off the kiln and allow it to cool at its natural rate until it drops to 950°F. Then begin slowly reducing the temperature at 100°F increments per hour. Continue this controlled cooling until the kiln reaches room temperature. Opening the kiln lid too soon can shock the glass with cold air and induce cracks.
Taking the time to properly anneal the fused glass prevents internal stresses from forming as the glass contracts during cooling. Annealing relieves these stresses and results in glass that is less prone to cracking or shattering either during cooling or afterwards when subjected to changes in temperature or physical impacts. With proper annealing, the final fused glass piece will remain intact for years to come.
Finishing
After the glass has completely cooled, the final step is finishing the fused glass piece. This involves grinding and polishing the edges to smooth any sharp points and give the glass a finished look. According to Elegant Fused Glass by Karen, when grinding the edges, start with a coarse grinding head and progressively move to smoother grits for polishing. Silicon carbide grinding heads are commonly used. It’s important to work slowly and wear safety glasses. Once ground and polished, many pieces also benefit from having a backing applied, such as felt, cork, or plastic. Backings protect surfaces the glass will rest on and help prevent scratches.
Troubleshooting
Two common issues when fusing glass are cracking and imperfections in the finished piece. To prevent cracking, make sure to fuse compatible glasses with similar COEs (coefficients of expansion). Going from a thick area to thin area can also lead to cracking from uneven stress, so try to maintain even thickness. Imperfections like bubbles can occur from trapped air between layers or moisture on the glass. Make sure the glass is completely dry before firing. Dust and oils can also cause imperfections, so clean the glass properly before fusing. Slow cooling is essential to allow the glass time to anneal and release internal stresses that could lead to cracking later on. A controlled cooling process of annealing after fusing can help avoid cracks and imperfections in the finished piece.
Advanced Techniques
There are several advanced glass fusing techniques that allow artists to create more complex and intricate designs. Some key techniques include using powders, foils, and multiple firings.
Powders containing metals like silver, gold, and copper can be applied to the glass surface to create striking visual effects. The powders melt and fuse to the glass during firing, leaving behind vibrant swirls of color and metallic shimmers. Using a resist technique, like a stencil, allows precise control over powder placement (Advanced Fusing Techniques Book 2).
Metallic foils act similarly to powders, introducing vibrant pops of color and reflective metallic accents. Foils come in a range of colors like purple, blue, and copper. Skinny foil stringers can be arranged into delicate patterns before firing. Embedding larger foil shapes between layers of glass creates shimmering landscapes (Advanced Fusing Techniques).
Firing glass multiple times, also called double firing, allows more elaborate layering and embedding of elements. After an initial tack fuse, items like dichroic glass shards, enamels, or foil can be inserted. The glass is then fired again at a higher temperature for a full fuse. This provides limitless options for intricate, multi-layered artwork.