How Do You Get Polymer Clay Out Of Tiny Cutters?
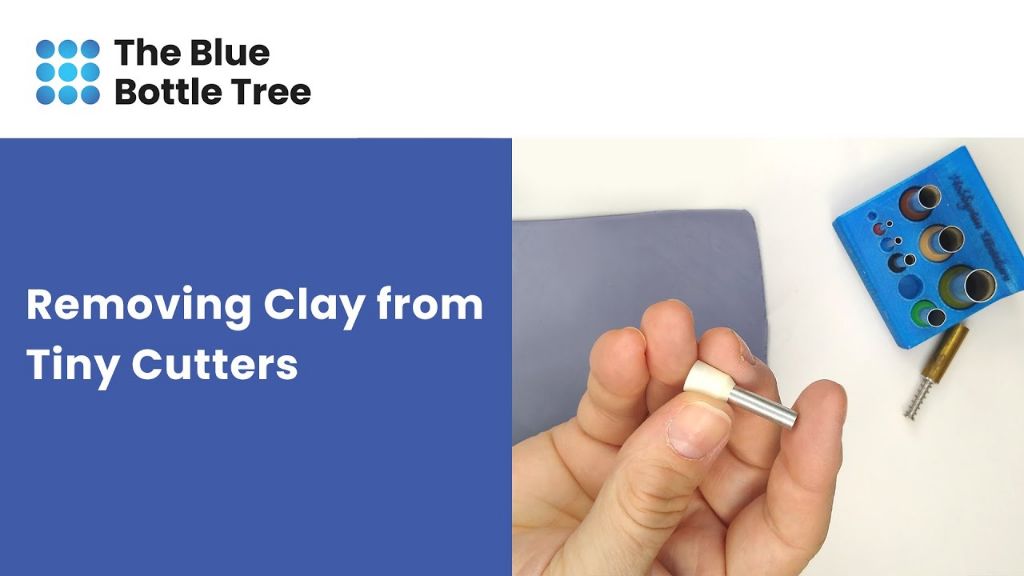
Removing hardened polymer clay from small, intricate cutters can be a frustrating process for crafters and artists. Tiny shapes and details in miniature cutters make it easy for the clay to get firmly stuck. Unlike clay cutters with large openings, small cutters have less surface area to grip and flex the clay out. The material can wedge tightly into edges, corners and crevices. Getting baked clay out while avoiding damage to the cutter requires some finesse.
With the right techniques and tools, removing stubborn clay doesn’t have to be a struggle. A combination of preparation before cutting, ensuring proper moisture content in the clay, and gentle removal methods can help preserve cutters and make de-molding easier. Read on for tips to cleanly and easily get polymer clay out of tiny cutters.
Pick the Right Clay
Polymer clay comes in a wide array of textures and consistencies. In general, there are two main types of polymer clay – firm/original and soft. Firm polymer clays like Sculpey III and Fimo Classic are harder to condition but less prone to sticking in cutters and molds. Soft clays like Sculpey Premo and Fimo Soft are easier to work with and blend colors, but tend to stick more in cutters due to their pliable texture.
Soft clays have more plasticizers added to the base resin, which makes them flexible and malleable straight out of the package. The downside is plasticizers allow the clay to grip onto surfaces. When using intricate or small cutters, soft clay can conform to all the crevices and fine details, making it difficult to push out.
Firmer clays hold their shape better and resist sticking to cutters. Their stiff texture pops out of most cutters with ease. However, firmer clays require more conditioning to warm up and soften. For complex designs, firmer clay may not pick up fine cutter details as cleanly.
In general, it’s best to use firmer polymer clays when working with tiny or highly detailed cutters where getting a clean release is important. For larger cutters and simpler designs, soft clays can be easier to work with.
Use Cornstarch
One of the easiest ways to prevent polymer clay from sticking in tiny cutters is to lightly dust the cutters with cornstarch before cutting out shapes. As explained on The Blue Bottle Tree, cornstarch acts as a release agent and prevents the clay from adhering to the cutter https://thebluebottletree.com/cornstarch-or-baking-soda-with-polymer-clay/. Simply tap a small amount of cornstarch into the cutter and shake off any excess. The thin layer left behind will allow you to cut and remove the clay shape smoothly.
Cornstarch is inexpensive, safe, and readily available in any supermarket. It’s a quick solution that takes just seconds to apply. Be careful not to use too much cornstarch, as thick layers can leave a white residue on the clay. A light dusting is all you need to keep those tiny cutters from clinging to the polymer clay.
Chill the Clay
Chilling your polymer clay before cutting can help make it less sticky and easier to remove from tiny cutters. The cooler temperature causes the clay to firm up and hold its shape better. According to one Reddit user, “You can chill it in the refrigerator to harden it, then use one of those razor blade cutting things.”
Allow the clay to chill for at least 30 minutes in the refrigerator before attempting to cut and remove pieces from small cutters and shapes. The firmer clay will resist distortion and sticking, allowing cleaner cuts and removal.
Just be careful not to let the clay get too stiff and brittle from chilling. It can help to let it rest at room temperature for 5-10 minutes after removing from the fridge before cutting to regain just a bit of flexibility.
Cut with Firm Pressure
When cutting polymer clay with cutters and dies, it’s important to apply an even, firm pressure. This will help the clay release cleanly from the cutter. If you cut with light pressure, the clay is more likely to stick in the cutter or become distorted.
Try pressing the cutter straight down into the clay quickly and smoothly. Don’t rock or twist the cutter. Use one hand to hold the cutter handle and apply pressure, while your other hand supports the base underneath the clay.
Applying too much pressure can also distort the clay, so find the right balance of firm yet controlled pressure. With practice, you’ll get a feel for the right amount of pressure to apply for clean cuts.
Additionally, ensure your work surface provides stability and prevents the clay from shifting as you cut into it. A stack of magazine pages or a cutting mat work well to cushion and support the clay.
By cutting polymer clay with a steady, firm pressure, you’ll achieve precise shapes and clean edges from your cutters.
Avoid Overfilling Cutters
When using cutters with polymer clay, it’s important not to overfill them. Packing too much clay into a cutter increases the surface area that can stick to the cutter’s sides.
Aim to fill cutters about 2/3 to 3/4 full. This will ensure clean cuts and make it easier to remove the clay shapes after cutting. If you fill cutters up to the brim or overstuff them with clay, the excess material has nowhere to go when pressure is applied.
Overfilled cutters force clay against the cutting edges, resulting in drag and resistance. This causes deformation of the cut shapes and makes them difficult to release. The clay is also more likely to get stuck inside the cutter.
Get in the habit of conservatively filling cutters and avoiding overpacking them. Use just enough clay to cut complete shapes. Your cutter life will improve and you’ll find the process requires less effort overall.
Clean Cutters Regularly
Cleaning your clay cutters thoroughly after each use is highly recommended to keep them functioning properly. Here are some key benefits of this practice:
Removes dried clay residue – Clay can dry inside the cutters, building up over time. Regular cleaning prevents this buildup which can impede the cutter’s ability to cut shapes cleanly.
Prevents cross-contamination – Thorough cleaning removes any residue from previous clay colors used. This prevents colors from bleeding into the next clay color put through the cutter.
Extends cutter life – Clay residue can damage cutters over time. Regular cleaning keeps cutters in good shape for longer use.
Improves cut quality – When cutters are kept clean, the clay moves through smoothly, creating crisp edges on cut shapes. Dirty cutters cause dragging and distorted shapes.
Saves time – Taking a minute to clean cutters after each use prevents spending lots of time later trying to remove caked-on clay. Quick regular cleaning is efficient.
Regularly cleaning your clay cutters after each use takes little time but provides significant benefits for functionality and longevity. It’s a simple practice that pays off in the long run.
Use Release Agents
Specialized release agents, such as Mold Rite, can be used to help prevent polymer clay from sticking in tiny cutters or molds. Release agents provide a barrier between the clay and cutter surface to make removing the clay easier. There are a number of release agent options formulated specifically for use with polymer clay, including liquid and paste formulas. Liquid polymer clay release agents can be brushed into cutters and molds before adding the clay. Paste release agents can also be rubbed into the surfaces. Follow manufacturer instructions on applying release agents. Reapply as needed between uses for best results. Using a dedicated polymer clay release agent can help tiny cutters stay clean and make demolding easier compared to improvised release agents like cornstarch.
Tap and Flex Cutters
Once the clay has cooled and hardened in the cutter, gently tapping and flexing the cutter can help release the clay shape. Hold the cutter over a clean workspace and gently tap the sides and bottom of the cutter against the table. Be careful not to tap too hard or the clay shape may become distorted. After tapping, gently flex and twist the cutter from side to side. This can help loosen the clay from the edges of the cutter.
Continue tapping and flexing until the clay shape starts to release on its own. At that point, you can try gently pushing it out from the other side with a blunt tool. Be patient and work slowly so as not to bend or warp the clay shape. With practice, you’ll get a feel for how much tapping and flexing is needed for different cutters and clay thicknesses. The key is applying just enough force to dislodge the clay while avoiding damage to the shape or cutter.

Conclusion
Getting your polymer clay creations out of tiny cutters cleanly can be a frustrating process. However, with some thoughtful preparation and technique, you can remove your clay cut-outs with ease. The key tips to remember are:
- Use a high-quality, conditioned polymer clay that is not too sticky or soft.
- Chill your clay before cutting to make it firmer.
- Apply cornstarch inside cutters as a release agent.
- Cut with firm, even pressure and avoid overfilling cutters.
- Tap and gently flex cutters to remove clay shapes.
- Clean cutters regularly to remove clay residue.
Taking the time to properly condition your clay and prep your cutters will save you hassle in the long run. Your cut-outs will release smoothly, allowing you to craft intricate clay creations with ease. With practice and the right techniques, working with tiny polymer clay cutters can be enjoyable rather than frustrating.


