How Do You Make A Pottery Signature Stamp?
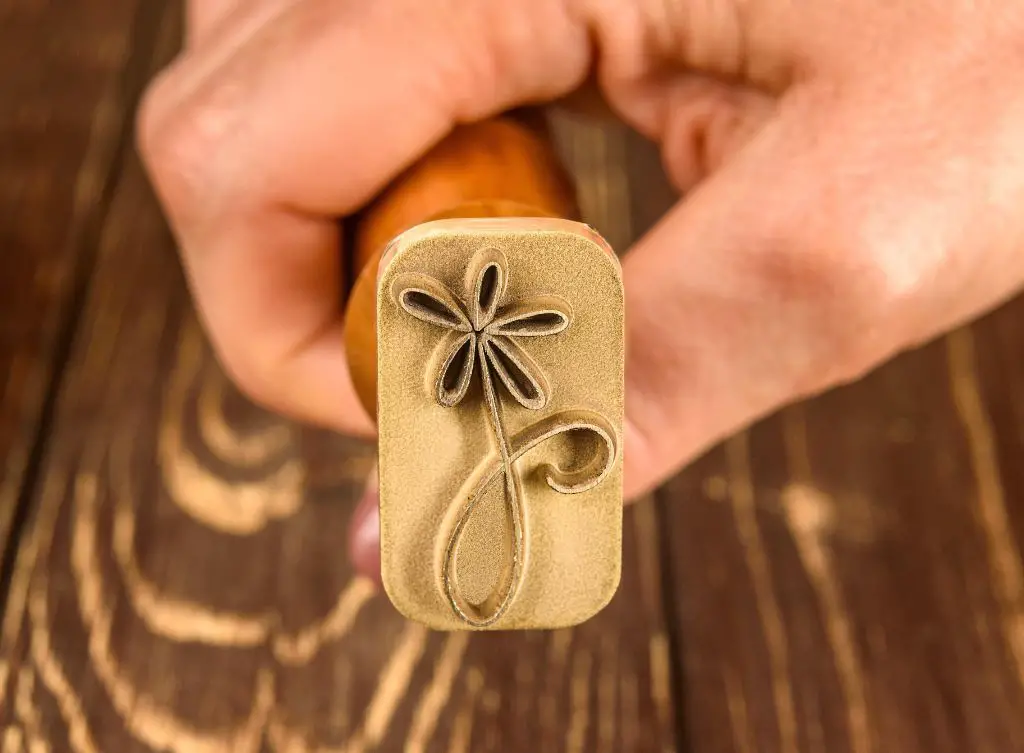
A pottery signature stamp, also sometimes called a chop mark, is a carved stamp made out of clay that potters use to sign or mark their work. Signature stamps allow potters to quickly and consistently mark their work, making it easy for collectors and customers to identify who created a piece. They serve as a potter’s unique maker’s mark or logo.
While stamps can be purchased pre-made, many potters prefer to create their own custom signature stamp. A personalized stamp reflects a potter’s individual style. This article provides a step-by-step guide to making your own pottery signature stamp from start to finish.
Materials Needed
To make your own pottery signature stamp, you will need the following materials:
Clay – Polymer clay such as Sculpey or Fimo is recommended for making stamps as it is very durable once baked/cured according to package directions. Polymer clay can be easily shaped and carved.
Carving tools – You will need metal carving tools with different shaped tips and heads to carve the design into the clay. Clay carving sets are readily available.
Sealant – A sealant is essential to protect the finished polymer clay stamp. A water-based polyurethane varnish or matte varnish specifically formulated for polymer clay works best.
Handle or holder – Optionally, you can attach the baked clay stamp to a handle or holder made out of wood, polymer clay, etc for easier use.
Ink pad or paint – You will need ink or paint to transfer your signature from the stamp onto your pottery.
Design the Stamp
When designing your pottery signature stamp, it’s best to keep the design simple, especially for beginners. Consider using your initials, name, logo, or a simple symbol or shape that represents you. The carved lines need to be at least 1 mm deep in order for the clay to pick up enough glaze to leave an impression, so avoid tiny details or thin lines (source). Focus on large shapes and thick lines that can be easily carved into the clay. Sketch your design on paper first to finalize it before transferring it to the clay. Simple stamps with letters or symbols are versatile and give your work a clean, professional finish.
Shape the Clay
The next step is to shape the clay into the right form for carving the stamp design. Start by rolling out the clay into an even, smooth rectangle using an acrylic roller. The clay should be about 1/4-1/2 inch thick. Cut the clay to the desired size for your stamp design, usually around 1-2 inches wide. At this stage, you can use a template if you want the stamp to be an exact size and shape. Cut around the edges of the template to get neat, clean edges on your clay. Once cut to size, allow the clay to firm up slightly before starting to carve so it doesn’t deform as you work on the design. Letting it sit for 10-15 minutes should be sufficient.
Some potters recommend using a higher grog content for stamp clay to help prevent warping and cracking during the carving and baking process. A clay body with 20-25% grog is ideal. The grog particles create space between the clay particles which makes the clay more durable.

Be sure your working surface is smooth and clean before shaping the clay. Any debris can transfer into the stamp design. Work carefully and methodically during the shaping process to end up with a uniform block of clay ready for carving.
Carve the Design
Once you have shaped your clay and have a design ready, it’s time to carve it into the stamp. Be sure to use proper carving tools for incising lines and details into the clay. You’ll want the lines to be at least 1 mm deep so they will transfer well onto pottery.
Take your time carving out the design, removing any excess clay to leave clean edges and details. Make sure to get all the fine points and intricacies of the design at this stage. It’s important that you fully finish the carving now, while the clay is still soft and workable.
Allow the carved stamp to dry completely before baking. Drying time depends on the thickness, but may take a few hours up to overnight. The clay must be fully dried to avoid cracking or warping in the oven. Once dry, you can proceed to baking and finishing the stamp.
Bake the Stamp
Once your stamp design is carved, it’s time to bake the clay to harden it. Follow the baking instructions on your clay’s packaging for the proper baking temperature and time. Polymer clay generally bakes at 275°F for 15-30 minutes per 1/4 inch of thickness [1]. However, specifics can vary between clay brands and colors, so always refer to the label.
You may need to bake the stamp multiple times if it’s thick or has intricate details to fully cure the clay throughout. Let the stamp cool completely before handling to prevent damaging the clay. If the stamp has any rough edges after baking, you can gently sand them smooth.
Seal and Finish
Once your stamp is baked and cooled, it’s important to seal it with a waterproof sealant. This will protect the clay from moisture and allow the stamp to be used many times without deteriorating.
There are several sealant options that work well for polymer clay stamps:
- Polyurethane (either water-based or oil-based)
- UV resin
- Epoxy resin
- Acrylic mediums like varnish
Apply 2-3 thin coats of your chosen sealant, allowing each coat to fully cure before adding the next. This ensures complete, even coverage. Let the sealant cure fully before using your stamp, as per the manufacturer’s directions. Polyurethane may take up to 72 hours to cure completely.
If you plan to mount your stamp on a handle, attach this after sealing. An empty chopstick, dowel, or even a pencil eraser can work well as a stamp handle. Apply a strong two-part epoxy to affix the handle securely.
With a good sealant and proper care, your custom stamp should provide years of use for signing your pottery creations!
Test Your Stamp
Before using your new signature stamp, it’s important to test it out first to make sure it stamps cleanly and consistently. Here are some tips for testing your stamp:
Try stamping the clay on a scrap piece or even a piece of paper. This allows you to test the stamp without wasting any projects you’ve invested time into. Check the depth and consistency of the impression – is it stamping deep enough into the clay? Are all areas of the design stamping evenly?
If parts of the design seem too shallow, re-carve those areas to make the lines deeper. This will create a more pronounced impression in the clay. Make sure to thoroughly clean the stamp before using it on your final project. Leftover clay residue could affect the stamped image.
Testing beforehand ensures your custom stamp will impress your signature perfectly every time. Adjustments are much easier on test pieces rather than finishing artwork!
Use Your Signature Stamp
Once your clay signature stamp is complete, you are ready to start using it to mark your pottery pieces. Here are some tips for getting the best results when using your stamp:
First, ink up your stamp using either a paint or ink pad. Make sure to cover the entire stamp surface evenly. According to https://www.4clay.com/how.htm, spraying the stamp with an oil can help the ink transfer better.
Next, press the stamp firmly and evenly onto the surface of the clay item you want to mark. Don’t rock or twist the stamp, as this can cause smudging. Apply even pressure across the entire stamp.
After stamping, let the ink dry fully before handling the clay piece. This prevents accidental smudging while the ink is still wet.
Once you’ve finished using your stamp, be sure to clean it thoroughly to remove any leftover ink. This will prevent buildup and allow for crisp impressions on your next projects.
Following these simple steps will help you get clean, professional signature stamps on your pottery items using your custom clay stamp.
Caring for Your Stamp
After you’ve designed and created your handcrafted pottery stamp, you’ll want to take proper care of it so the stamp lasts a long time. Here are some tips for maintaining your custom-made pottery stamp:
First, be sure to clean ink off the stamp regularly when you are finished using it for the day. Allowing ink or clay to build up on the stamp surface can reduce the stamp’s effectiveness and longevity. Use a damp cloth or brush to gently wipe excess ink off the stamp.
When not in use, store your pottery stamp properly to avoid damage. Keep it in a sealable plastic bag or airtight container. Avoid exposing the stamp to moisture or extreme temperatures. Store in a cool, dry place.
Over time, the sealant used to finish the stamp may wear off. Check the bottom of the stamp occasionally and re-seal if needed so the clay does not stick to the bare clay. Use a clear acrylic sealant spray.
Finally, if your stamp wears out from heavy use and no longer leaves crisp impressions, it’s time to remake it. Re-create your signature stamp by following the original carving and design process. This will give your pottery that consistent custom touch.
With proper care and maintenance, your handcrafted pottery stamp can last for many years.


