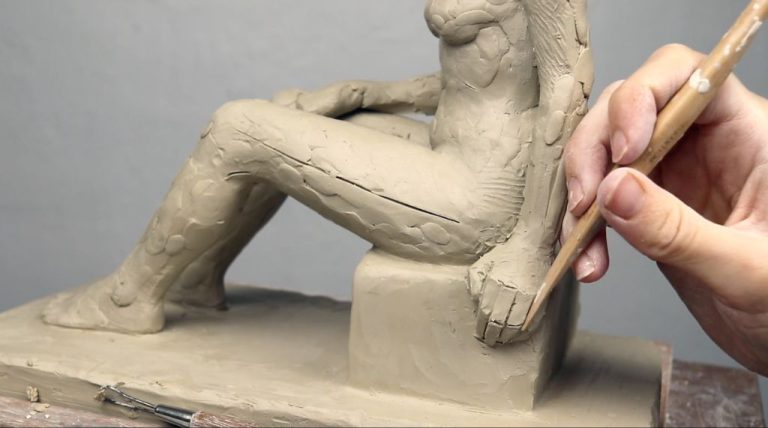
How Do You Make Modelling Clay Harden?
Modeling clay, also known as plasticine, is an oil-based modeling material made primarily from clay and other ingredients such as oils, waxes, and mineral fillers. It has a smooth, doughy consistency that makes it easy to shape and mold. Modeling clay remains soft and pliable at room temperature and never fully dries out. This allows artists to continually reshape their creations without the clay cracking or hardening prematurely.
While the malleable nature of modeling clay is ideal for sculpting, many artists want to permanently preserve their finished pieces. Allowing modeling clay sculptures to harden makes them more durable and less prone to becoming misshapen from handling or changes in temperature or humidity. There are several techniques to effectively harden modeling clay depending on factors like the size of the sculpture, time constraints, and availability of materials.
The most common methods for hardening modeling clay are baking, air drying, applying varnish or glaze, and using products like clear acrylic spray. Each technique has its own benefits and drawbacks. Baking is very effective but requires an oven. Air drying takes a long time but doesn’t require any other materials. Products like varnish, acrylic spray, and glaze form a protective coating that hardens as it dries. The following sections will explore these techniques in greater detail.
Baking
Baking is the most common and reliable method for hardening modeling clay. It involves placing the finished clay sculpture in a standard oven set to a low temperature for a period of time. Most brands of modeling clay recommend baking at 130°C for 15-30 minutes. However, check the specific instructions on your modeling clay package as times and temperatures can vary between brands.
When baking modeling clay, it’s important not to overbake it. Baking for too long or at too high of a temperature can cause the clay to crack or become misshapen. Keep a close eye on your sculpture as it bakes, and avoid opening the oven door frequently. Clay should be baked in a well-ventilated area, as it can produce fumes during the baking process.
The main benefits of baking modeling clay are that it fully hardens the sculpture into a durable, permanent finish. The colors also become more vibrant after baking. The only real downside is you must have access to a standard oven. Overall, baking is the best technique for achieving professional, lasting results with modeling clay projects.
Air Drying
One of the easiest ways to harden modeling clay is to simply leave it out to dry naturally. Air drying takes advantage of evaporation to slowly draw out the moisture in the clay over time. Here’s what you need to know about letting your clay sculptures dry naturally:
Air drying can take anywhere from 24 hours to several days or weeks, depending on the thickness and size of your clay sculpture. Thinner pieces will dry faster, while large, thick sculptures may require weeks of drying time. Air drying thick pieces too quickly can cause cracking as the outer layers dry faster than the inner clay.
To speed up the air drying process, work in a warm, dry, well-ventilated area. Position your clay so it’s not touching any surfaces – allow air to circulate all around the sculpture. Rotating the sculpture periodically also allows moisture to evaporate evenly.
The advantage of air drying is that it’s completely free and natural. There’s no need for additional equipment or specialty products. It also results in very little shrinkage of the clay. Just be prepared for the slow drying time, especially for larger pieces.
Using a Hair Dryer
Using a hair dryer is a quick and easy way to speed up the drying process for modeling clay. The main benefit of using a hair dryer is that it can harden clay in a matter of minutes compared to air drying which can take hours or days.
When using a hair dryer, it’s recommended to use the low or medium heat setting. Hold the dryer 6-12 inches away from the clay sculpture and evenly blow hot air over the surface. Slowly rotate the sculpture to dry all sides. Take care not to hold the dryer too close or on too high of heat, as this can cause cracking or burning.
The main pros of using a hair dryer are the fast drying time and ability to target heat on specific areas. The main con is that it can be easy to overheat the clay if you’re not careful with the settings and distance. Hair dryers also use more electricity than air drying. But overall a hair dryer is an effective way to quickly harden modeling clay when needed.
Using Acetone
Acetone is a chemical solvent that can be used to harden modeling clay. When applied to the surface of clay, acetone evaporates and helps solidify the clay by forming bonds between the polymer chains.
The recommended technique is to mix a solution of 1 part acetone to 2 parts water in a spray bottle or shallow container. Apply a light misting or dip the clay model into the solution briefly. Too much acetone can melt the clay. Work in a well-ventilated area and wear gloves to avoid skin irritation.
Acetone dries modeling clay quickly, within about 15 minutes. It leaves a smooth, non-sticky finish. The main advantage is speed – acetone hardens clay faster than air drying. The downside is that too much acetone can dissolve details or make the clay brittle. It also has a strong odor.
Overall, acetone is a decent option for quickly hardening modeling clay when air drying would take too long. Use a diluted solution and handle with care to avoid damaging the clay.
Using Varnish
Varnish is another handy product that can help harden modeling clay permanently. Varnishes are clear, liquid sealants that provide a hard, glossy coating over various materials when brushed on and allow to dry. Most varnish products are typically used for finishing and protecting wood surfaces, but applying varnish to modeling clay works great for sealing and hardening clay sculptures.
There are a few different types of varnish that work well for hardening clay:
- Polyurethane – Provides a durable, plastic-like finish.
- Acrylic – Quick-drying and resists yellowing.
- Spray sealers – Easiest to apply evenly.
To use varnish, first make sure your clay sculpture is clean and dry. Apply a thin layer of varnish using a soft brush, covering the entire surface. Let the varnish dry completely, which usually takes 30-60 minutes. Apply a second coat for added protection and hardness. The varnish will dry clear and hard, sealing the clay permanently.
Varnish is a great clay hardener because it is relatively inexpensive and easy to find. It provides a smooth, even finish. The main downside is that applying varnish can be messy and brush strokes may show. Proper technique is required to get an optimal finish. Overall, varnish is a handy way to quickly and affordably seal and harden modeling clay sculptures.
Using Mod Podge
Mod Podge is a popular decoupage glue often used in arts and crafts projects. Many clay artists have found that Mod Podge can also be used to seal and harden modeling clay sculptures.
To harden clay with Mod Podge, start by ensuring your sculpture is completely dry. Then, use a brush to apply a thin layer of Mod Podge over the entire surface of the clay. Let this dry completely. Apply additional coats until you have a smooth, glossy seal. Typically 2-3 coats is sufficient.
The pros of using Mod Podge are that it dries clear, leaves a nice glossy finish, and is readily available at most craft stores. It’s also non-toxic when dry. The cons are that too many layers may leave brush strokes visible, and pieces may be fragile until fully cured, which takes 7+ days. So handle with care until fully hardened.
Overall, Mod Podge is an accessible option for sealing modeling clay. Just be sure to apply thin, even coats and allow several days for full curing time. With proper application, Mod Podge can transform soft clay into a hardened, finished sculpture.
Using Clear Glaze
Applying a clear ceramic glaze is an effective way to harden and protect modeling clay sculptures or projects. The glaze forms a glassy coating that seals and preserves the clay.
To use clear glaze, first let air dry modeling clay fully cure, which can take 24-48 hours. Then apply a thin, even coat of glaze using a brush. Clear glazes often require mixing with water, typically at a 1:1 ratio. Allow the glaze to fully dry, then apply a second coat for added protection and sheen.
Finally, bake the glazed clay according to the temperature guidelines on the glaze package, usually around 110°C or 230°F. Baking helps fuse the glaze to the clay. The end result is a hardened, glossy finish.
Using clear ceramic glaze has several advantages compared to other modeling clay hardening methods:
- It creates a smooth, glass-like coating that fully hardens clay.
- The coating is transparent, so it doesn’t affect the clay’s color or appearance.
- Glazing helps protect delicate clay sculptures from damage.
- It provides a bright, shiny finish.
Potential downsides include the need to buy a ceramic glaze product and properly bake the clay. The process also requires more time andeffort compared to quick options like hairspray. However, clear glaze isnon-toxic and provides superior durability forclay projects.
Comparison of Methods
When choosing a method to harden modeling clay, there are several factors to consider including time required, cost, complexity, durability, and suitability for different projects. Here is an overview comparing the different techniques:
| Method | Time Required | Cost | Complexity | Durability |
|---|---|---|---|---|
| Baking | 1-2 hours | Low | Simple | Very durable |
| Air drying | 12-24 hours | Low | Very simple | Durable |
| Hair dryer | 10-30 mins | Low | Simple | Durable |
| Acetone | 1 hour | Low | Moderate | Durable |
| Varnish | 8-12 hours | Low | Simple | Very durable |
| Mod Podge | 2-3 hours | Low | Simple | Durable |
| Clear glaze | 24 hours | Low | Moderate | Very durable |
Based on the comparison, baking modeling clay in a standard oven provides the most durable result but requires 1-2 hours. Air drying takes longer but requires no additional equipment. For faster hardening at low cost, using a hair dryer for 10-30 minutes works well. Clear glaze and varnish also produce very durable finishes but take longer to fully cure.
For detailed miniatures that need to withstand frequent handling, baking or clear glaze are best. For decorative pieces that don’t need to be as sturdy, air drying or a hair dryer offers a quicker and simpler option. Varnish can provide extra protection if using air drying for a delicate piece. For modeling clay jewelry that needs to be lightweight but durable, baking or acetone hardening are recommended.
Frequently Asked Questions
Modeling clay is a fun and creative material for both kids and adults, but you may run into issues when trying to harden it. Here are some common questions and troubleshooting tips.
FAQs About Problems Hardening Modeling Clay
Why isn’t my modeling clay hardening?
There are a few reasons this could happen. First, make sure you are using an air-dry or oven-bake clay. Materials like Play-Doh do not harden. If using the right type of clay, it may not have dried thoroughly – leave it out for longer or bake it for a longer time at a slightly higher temperature.
Why is my modeling clay sticky or soft after drying?
This occurs when the clay has not completely hardened. Ensure it dries thoroughly by leaving it out for 24-48 hours or baking it for the recommended time listed on the packaging. Let it cool completely after baking before handling.
Why did my modeling clay crack or break apart when drying?
Clay can crack if it dries too quickly or unevenly. Avoid thick uneven sections which dry at different rates. Bake clays slowly, starting at a lower temperature to dry evenly. Cracks can also occur if clay is handled before fully hardened.
Tips for Avoiding Issues When Hardening
– Work in sections so the clay dries evenly
– Avoid adding too much water which lengthens dry time
– Bake at the right temperature and for the recommended time
– Let clay cool completely after baking
– Use quality, non-drying clay that specifies it hardens
Troubleshooting Guide
– If still sticky, rebake at a slightly higher temperature
– If cracking, bake more slowly and evenly
– If didn’t harden, ensure proper type of clay and bake for longer
– When in doubt, refer to the clay package directions