How Do You Mix Clay For Oven?
Clay is an incredibly versatile material that has been used for centuries to create pottery, sculptures, and other artistic works. The term “clay” refers to a naturally occurring material composed primarily of fine-grained minerals such as kaolinite. When mixed with water, clay becomes plastic and malleable, able to be shaped into anything you can imagine.
However, not all clay is created equal. The properties of clay can vary greatly depending on factors like mineral content, particle size, and desired firing temperature. This means taking the time to properly prepare your clay is crucial for achieving your desired results.
Properly mixing clay ensures an even distribution of ingredients, a uniform texture, and an ideal moisture content. It eliminates air pockets that can cause cracks or explosions. While it may seem straightforward, careful measurement, order of adding ingredients, kneading techniques, and resting time can make all the difference. This guide will walk through the entire process step-by-step.
Types of Clay
There are several different types of clay that are commonly used for pottery and ceramics. Here are some of the main types:
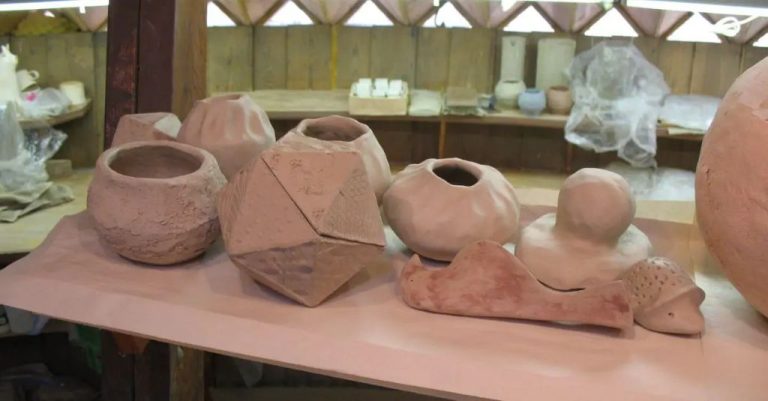
Earthenware – Earthenware clays are lower-fired clays that mature at lower temperatures, usually between 1000°F-2200°F. They are porous when fired. Common types of earthenware clay include terracotta and red clay. Earthenware is easier to work with and good for beginner potters.
Stoneware – Stoneware clays are mid-range firing clays, maturing between 2200°F-2400°F. They vitrify and become non-porous when fired. They are stronger and more durable than earthenware. Common stoneware clays are called ball clays and fire to a grayish color.
Porcelain – Porcelain clays are the highest fired clays, maturing around 2300°F-2600°F. They are very white, translucent when held up to light, and extremely strong and durable after firing. However, porcelain can be more challenging to work with than other clays.
Knowing the different characteristics of earthenware, stoneware, and porcelain clay bodies will help you select the right type of clay for your project or artwork.
Important Tools
Having the proper tools is essential for mixing clay evenly and efficiently. Here are some of the most important tools you’ll need:
-
Wedging table – This sturdy table provides a large, flat surface for wedging your clay. Wedging helps remove air pockets.
-
Mixing bucket – A 5-gallon bucket is ideal for mixing large batches of clay. Make sure it’s clean and dry before using.
-
Clay blender – This drill attachment mixes clay thoroughly without incorporating air bubbles. A paint mixer can work too.
You’ll also need basic tools like a ruler, knife, and water spray bottle. Having the right equipment makes the mixing process much smoother.
Measuring Clay
When measuring clay for pottery or ceramics, it’s crucial to use precise measurement by weight rather than volume. This is because clay can compact or settle over time, leading to inconsistencies if measured by volume. Measuring by weight eliminates this issue.
Weighing clay ensures you get the exact proportions and consistency every time. Even small variations in the amount of clay can impact the structural integrity and firing outcomes. Precise measurement also allows you to accurately reproduce recipes and mixes.
Digital kitchen or jewelry scales designed for small quantities are ideal for weighing clay. Scales that measure down to the gram will provide the level of precision needed for most clay bodies and projects.
When following clay recipes by weight, make sure to use the same scale and measure in the same units as the recipe specifies. This will guarantee the most accurate and reliable results.
So for optimal consistency, quality control, and reproducible outcomes, always rely on weight rather than volume when measuring clay.
Water Content
Water content is crucial when mixing clay for oven use. The ideal water content helps the clay become smooth, pliable, and workable without becoming too wet. As a general rule, oven-bake polymer clay should feel smooth but not sticky. Too much water will make the clay sticky and difficult to handle. It may also result in air bubbles, cracks, and a longer baking time. Not enough water will make the clay dry, crumbly, and prone to cracking.
When clay contains excessive water, it will be sticky, droopy, and unable to hold its shape well. Details made with the clay may become flattened or lose their crispness. Baked items may end up with a surface that looks blistered or frosted. On the other hand, insufficient water leads to clay that feels dry and stiff. The clay will be more challenging to condition and roll out smoothly. Baked pieces are likely to crack or break.
Testing your clay mixture before baking can help identify water content issues. An ideal clay mixture should be smooth, flexible, and strong enough to handle without sticking or deforming. By spending the time to mix in the right amount of water, you’ll be rewarded with clay that performs beautifully in the oven.
Mixing Process
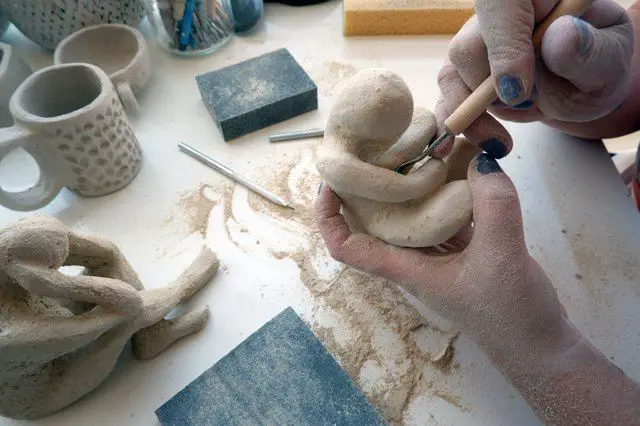
The mixing process involves thoroughly wedging and kneading the clay to achieve an even consistency free of air bubbles. Here is a step-by-step process for properly mixing clay:
- Start with softened clay and break it into smaller chunks.
- Smear a handful of clay down firmly on your work surface, using the palm of your hand.
- Fold the smeared clay over itself and press down firmly again.
- Repeat smearing, folding, and pressing the clay several times until it becomes one consistent color.
- Gather the wedged clay into a ball and begin kneading it with both hands.
- Press down into the center of the ball while pulling the edges up and inward.
- Fold the clay over itself and press down, then rotate 90 degrees and repeat.
- Continue kneading the clay, pressing and folding until it holds together and has an even, elastic consistency.
- Add water or dry clay as needed while kneading to achieve ideal moisture content.
- Knead thoroughly for 5-10 minutes until the clay is smooth, pliable, and air bubble free.
Proper wedging and kneading is crucial for mixing clay evenly and removing air pockets that can weaken fired pieces. Take care not to over-mix, as this can cause the clay to become too stiff.
Additives
There are a few common additives that you can mix into clay to modify its properties and performance. Many potters add things like grog (pre-fired clay shards), sand, and plant fiber to strengthen the structural integrity of finished pieces. Here are some of the most popular additives used when mixing clay:
Grog – This is clay that has been bisque fired and ground into a granular form. Adding grog makes clay more porous and less prone to cracking and shrinking. It provides reinforcement for stronger clay bodies. A typical addition is 10-30% grog by weight.
Sand – Natural sands, feldspar, or silica are sometimes added to clay. This helps prevent excessive shrinkage and improves stability when firing to higher temperatures. However, too much sand makes clay difficult to shape. Limit sand additions to 10-20%.
Plant Fibers – Natural fibers like wood shavings, sawdust, straw, or paper can be mixed into clay. In small amounts (5-10%), this creates porosity and makes the clay body more forgiving when forming large vessels or hand-building. Don’t use with thin or delicate pieces.
Test these additives in small batches first to find optimal proportions for your particular clay and project. Adjust the amounts as needed. Let the clay fully homogenize after mixing in additives before using. This strengthens the overall clay body for creating sturdy finished pieces.
Avoiding Air Bubbles
When mixing clay, it’s important to avoid trapping air bubbles in the mixture. Air bubbles can lead to cracking or exploding in the kiln. Here are some techniques for removing air pockets while mixing:
Tap the clay – Gently tap the clay against the table or work surface to help bring air bubbles to the surface where they can pop.
Slam the clay – For a more aggressive approach, vigorously slam a ball of clay against the table. This shock helps release trapped air.
Squeeze the clay – Press your fingers into the clay and push together to squeeze out tiny air pockets.
Roll out the clay – Using a rolling pin, roll out the clay into a slab. This flattens any air pockets.
Let it rest – Allow the clay to rest for 10-15 minutes so air can escape on its own before further mixing.
Avoid overmixing – Mix only as long as needed to evenly combine ingredients. Too much mixing whips air into the clay.
Pop bubbles – Use a needle tool or skewer to pop visible surface bubbles after mixing.
Testing Consistency
Once you’ve mixed your clay, there are a few ways to test if it is properly combined and ready to use:
Press your finger into it – If the clay keeps the shape of your fingerprint without oozing back, it likely has the right consistency. If it oozes back immediately, it may need more kneading.
Roll a coil – Try rolling some clay into a coil shape. If it cracks as you roll it, it’s too dry. If it’s mushy and won’t hold its shape, it’s too wet.
Check for sticky spots – Knead the clay thoroughly and feel for any wet or sticky areas, which indicate uneven mixing. The clay should feel smooth and elastic throughout.
Do a tear test – Tear off a piece of clay. If it tears smoothly, it’s well mixed. Jagged edges or crumbling indicate issues.
Shape a ball – Form a ball with the clay. Cracking, crumbling, or mushiness means more kneading is needed.
Doing a few simple hands-on tests like these will ensure your clay is properly mixed and ready for use in pottery, sculptures, and other oven-baked clay projects.
Storing Clay
Proper storage is crucial for maintaining the consistency of clay. Here are some tips for storing clay:
-
Store clay in airtight plastic bags or containers. Exposure to air can cause clay to dry out.
-
Avoid temperature fluctuations. Keep clay stored at room temperature away from direct sunlight or heat sources.
-
Consider adding a moist paper towel to the storage container to help regulate humidity.
-
Knead a bit of vegetable oil into the clay before storing to prevent drying.
-
For long term storage, wrap clay tightly in plastic wrap before placing in a sealed container.
-
Store different colors of clay separately to prevent colors from bleeding together.
-
Work clay into a smooth ball before storing so it maintains an even consistency.
-
Label clay with the date it was stored and clay type.
Following proper storage methods will help maintain the ideal consistency of clay for future projects.


