How Do You Mold A Clay Cup?
Molding a clay cup is a fun and rewarding process that allows you to create a beautiful and functional piece of art. With some basic materials, techniques, and a bit of patience, anyone can craft their own custom cup. The general process involves gathering clay and tools, shaping the cup form on a pottery wheel or by hand, decorating it, and then drying and firing the finished piece. While it takes some practice, making ceramic cups can become an enjoyable hobby or even a profession. This guide will walk through the complete process start-to-finish.
Gather Materials
The key materials needed to mold a clay cup are clay, a mold or form, and sculpting tools.
For the clay, choose an air-dry clay that does not require firing. Look for a clay that is pliable and smooth like modeling clay. Alternatively, a polymer clay that cures in the oven can be used.
You will need a mold, form, or other base structure to shape the cup around. Simple options include a glass jar, plastic cup, or rounded bowl. The cup can also be shaped freehand without a mold.
Sculpting tools like a knife, sponge, and plastic bag assist in sculpting and smoothing the shape. A sculpting knife carefully trims and defines edges. A damp sponge smooths seams and shapes curves. A plastic bag placed over fingers evens out fingerprints and minor dents. Have these tools on hand before starting.
Prepare the Clay
An important first step when molding clay is to properly prepare and condition the clay body. Start by kneading the clay vigorously to soften it up and make it more malleable. Knead it with your hands for several minutes, pressing and folding the clay over on itself repeatedly. This kneading action helps distribute moisture evenly throughout the clay and aligns the clay particles, improving its plasticity.
As you knead, also make sure to remove any air pockets that may be trapped in the clay. Air pockets can lead to cracks or explosions when firing later on. To remove air pockets, slap the clay down firmly on a flat work surface. You may need to cut open thicker areas of clay and press the air bubbles out. Kneading thoroughly until the clay is soft, smooth, and free of air pockets ensures it will be in ideal condition for molding your cup.
Shape the Base
The next step in molding a clay cup is to shape the base. Start by taking the ball of clay and flattening it out into a circular disk shape. This will form the bottom of the cup. Use your hands to press the clay down and flatten it, turning it as you go to maintain an even thickness. You can also use a rolling pin on a flat surface to roll the clay into the desired circular base shape.
Apply even pressure with your palms or rolling pin to flatten the clay into a disk about 1/4 to 1/2 inch thick, depending on the desired size and thickness of your cup’s base. The disk should be wider than the width of your intended cup, approximately 2-3 inches for a standard sized mug base. Smooth out any cracks or uneven spots in the clay. The base should be an even thickness throughout and free of lumps.
Once your clay base has been flattened into a smooth, circular disk shape you can move on to forming the actual cup shape around it. The flat, sturdy base will support the cup walls and provide stability when shaping the rest of the piece.
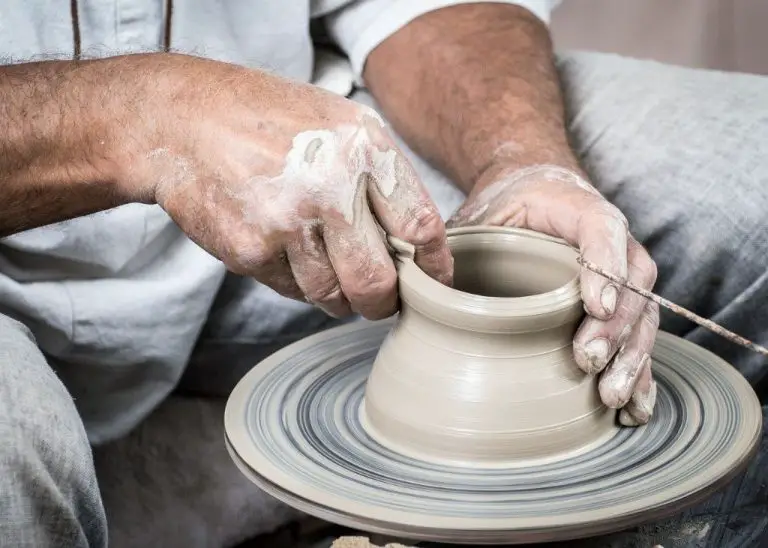
Create the Cup Form
Once you have shaped the base of the cup, it’s time to create the actual cup form. Take the ball of softened clay and gently drape it over the mold, allowing gravity to pull the clay down around the form. Make sure the clay fully covers the entire mold and doesn’t have any holes or gaps in coverage. Use your fingers to gently smooth the edges of the clay over the top of the mold, blending them into the sides. You want a seamless transition from the base into the cup walls. Don’t pull or stretch the clay too much, as you don’t want it to become thin or uneven. Work slowly and methodically, smoothing out any wrinkles or pleats in the clay as you shape it over the form.
Refine the Shape
Once you have formed the basic cup shape, the next step is to refine the shape using various tools. Here are some tips for refining the shape:
Smooth the walls – Use a rib or kidney tool to smooth out the inner and outer walls of the cup. Remove any lumps or uneven textures. Apply even, smooth strokes from top to bottom.
Refine the rim – Use a loop or ribbon tool to refine the rim of the cup. Smooth and round the edges so they are even all the way around. Create a finished lip.
Adjust thickness – Use a measuring tape or ruler to check thickness. Target an even thickness of 1/4″ or less throughout the cup walls and base. Use your fingers or a rib tool to carefully pinch and compress thicker areas.
Define the base – Use a modeling tool to refine the base and create a smooth, even surface for the cup to sit on. Remove excess clay if needed.
Take time refining the shape to achieve a symmetrical, smoothly curved cup form. Check for any cracks, folds, or uneven areas and repair as needed. Refining while the clay is soft makes the cup strong and durable when fired.
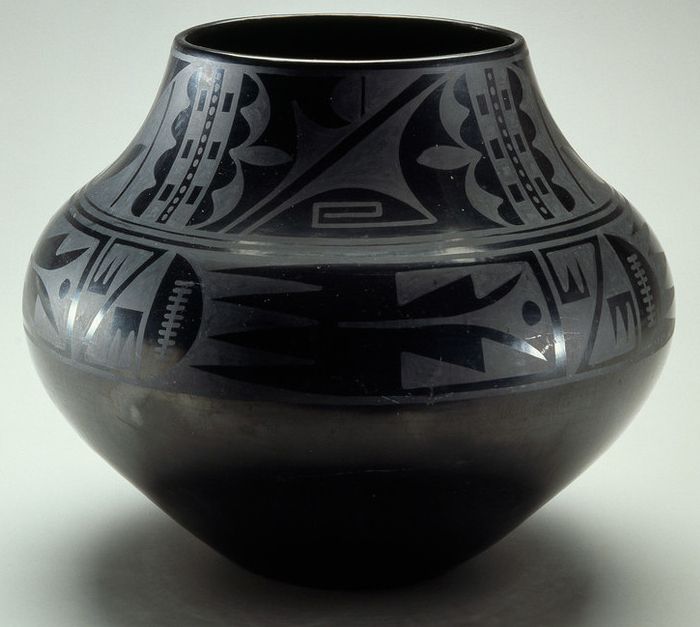
Add Decoration
Decorating your clay cup is one of the most creative parts of the process. Here are two popular ways to add artistic details:
Imprint Designs
You can imprint the clay with designs using different tools and textures. Some options include:
- Stamps – Press rubber stamps or carved stamps into the wet clay to leave an imprint.
- Textures – Use textured items like lace, burlap, or leaves to create patterns in the clay.
- Cut Outs – Use cookie cutters or a craft knife to cut shapes out of clay and apply them to the cup.
- Incising – Use a dull tool to scratch or engrave lines and patterns into the clay.
Add imprints before the cup is fired. Remember that clay shrinks slightly during firing, so keep imprints bold.
Attach Clay Handles/Details
Adding 3D clay details takes your cup design to the next level. Options include:
- Handles – Roll coils and attach them to form handles.
- Texture – Add small clay coils, balls, or ridges.
- Charms – Make miniature clay shapes and attach them as charms.
- Feet – Shape clay feet or base to raise the cup up.
Attach any extra clay pieces securely so they don’t fall off during drying and firing. Blend joints well so they hold.
Dry the Cup
After the cup has been shaped and any decorations have been added, it needs to be thoroughly dried before firing. There are a couple options for drying the clay:
Allow to air dry fully – Set the cup in a safe, dust-free location where air can circulate around it. Let it sit for 24-48 hours until bone dry. Check for any moist areas, especially near the base. The cup needs to be completely dry to avoid cracking during firing.
Use a low heat oven – Place the cup on a baking sheet or ceramic kiln shelf. Set the oven to the lowest temperature, usually around 150°F to 200°F. Let the cup dry for 4-6 hours, checking it periodically. Keep the oven door slightly propped open to allow moisture to escape. The gentle heat will accelerate drying without shocking the clay. Rotate the cup occasionally for even drying.
Proper drying is a critical step before firing the clay. Any remaining moisture can cause cracks or even explode the cup in the kiln. Take your time and make sure the cup is completely dry before moving to the firing stage.
Fire the Cup
Once your clay cup has dried completely, it’s time to fire it in a kiln to harden the clay through a process called vitrification. Firing is done in two main stages – bisque firing and glaze firing.
Bisque firing is the first firing stage. Place your dried unfired clay cup in a kiln and fire to approximately 1800°F. Bisque firing solidifies the clay body and makes it less porous and receptive to glazes. The cup will be chalky and matte after the bisque firing.
For the second firing stage, apply glaze to the bisqueware if desired. Glazes are made from finely ground glass that melts and fuses to the clay body during firing. Place the glazed cup back in the kiln and fire to around 2200°F. This fuses the glaze to the clay body, making it smooth, shiny, and watertight. The higher temperature vitrifies the clay, hardening it fully. After glaze firing, the cup is ready to be used!
Finish and Seal
After firing, your clay cup will likely have some rough edges or imperfections from the kiln. There are a few finishing steps you can take to smooth and seal the surface.
First, sand any rough areas gently with fine grit sandpaper or a sanding sponge. Focus on the bottom edge of the cup and the rim, as these often have rough spots. Sand in small circular motions. Be careful not to scrub too hard or you may sand through the glaze.
Next, polish the sanded areas with a soft cloth. This will smooth the surface and give your cup a nice sheen.
Finally, apply a food-safe glaze or sealant if desired. This will make the cup watertight and also add an attractive finish. Use a brush or sponge to evenly coat the inside and outside with glaze. Allow it to dry fully. Then your cup is ready to be enjoyed!
Adding this finishing touch makes your handmade clay cup look truly professional. The sanding, polishing, and sealing transforms the raw clay into a smooth, durable work of art.