How Do You Sculpt A Cat Face With Clay?
Gather Materials
Before you can begin sculpting a cat face out of clay, you’ll need to gather the necessary materials. Here are the main supplies you’ll need:
-
Clay – Polymer clay or pottery clay work best. Opt for a clay that is easy to sculpt and holds details well. Make sure you have enough clay for the size of cat face you want to sculpt.
-
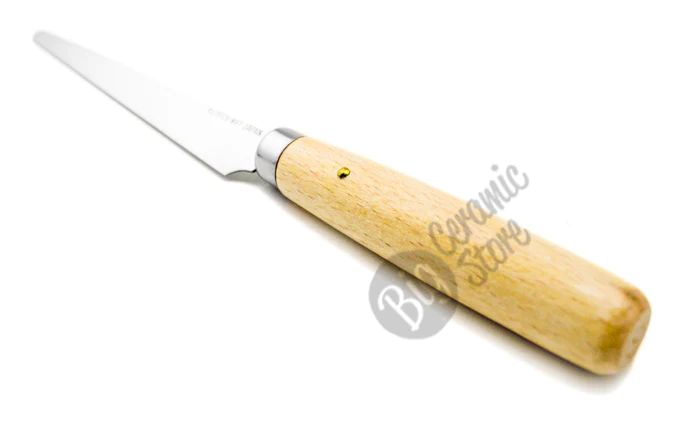
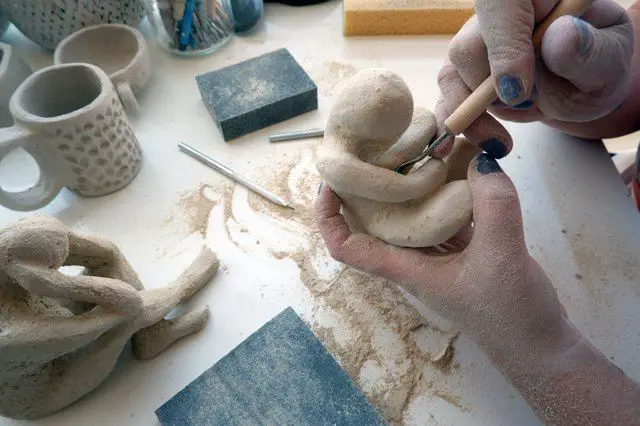
Sculpting tools – Some essential clay sculpting tools include loop tools, clay shapers, ball stylus, sponge, craft knife, and various sculpting paint brushes. Having an assortment of sculpting tools allows you to achieve different textures and effects.
-
Reference photos – Look for close up, high quality photos of cat faces from different angles to use as reference. Side profile shots are especially helpful. You may want multiple photos of different cats and facial expressions.
In addition to these main supplies, you may want an armature wire, acrylic roller, clay softener, workspace covers, and other general sculpting supplies. Take time to gather all necessary materials before beginning to sculpt.
Prepare the Clay
Properly preparing the clay is one of the most important steps when sculpting a cat face. Clay often arrives in a hardened block that needs to be softened and made malleable before sculpting. There are a few techniques for preparing clay:
Wedging involves repeatedly slamming a block of clay down on a flat surface. This helps distribute moisture evenly throughout the clay and removes air bubbles. Start by cutting the hardened clay block in half. Smash one half down, fold it in half, and smash again. Repeat this process until the clay feels soft and uniform.
Kneading is similar to wedging but more gentle. Take a softened lump of clay and use your palms to push it down and fold it over itself again and again. This helps blend the clay and achieve an even, smooth texture. Do this for a few minutes until the clay is soft, pliable, and free of lumps.
If the clay is still too dry and crumbly, you can soften it by spraying or misting it lightly with water. Then seal it in an airtight bag or container for several hours so the moisture is absorbed evenly throughout. Once the clay is soft and workable, you’re ready to start sculpting your cat face.
Shape the Basic Head
The fundamental shape of a cat’s head is an oval or egg-shaped form. When sculpting the basic head shape, it’s important to establish the proper proportions before adding finer details. A common guideline is the “rule of thirds” – divide the oval into thirds both vertically and horizontally. The ears will sit at the top third line, the eyes at the middle third, and the chin/jaw at the bottom. Using photographic references is highly recommended when sculpting animal portraits. Study photos of cats from multiple angles to understand the underlying head structure you’ll be sculpting. Front facing photos are especially helpful for placing the facial features. Carefully shape the clay into an oval form approximately 3 inches long and 2 inches wide, using the rule of thirds as a guide. Check the profile shape as well, curving smoothly from forehead to snout. Refine the proportions until you have a balanced basic head ready for detailing.
Add the Ears
The placement and shaping of the ears is an important step in sculpting a realistic cat face in clay. When adding the ears, consider the following:
- Place the ears fairly high up on the head, roughly aligned with the outer corners of the eyes. Real cat ears are set high and wide apart.
- The ears should stick out to the sides but have a slight front-facing angle. Avoid setting them too low or flat against the head.
- Form triangular ear bases extending from the head. Make the inner ear slightly rounded and the outer edge straighter.
- Add curves and folds inside the ear to create a natural, relaxed look. The ears should not appear stiff.
- Pay attention to variations in thickness, keeping the ears thin but not too fragile.
- Consider the ear tips. Round off the edges and avoid pointed tips which appear unnatural.
- Look at cat ear references. Observe the asymmetries and imperfections that bring realism.
Taking time on the ears will help bring personality and realism to your sculpted cat face. Their placement, angles and detailing are important to making them look natural.
Sculpt the Eyes
Sculpting the eyes is crucial for shaping the expression and realism of your cat sculpture. Start by indenting the eye sockets using your clay sculpting tools. Make sure they are evenly spaced and aligned. The eyes should bulge out slightly rather than being flat against the surface.
Use a rounded clay tool to shape the outline of the eye, creating an almond shape. Refine the shape by smoothing the edges. For a realistic look, angle the outer edges of the eyes down slightly. This helps give the face a natural relaxed appearance.
Next, delineate the upper and lower eyelids using a sharp sculpting tool. Create a subtle ridge for the upper eyelids. The lower lids can be shaped by gently pressing the clay downward. Define the inner and outer eye corners for added detail.
To set the eyes, indent the pupil using a small ball stylus. Create a highlight by adding a raised dot opposite of the pupil indentation. You can also add light vertical lines on the iris to mimic veins and capillaries in a realistic cat eye.
Pay close attention to proportions as you sculpt the eyes. The space between the eyes should equal the width of one eye. Make adjustments and refine details until you have the perfect eye shape and expression.
Form the Nose
The nose is one of the most distinctive facial features on a cat sculpture. Start by shaping the basic nose structure using clay tools to flatten and indent the clay. The nose should protrude slightly from the face.
To create nostrils, use a clay loop tool to carve out two oval shaped holes on the lower part of the nose. Make sure the nostrils have clean edges and adequate depth and dimension. You can add extra definition around the nostrils by gently pressing in with a clay shaper or dull tool.
Refine the shape and size of the nose to achieve a proportional look. Give special attention to recreating the characteristic nose bridge and nostril shape of a cat. The nostrils can tilt up slightly at the bottom edges. Work slowly and gently when detailing the nose to avoid unintended marring of the clay.
Shape the Mouth
Shaping the mouth is crucial for bringing your cat sculpture to life. Pay close attention to the lips, teeth, and overall expression. For the lips, use your clay sculpting tools to define the upper lip line and lower lip line. Gently pinch and curve the clay to form the lips into a natural shape. For the teeth, use a sharp tool to indent each individual tooth into the upper and lower gums. Teeth can be sculpted in a neutral position or parted slightly open. For expression, refer to your reference photos of cats. A mouth shaped into a slight upturn will give the appearance of a happy or curious cat. A closed mouth with relaxed lips conveys a calm demeanor. Practice shaping different expressions until you achieve your desired look.
Take your time on this step to make the mouth area realistic. Well-sculpted lips, teeth, and expression will breathe life into your cat sculpture. The mouth is integral for conveying emotion and personality.
Add Facial Features
Facial features like the cheeks, chin, and eyebrows are important for bringing your cat sculpture to life. For the cheeks, use your fingers or a sculpting tool to gently press and round out the area below the eyes. Create subtle indents on either side of the muzzle to form shallow cheekbones. For a sleek look, make the cheeks smooth and rounded. For a fluffier cat, add more definition to the cheek area.
The chin and jawline give shape to the bottom of the face. Make slight outward sweeps from the corner of the mouth down to shape the jowls. Define the chin area with gentle ridges or lines depending on the look you want. Leave some texture for fur. For the bridge between the chin and lower lip, use your tool to create a slight indent.
Eyebrows frame the eyes and add expression. Make shallow grooves above each eye, tapering the inner and outer edges. For a furrowed or angry look, deepen the brow area. For perky and alert, keep the brow fairly flat. Use your tool to add texture and definition to the brows.
Refine and Detail
Once the basic facial features are sculpted, it’s time to refine the details to bring your cat sculpture to life. Use various sculpting tools to smooth and blend the clay. Try loop tools, silicone tipped shapers, or a plastic scraper. Gently smooth any rough edges or uneven textures. Be careful not to overwork any details you want to keep defined, like the eyes, nose and mouth.
To sculpt fur, use a clay shaper or loop tool to add short strokes in the direction the fur grows. Work in layers starting with broad strokes for the base, then add slightly shorter strokes on top to define clumps of fur. Add very fine lines and textures for the top layer. Focus on the forehead, cheeks, chin and chest area for the most fur detail. Use a clay shaper to imprint paw pads on the feet.
Cat whiskers add personality and realism. Roll thin strands of clay between your fingers to make whiskers. Apply a dab of slip clay to attach them in the whisker spots, using photos as reference. Bend the ends of the whiskers slightly for a natural look. Add 6-12 whiskers on each side of the muzzle.
During the refining stage, frequently step back to look at your sculpture from all angles. Identify any areas that need more definition or smoothing. Pay close attention to making both sides of the face symmetrical.
Finishing and Preserving the Cat Face Sculpture
Once you are satisfied with the details and expression of your cat face sculpture, it’s time to finish and preserve it. There are a few important steps to take:
Baking the Sculpture
Clay sculptures must be baked in a kiln or oven to harden and permanently set the shape. Follow the baking instructions for the specific clay you used. In general, baking times range from 10 minutes to over an hour at temperatures between 130-300°F. Slowly ramp up the temperature to avoid cracking and use kiln posts or a baking pan to support the sculpture.
Applying a Glaze
Optional glazes create a glossy finish and decorative effect. Select a non-toxic glaze approved for the type of clay used. Brush or dip glaze over the sculpture, letting excess drip off. Fire again according to glaze instructions to set the finish.
Sealing the Sculpture
For an unglazed look, seal clay with a protective spray or liquid acrylic sealer once cool. This helps lock in surface details and prevents dust buildup. Apply 2-3 thin, even coats allowing each to fully dry. Repeat every 1-2 years to maintain the protective barrier.
With proper baking, glazing, or sealing, a polymer clay cat sculpture will remain preserved for many years of enjoyment.


