How Is Clay Used To Make Pots?
Clay is a type of fine-grained earth that can be molded when wet and hardened into shape when dried. Clay has been used to make pottery and ceramics for thousands of years across many ancient civilizations. Clay pots and ceramics were some of the earliest human inventions and served a variety of important functions including carrying water, storing grains and food, and cooking.
Clay pots enabled the growth of early societies by allowing food and water to be stored and transported. The development of pottery also reflects advancements in culture – decorative ceramic arts emerged and pottery styles evolved across different regions and time periods. Today, pottery making remains an important craft around the world that connects us to our past.
Clay Types
Potters use several different types of clay to create their wares. Each type has unique properties and characteristics that affect the shaping of the clay, how it holds its form, and how it responds to firing. The main types of clay used in pottery are:
Earthenware Clay – This clay contains a lot of minerals and organic matter. It is very porous and coarse after firing, absorbing water easily. Earthenware clay requires a lower firing temperature than other clays, making it more beginner-friendly. It comes in a wide range of colors including red, brown, buff, and white.
Stoneware Clay – Stoneware clay is smooth and dense, with fewer impurities than earthenware. It becomes watertight after firing and can withstand repeated use. Stoneware requires higher firing temperatures around 2200°F. It is excellent for functional pottery and comes in gray, buff, brown, and red colors.
Porcelain Clay – The purest clay with the fewest mineral impurities. Porcelain is extremely fine and smooth, resulting in a bright white, translucent appearance after firing at over 2300°F. Porcelain is ideal for decorative wares but requires careful skill in shaping and glazing.
Preparing the Clay
After choosing the right type of clay for your pottery project, the clay must be properly prepared before it can be shaped. The two most important techniques for preparing clay are kneading and wedging.
Kneading the clay is a process of repeatedly folding, pressing, and flattening the clay body to evenly distribute moisture and remove air bubbles. This helps improve the plasticity and workability of the clay. The clay should be kneaded until it reaches a uniform consistency with no dry spots or air pockets. Using a kneading board makes this process easier.
Wedging is a technique used after kneading to further mix the clay and remove any remaining air pockets. To wedge, cut the clay in half and press it together in a rhythmic forward-pushing motion. Fold the clay over itself and repeat the wedging process until no more air bubbles can be seen. This aligns the clay particles and creates an even, plastic ball of clay ready for throwing or handbuilding.
Ensuring the proper moisture content in the clay is also key. The clay should be damp but not soaked. Too little moisture will make the clay prone to cracking while shaping, and too much moisture will prevent the clay from holding its shape. Test the clay’s readiness by shaping a small ball. An ideal moisture level will allow the clay to form into a smooth ball that holds together without cracking.
Shaping Methods
There are several techniques used to shape clay into pottery. The most common methods are handbuilding and wheel throwing.
Handbuilding involves shaping the clay directly with your hands and simple tools. Common handbuilding techniques include:
- Pinch pots – Pinching clay into an open bowl shape
- Coil pots – Rolling and stacking coils of clay into a pot shape
- Slab pots – Cutting flat slabs of clay and joining them together
Handbuilding allows you to create unique asymmetrical and organic pot shapes. It’s a great method for beginners since it doesn’t require a pottery wheel.
Wheel throwing is the process of using a pottery wheel to shape clay into symmetrical pot forms. The momentum of the spinning pottery wheel and the use of your hands allows you to raise the walls of the clay and shape the form. Wheel throwing requires practice to control the clay properly as it spins on the wheel.
Both handbuilding and wheel throwing have their advantages. Wheel throwing is ideal for achieving uniform wall thickness and symmetrical forms, while handbuilding offers more creative freedom.
Drying the Clay
Once the clay pot has been shaped, it must be allowed to dry slowly and thoroughly before firing. Drying is one of the most crucial steps, as any moisture left in the clay will cause cracking or even explosions in the kiln.
Air drying is the most common method. The pot is left in a warm, dry area out of direct sunlight for several days to a week or longer, depending on the size and thickness of the piece. Larger or thicker pieces may take weeks to fully dry. Turning the piece periodically allows even drying. Placing the pot on a bed of sand or sawdust can help absorb moisture from the bottom.
Using a dehumidifier and fans will speed up the drying time, but care must be taken not to dry the clay too quickly, which risks cracking and warping the pot. The clay must dry evenly from the center out. If the surface dries too fast, it will contract and pull apart before the inside has sufficiently dried.
Checking the moisture by weighing the piece over several days can help determine when the clay is ready for firing. When it maintains a consistent weight for at least 24 hours, it means the clay has fully dried. At this stage, the clay will feel lighter, turn from gray to white, and become less cool to the touch.
Bisque Firing
Once the clay pieces have dried completely, the next step is the bisque firing. This first firing is done at a lower temperature, usually around 1100°F to 2100°F (590°C to 1150°C). The purpose of bisque firing is to harden the clay body and remove any water, organic matter, or chemicals still remaining in the clay before applying glaze. The bisque firing turns the soft clay into a hard, porous ceramic material ready for glazing and the higher temperatures of the final firing.
During bisque firing, chemical changes also take place in the clay body that prepare it for the application of glazes. As clay heats up, the silica and alumina compounds start to form together, making the clay less porous and impermeable to water. Bisque firing essentially converts the clay into a durable material ready to be decorated and shaped into a finished ceramic piece. It is an essential intermediate step before the final glaze firing.
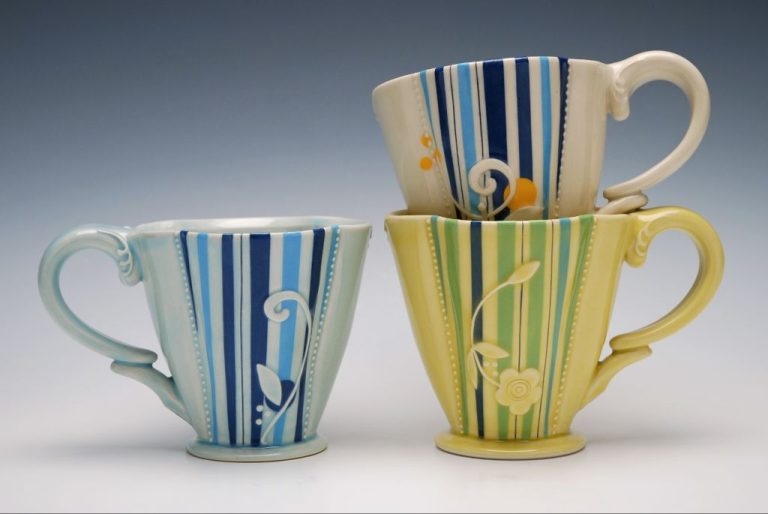
Glazing
Glazing is an important step in finishing ceramic pots made from clay. Glazes serve two main purposes in pottery making. First, they provide decorative colors and finishes to the bisque fired clay. Glazes with various mineral pigments can create beautiful colors and effects on the pottery. Second, glazes seal and protect the porous clay body, making it waterproof and durable for practical use.
There are many types of glazes to choose from including transparent, opaque, glossy, matte, crystalline, and more. Potters can apply colored glazes in various ways such as brushing, dipping, pouring or spraying to achieve the desired decoration. Using multiple layers and colors of glazes can create even more complex designs. Some potters also incise patterns or textures into leather-hard clay before glazing to interact with the colors in unique ways.
Testing small glaze samples is important to achieve the right colors, textures and effects. Factors like glaze chemistry, firing temperature and atmosphere can significantly affect the final glazed surface. Mastering glaze application takes much knowledge and experience to perfect.
Final Firing
The final firing, also known as glaze firing, is the high temperature firing process that melts the glazes on the pottery and permanently sets them on the clay body. This firing is done after the bisque firing and glazing steps. The purpose of this firing is to melt the glazes so they bond with the clay body to produce a glasslike coating.
Final firings are done in the range of 2200-2400°F, much hotter than bisque firings. There are several types of kilns used for final firing:
-
Electric kilns – These kilns use electricity to generate the high heat needed. They offer a clean, easily controlled heat source.
-
Gas kilns – Gas fired kilns use natural gas or propane burners to produce flames that heat the kiln chamber. They can achieve high temperatures efficiently.
-
Wood kilns – Also known as wood-fired kilns, these kilns use wood as the fuel source. The ash from the wood can produce unique effects on the pottery.
Regardless of kiln type, final firings require carefully controlled heating and cooling cycles. The glazes need time to melt and fuse properly at the peak temperature. Fast firing can cause defects. The cooling period is also important to avoid cracking and promote hardness.
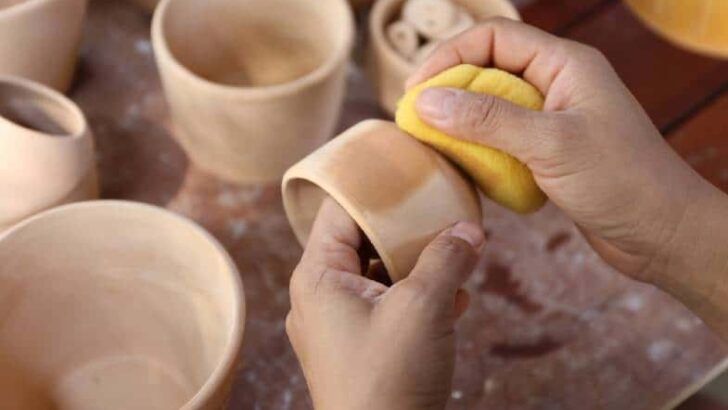
Finishing Touches
After the pots have been fired, there are often still some finishing touches required before they are ready to be used or sold. Two common finishing techniques are polishing and adding decorations.
Polishing helps smooth any rough edges and gives the pottery a nice sheen. This can be done in a few different ways. Sanding the surface with increasingly finer sandpaper is one option. Another is to rub the pottery on a whetstone. Some artisans also use tumblers which are machines that roll the pottery along with abrasive materials inside to polish the surface.
Decorating the pottery helps give it more visual appeal and personality. Potters have many choices for adding decorative elements. Incising designs by carving into the clay is very common worldwide. Applying slip trailing, in which liquid clay slip is drizzled onto the surface, allows for great detail.Stamping designs using carved stamps is another prevalent technique. Painting images with underglazes prior to firing also yields beautiful results.
These finishing steps help complete the pottery pieces and make them ready for use or display. The polishing lends an attractive luster while decorations give each item a unique, artistic flair. With the right techniques, finishing with polishing and decoration can take pottery from plain to extraordinary.
Conclusion
Making pots from clay is an ancient and intricate process that involves several steps. It begins with choosing the right type of clay and preparing it to the ideal consistency. The clay is then shaped using different techniques like throwing, handbuilding, or molding. Once the basic form is created, the clay goes through an important drying period to harden and stabilize.
The pottery then undergoes the bisque firing, which further hardens the clay and prepares it for decorating. Glazes can be applied for color and effects before the final firing permanently sets the glaze. Finishing touches like polishing bring out the sheen of the glazed pottery.
Pottery has been an essential art and craft throughout human history. The ability to create vessels, plates, and artwork out of clay has been vital to cultures around the world for thousands of years. Though methods have evolved, the creative process of forming functional and beautiful objects from this elemental material remains a practice that connects the past with the present.