How To Make Cheap Clay?
Clay is a fine-grained natural material composed of hydrated aluminum silicates that can be molded when wet. Clay has been used for centuries to create pottery, sculptures, tiles, and other decorative or functional items. While clay can be purchased from craft stores, it tends to be expensive, especially for large quantities or specific colors and textures.
Luckily, clay is relatively easy to make at home using just a few simple ingredients. This inexpensive homemade clay, often called air-dry clay or no-bake clay, works similarly to store-bought varieties. With a few basic supplies from your kitchen, garage, or garden, you can create your own clay for kids’ crafts, pottery, and other hands-on projects.
Gather Materials
To make cheap homemade clay, you will need the following ingredients:
- 2 cups flour (all-purpose or whole wheat)
- 1 cup salt
- 1 cup water
- Food coloring (optional)
You can substitute cornstarch for the flour if desired. The measurements may need to be adjusted slightly if using cornstarch to get the right consistency.
That’s all you need! Most households will already have flour and salt on hand. The clay can be made with ingredients you likely have in your kitchen.
Make the Clay
Making homemade clay is a simple process of mixing together a few basic ingredients. The consistency you are aiming for should be similar to cookie dough. Here are the steps:
1. In a large bowl, combine 1 cup of flour, 1/2 cup of salt, and 1 tablespoon of cream of tartar. Mix well.
2. In a separate bowl, mix together 1 cup of warm water and 1 tablespoon of vegetable oil. Stir until fully blended.
3. Slowly pour the wet ingredients into the dry ingredients bowl, mixing continuously. Use a spoon at first then switch to kneading with your hands once it begins to form a dough.
4. Knead the clay dough for 2-3 minutes until all ingredients are fully incorporated and smooth. Add extra flour 1 tablespoon at a time if it’s too sticky.
5. This is the time to add food coloring if desired. Start with 2-3 drops and knead it in. Add more drops until you reach the desired color intensity.
6. Once fully mixed, the homemade clay is ready to use for crafts and creations. Store any unused portions in an airtight container.
Store the Clay
Properly storing your homemade clay is important for keeping it usable for as long as possible. Here are some tips for storing clay:
Keep clay in a sealed bag or airtight container. This prevents it from drying out. Plastic bags, plastic containers, or even tightly sealed glass jars all work well.
You can store clay in the refrigerator for even more longevity. The cool temperature helps slow down drying. Stored in an airtight container in the fridge, homemade clay can last for several weeks to a few months.
If you notice the clay is drying out, you may be able to refresh it by kneading in a little water. But if it is too dried out, it’s best to simply make a new batch.
Use the Clay
With homemade clay, the possibilities for crafting and creating are endless! Here are some of the many ways homemade clay can be used for arts and crafts:
Sculpting
Clay is a perfect material for sculpting. Let your imagination run wild and sculpt anything from simple shapes to detailed figures. Use your hands or basic sculpting tools to shape, mold, and form the clay into unique 3D creations.
Jewelry
Clay can be rolled thin and cut into shapes to make homemade beads for necklaces, bracelets, and more. Use cookie cutters or clay tools to cut the rolled clay into circles, squares, hearts, stars, or custom shapes. Add holes before baking so the beads can be strung.
Decorative Pieces
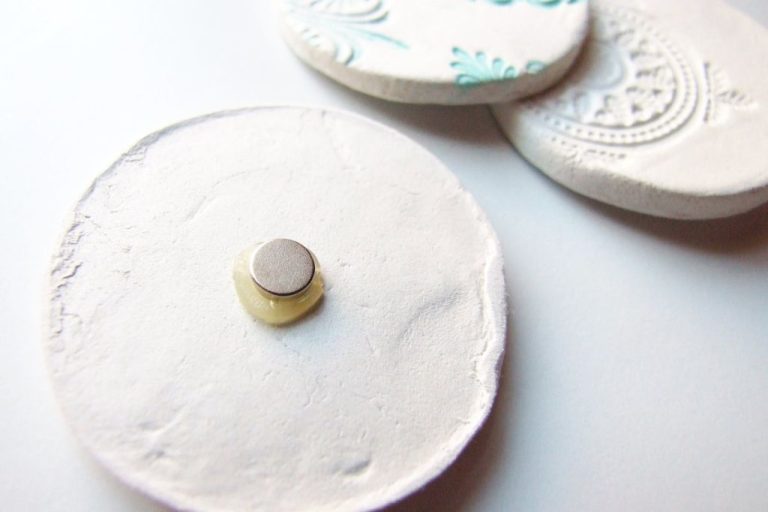
Make decorative bowls, vases, figurines, tiles, and boxes out of clay. Roll flat slabs of clay and use cookie cutters or a knife to cut shapes. Craft details and textures using tools like roller stamps, toothpicks, and paint brushes. Let your clay creations decorate your home.
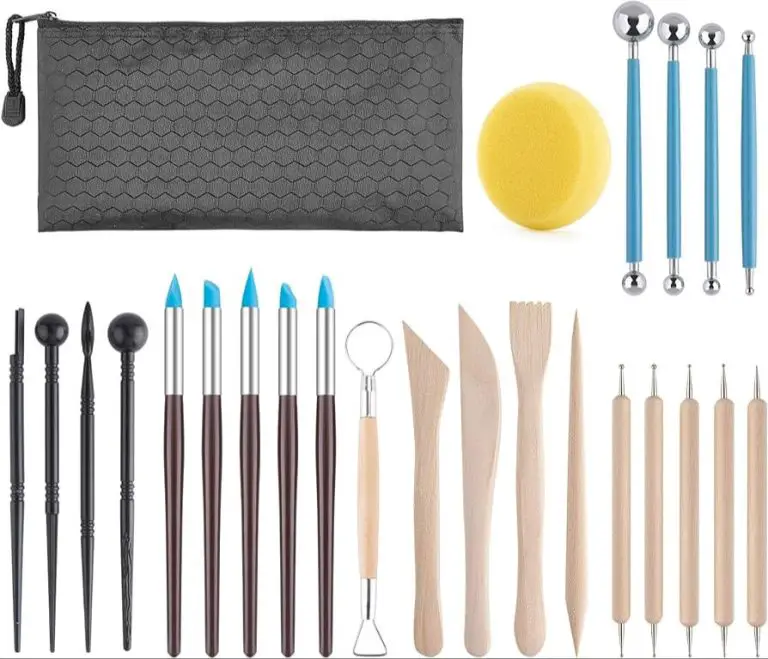
To shape and craft the clay, use basic tools like a rolling pin, clay cutters, sculpting tools, toothpicks, paint brushes, and more. Get creative with household items too. Almost anything can be used to imprint shapes and patterns into the clay.
Bake Creations
Once you have finished sculpting your clay creations, they will need to be hardened through baking in the oven. Baking helps to cure the clay fully so that finished pieces will be durable and long-lasting.
It’s important not to overbake clay, as exposing it to too much heat can cause it to crack or become misshapen. For most air-dry and polymer clays, baking at 275°F for 15-20 minutes per 1/4 inch of thickness is ideal. Check on your pieces periodically as they bake. The clay should harden but not darken dramatically in color.
Allow your clay creations to cool fully before handling them after baking. The increased stability from oven-curing means you can paint and enjoy your finished clay masterpieces without worrying about them deforming over time.
Paint Pieces
Once your clay creations are baked and cooled, it’s time to paint them. Acrylic paint works best on polymer clay because it adheres well and dries fast.
When painting, start by applying a base coat of paint in your desired color. Let the base coat dry fully before adding additional details. Mix paints together on a palette to create custom colors. You can also dilute acrylic paints with a bit of water to create washes. Experiment with different paint techniques like dry brushing and stippling to add interest.
Apply paint in thin layers, letting each layer dry before adding more paint. Thick coats of acrylic paint may bubble or crack. If you make a mistake, wipe it off right away with a damp cloth.
Once satisfied with your painted clay piece, it’s a good idea to seal it. This will protect the paint and give your creation a nice finished look. Apply one or two coats of a water-based acrylic sealant, letting each coat dry completely before adding the next.
Store Finished Crafts
Once your clay crafts are baked and painted, ensure you store them properly to preserve them and avoid damage. Here are some tips for storing finished clay crafts:
Display out of direct sunlight to preserve the paint and colors. Direct sunlight can cause the paint to fade over time. Find an indoor spot that gets ambient light but avoid setting them on a windowsill or anywhere with prolonged sun exposure.
Keep pieces in a dry place to prevent moisture damage. Exposure to moisture can make the clay soften and ruin painted details. Storing clay crafts in an air-conditioned environment is ideal.
Note any special cleaning instructions. Some paints and finishes may require gentle cleaning methods. Before storing, read any product details to understand proper care and cleaning.
Consider investing in a display cabinet or enclosed shelf. This protects delicate clay crafts from dust, curious hands, and other environmental risks. Risers or stands can create visually appealing displays.
Change up your displays over time. Rotate pieces in and out of storage to keep your collection fresh. Clay crafts make great gifts too!
With proper care and storage, homemade clay crafts can last for many years. Be sure to handle pieces gently and keep them away from moisture, direct sunlight, dust, and damage. Follow any special cleaning directions. Displaying your clay creations is a fun way to enjoy your handmade art for years to come.
Troubleshooting
If you run into any issues while making or working with homemade clay, there are some simple fixes to try:
Fixes for Clay That’s Too Wet or Sticky
If your clay is too wet and sticky to work with, you can add a little more flour, cornstarch, or baking powder to absorb some of the moisture. Knead in small amounts at a time until it reaches the desired consistency.
Fixes for Clay That’s Too Dry or Crumbly
For clay that’s dried out and crumbly, you can add a teaspoon or two of water at a time and knead it in to bring the clay back to a pliable consistency. You may need to do this multiple times as you’re working.
Fixes for Cracked or Broken Pieces
If a piece cracks or breaks while you’re sculpting or after baking, there are a few options to repair it. For slight cracks before baking, you can moisten the broken edge and smooth the pieces back together. For larger cracks or breaks, you can fix with clay slip (mix clay and water to a glue-like consistency). After baking, use acrylic paint or baking clay as a filler to fix cracks.
Conclusion
Homemade clay is a fun, creative and inexpensive craft that allows your imagination to run wild. You can easily customize the clay’s texture and colors by using different ingredients and paints. Making your own clay gives you the freedom to create original pieces from scratch.
From sculptures to jewelry, homemade clay allows you to make all kinds of arts and crafts. Encourage kids to get messy and mold creatures, shapes and objects from their wildest dreams. The baking and painting process is also a great way for them to bring their clay creations to life.
There are many recipes for making homemade clay, such as ones using flour, cornstarch, glue, cream of tartar, or even paper. Experiment with the different recipes to find your favorite. The great thing is that you likely already have most of the ingredients on hand.
Homemade clay is an enjoyable and gratifying way to express creativity on a budget. With some simple ingredients and basic techniques, you can start crafting your own unique clay masterpieces today.


