How To Make Pottery Step By Step?
Pottery making dates back thousands of years, with some of the earliest known pottery pieces found in China and dating back to 20,000 BC. Throughout history, pottery has been an important technology for creating vessels for holding food, water, and other storage needs. The development of pottery has evolved across many cultures over time, with innovations in materials, techniques, styles, and functions.
At its most basic level, pottery involves forming vessels from clay, allowing them to dry, and then firing them at high temperatures in a kiln. Clay is an abundant, moldable material that becomes permanently hard after firing. There are many techniques for forming and decorating pottery depending on the type of clay used and the desired end result. Some of the main forming techniques include handbuilding, throwing on a potter’s wheel, and molding.
To make pottery at home, you will need some basic supplies and tools. The main requirements are:
- Clay – Self-hardening clay is the most beginner-friendly option.
- A work surface – This can be a table covered with canvas or plastic.
- Basic hand tools – A pottery wheel if throwing vessels, stamps and texture tools for embellishing.
- Access to a kiln – Using a local studio, school, or buying a small countertop kiln.
With an understanding of the history, some clay, and a few simple tools, you can start handbuilding or throwing your own pottery pieces.
Choose Your Clay
There are several types of clay that can be used for pottery, each with their own properties and characteristics. The three main types are:
Earthenware Clay – This clay fires at lower temperatures, between 1750°F-2100°F. It’s very porous and absorbent. Earthenware is easy to work with making it good for beginners. Some examples of earthenware clays are red clay and terra cotta (Source: https://www.soulceramics.com/pages/types-of-clay).
Stoneware Clay – Stoneware fires at higher temperatures, between 2200°F-2400°F. It’s less porous than earthenware, making it water-tight. Stoneware has high durability. Some examples of stoneware clays are porcelain and white stoneware (Source: https://thepotterywheel.com/types-of-clay-for-pottery/).
Porcelain Clay – Porcelain is a type of stoneware that fires at extremely high temperatures, between 2300°F-2400°F. It’s non-porous and glass-like when fired making it ideal for functional ware. Porcelain is smooth, refined, and white after firing.
When selecting clay, consider the firing temperature, color, texture, and characteristics you need for your particular pottery project. The clay type impacts the final look, durability, and functionality of finished ware.
Prepare Your Workspace
Setting up your pottery workspace properly is crucial for efficiency and safety. Here are some key steps for preparing your wheel throwing and handbuilding areas:
For wheel throwing, you’ll need adequate space for the wheel itself plus room to sit and freely move your arms and elbows. Make sure your wheel is properly leveled and stabilized. Position it near an electrical outlet and have a water source handy for keeping clay wet. Proper lighting is also important so you can see clearly while throwing. Consider an adjustable stool that allows you to sit upright while maintaining even pressure on the pedal [1].
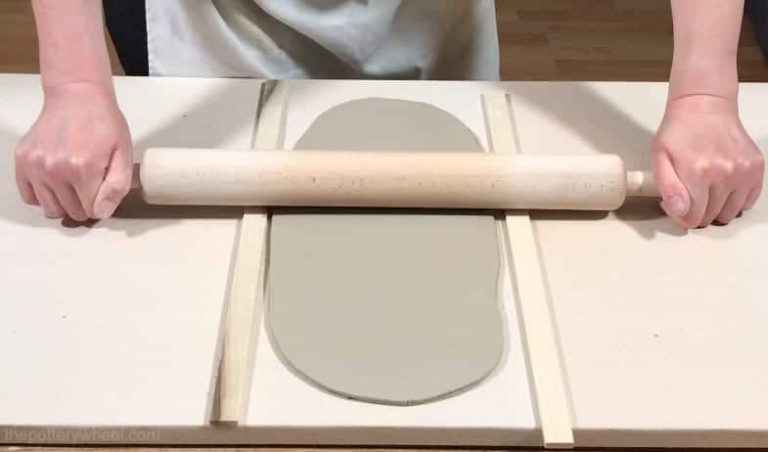
For handbuilding, set up a large, sturdy table or countertop work surface at a comfortable height. Make sure you have enough room to roll out slabs and move around your projects. Good overhead and task lighting are also key. You’ll want your handbuilding area close to your clay storage and tools [2].
Safety equipment like a respirator, apron, and eye protection are essential for any pottery workspace. Install a vent fan, air filter or air cleaner to minimize dust. Have a well-stocked first aid kit on hand too. Keep walkways clear and organize tools within easy reach. A tidy, uncluttered workspace helps prevent accidents.
Wedging the Clay
Wedging is a critical step in preparing clay for pottery making. The purpose of wedging is to remove air bubbles and homogenize the clay by evenly distributing water throughout it. Properly wedged clay is smooth, pliable, and free of cracks or dry spots.
There are a few techniques for wedging clay. The cutting and slamming method involves cutting the clay into several pieces, then slamming the pieces together. As described by Pottery Making Info, this realigns the clay particles and removes air pockets. Repeatedly cut, slam, and knead the clay until it’s fully integrated.
Another technique is circular wedging. To wedge circularly, form the clay into a ball and push it around on the wedging table in a spiral pattern. As outlined by Community Clay, rotate the clay as you wedge to evenly distribute moisture and create a homogeneous clay body. Continue wedging until the clay is smooth, plastic, and ready for throwing or handbuilding.
Centering the Clay
Once you have wedged your clay thoroughly, it’s time to mount it on the pottery wheel. Start by cutting off a workable amount of clay, usually around 2-5 lbs depending on your project. Form it into a ball and place it in the center of the wheel.1
To center the clay, apply even pressure with both hands while slowly rotating the wheel. As the wheel turns, gently press into the clay while pulling up and out, drawing the walls upward. The goal is to form a cone shape and compress the clay into a compact cylinder.
Some techniques for effective centering:
- Place palms directly across from each other on the clay and slowly pull apart, applying steady pressure.
- Use the sides of the hands to square off the cylinder as it takes shape.
- Rotate the wheel head frequently to check for uniform thickness and height.
If the clay mass moves off-center, stop the wheel and re-center the lump by pushing clay from the thicker side back to the thinner side. Use a rib tool to trim excess clay if needed. Applying water can also help lubricate and move the clay. With practice, you’ll learn to recognize when the clay is properly centered by the feeling of balance while pressing into it.
Opening the Clay
After you have centered the clay on the pottery wheel, the next step is to open up the clay into the shape you want for your piece. There are a couple techniques you can use for opening up the clay:
Using Your Fingers
One of the most basic ways to open up centered clay is to simply use your fingers. Start by wetting your hands slightly to prevent the clay from sticking too much. Then, gently press your fingers down into the top center of the clay mound and pull down and outward to stretch the clay open.
Opening the clay with your fingers gives you a very tactile, hands-on feel for the clay. It allows you to get a sense of the clay’s plasticity and workability. However, this method may not be as precise as using tools.
Opening with Wood Ribs
Another common technique for opening centered clay is to use wood ribs. These are paddle-shaped wood tools that allow you to precisely stretch the clay outward from the center. Hold the rib with both hands and place one end against the top center of the clay mound.
Then, gently push and pull the rib outward to stretch the clay side-to-side into an open cylindrical shape. The ribs give you more control and precision than using just your fingers. They also don’t stick to the clay as much as bare hands.
Determining the Size
When opening the clay, think about the approximate size and shape you want for your finished piece. Open the clay until it is wide enough to achieve your desired size after raising the walls. Keep in mind the clay will shrink and condense slightly as you work with it. It’s better to open it a little wider than you think you need.
Raising the Walls
Once you have centered and opened the clay on your wheel, it’s time to raise the walls. This process involves carefully pulling the clay upwards to form the sides of your piece. Here are some tips for raising even, sturdy walls:
Pull the walls up evenly and slowly. Don’t raise one section too quickly or it may become thinner and prone to collapsing. Apply gentle, steady pressure as you pull the clay upwards from the base. Move your hands up the walls in unison. According to sparanoarts.com, you should continue pulling upwards at least half an inch above the desired rim height, then move your hands apart and dunk back into the water.
Focus on thicker bases. As you raise the walls, taper them slightly so the bottom remains thicker than the top rim. This gives stability and prevents your piece from becoming top-heavy. Compress the clay at the base gently with your fingers while pulling up the walls.
Consider using concave shaping. Create a curved interior by pressing the walls gently inwards as you pull upwards. The thinness at the rim paired with a wider base will add durability. You can also create decorative shapes like bowls by angling the walls.
Work slowly and make small adjustments. If a section starts collapsing, stop pulling upwards, wet your hands, compress the base again, and resume gently. Let the clay firm up slightly between intervals of raising the walls.
Final Shaping
Once the basic shape of the pottery is formed, it’s time to refine the shape and smooth out any imperfections. This process is known as final shaping. There are a few key techniques used:
Smoothing ripples and flaws – As you shape the clay on the pottery wheel, it’s common for ripples and irregularities to form on the surface. To correct these, use a metal rib tool to gently smooth over the surface while the wheel is spinning. Apply even pressure and work in overlapping strokes to blend the clay and eliminate ripples.
Refining shape with ribs – Metal ribs can also be used to refine the overall shape of the pottery. Hold the rib against the surface and apply pressure to compress and smooth areas that need adjustment. Work systematically around the entire piece to achieve symmetry and your desired proportions.
Sponging for texture – A sea sponge can be used to add subtle texture to the surface. Lightly press and dab the sponge against the spinning clay to create pores and indentations. A textured effect can add visual interest and distinction to the final fired piece.
Take time during the final shaping stage to perfect the form and surface quality before moving on to drying and firing. Pay close attention to creating clean lines, smooth curves, and a visually appealing overall look. (Source)
Trimming and Drying
Once the pottery piece has been shaped, it needs to be trimmed and properly dried before firing. Trimming involves using a sharp tool to refine the bottom of the piece and create a smooth, finished surface according to this Reddit post. Letting the clay dry to a leather hard state before trimming will prevent distortion. Use a rib tool or surform to scrape and smooth the base. Remove any excess clay and shape the bottom profile. Avoid trimming the walls or altering the form at this stage.
Proper drying is critical to prevent cracking and exploding in the kiln. Allow the piece to air dry slowly over several days. Wrap in plastic if drying too quickly. Place on racking to allow air circulation all around. Turn periodically to ensure even drying. Test for dryness by pressing on the sides to check for a consistent leather hard state throughout before firing. Going straight from wet clay into a hot kiln will cause cracks from the rapid evaporation of water.
Glazing and Firing
Glazing and firing are critical steps in creating finished pottery pieces. Choosing the right glaze and properly firing the kiln will help bring out the best in your pottery.
When choosing a glaze, consider the clay body, the desired colors, textures, and effects. Popular glaze types include transparent, satin, matte, and glossy. According to The Crucible’s guide on glazing, test different options on test tiles to see how they interact with your clay before applying them to finished pieces. https://www.thecrucible.org/guides/ceramics/how-to-glaze/
Apply glazes using a brush, sponge, or spraying. Ensure the bisqueware is free of dust before glazing. Apply glaze to the inside and outside of pieces to be functional. Let the glaze dry completely before firing. According to How Stuff Works, clean up drips or over-application of glaze before the firing process. https://home.howstuffworks.com/green-living/pottery5.htm
Load the kiln carefully, keeping adequate space between pieces. Program the kiln with the appropriate firing schedule for the clay and glazes used. Firing time and temperatures vary based on the materials. Allow sufficient cool down time before unloading finished pottery.

