Playful Clay Creations: Art Projects For Kids Of All Ages
Play and experimentation with clay is a fundamental part of child development. For centuries, children have used clay as an artistic medium to freely explore and nurture their creativity. Clay can be molded into endless forms and possibilities, allowing kids to express themselves and make their visions come to life. Modeling with clay has numerous developmental benefits for kids of all ages, while also being fun and providing hands-on learning.
One of the greatest benefits of working with clay is that it stimulates creative thinking and problem solving skills. As children sculpt clay, they visualize shapes and make decisions to construct their artwork, enhancing spatial reasoning abilities. The tactile experience also builds fine motor skills and hand-eye coordination. Clay gives kids an open-ended artistic material to invent and create without boundaries – allowing them to freely express imagination in 3D form through sculpting, coils, slabs, and more.
Clay art helps children build self-confidence by fostering a sense of satisfaction and pride in completing a project from start to finish. The forgiving texture of clay allows mistakes to be repaired, teaching kids resilience. There is also a calming, therapeutic quality to handling clay that can relieve stress. On a social level, creating with clay in group settings teaches cooperation, communication, sharing and interaction skills. The benefits of clay art begin in early childhood but can be enjoyed at any age.
This guide will cover a range of fun clay projects suitable for preschoolers, elementary students and teens. Kids of all skill levels can work with air dry clay, polymer clay or homemade clay recipes to make animals, jewelry, prints, pottery items and more. Tips and inspiration will be provided to spark creative ideas for using this versatile medium.
Clay Basics
Clay is a versatile and fun material for kids to work with. There are many different types of modeling clays, each with their own characteristics. Some key properties of clay that make it excellent for creating art projects include:
- Plasticity – Clay can be shaped, molded, squished, rolled, and imprinted into endless forms and designs.
- Workability – Clay is easy for little hands to manipulate and shape.
- Texture – Clay can be smooth or coarse, depending on the type.
- Color – Natural clay comes in earth tones like brown, yellow, red, and grey. Precolored clay is available in vibrant rainbow hues.
- Sculptability – Projects can be sculptural or flat depending on the techniques used.
Popular types of modeling clay include:
- Play-Doh – A non-hardening modeling compound made of flour, water, salt, and cream of tartar. Available in a wide variety of colors (https://eduart4kids.com/types-of-clay/).
- Air-dry clay – Clay that dries hard at room temperature. It doesn’t require baking. Crayola Model Magic is a popular air-dry clay (https://artfulparent.com/15-amazing-crayola-air-dry-clay-art-projects-for-kids/).
- Polymer clay – An oven-bake modeling clay that cures very hard. Popular brands are Sculpey and Fimo.
Basic tools and materials needed for working with clay include:
- Clay modeling tools like sculpting loop tools, clay rollers, cookie cutters, and clay extruders
- Work surface like cardboard, tile, or clay mats
- Containers for water
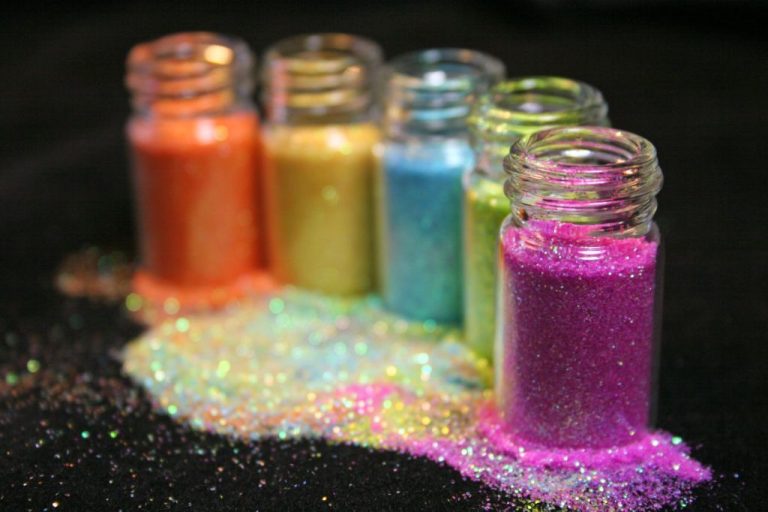
- Acrylic paints, glitter, beads, and other decorating materials (optional)
Clay Sculpting
Sculpting with clay allows kids to create 3D works of art. There are various techniques that can be used to sculpt figures and objects out of clay. Some key sculpting techniques for beginners include:
[According to SculptureAtelier](
Sculpting details and textures is an important part of bringing a clay sculpture to life. Details can be added using clay sculpting tools or household items like toothpicks, paper clips, forks, etc. Textures are created by impressing items into the clay’s surface, like pressing a coin to add a bumpy texture.
When first starting out, simple figures like animals or characters are a great way to practice sculpting skills. As confidence grows, more elaborate and life-like sculptures can be attempted, incorporating multiple figures and more complex shapes and poses. The creativity and skills of the young sculptor will continue developing with practice and experimentation.
Clay Pottery
One of the most classic clay projects for kids is sculpting their own pottery pieces like bowls, mugs, and vases. With a simple lump of clay, kids can shape and mold it into a functional vessel for holding food, flowers, or trinkets. The clay consistency makes it easy to stick pieces together and blend seamless edges as the forms take shape.
Kids can start with basic round or square shapes, or get creative with oval, triangular, or freeform abstract styles. Using tools like wooden sculpting sticks, loop tools, and rib tools can help shape details and smooth surfaces. Let pieces fully air dry before firing in the oven or kiln (see package instructions).
Once bisque fired, pieces are ready for decorating. Kids can paint designs using acrylic paints and brushes, or dip in colorful glazes for a glossy finish after a second firing. Pieces can be left natural clay color too. Pressing objects into the soft clay can also make imprinted designs. Some fun techniques include carving or incising patterns, using rubber stamp textures, or attaching clay coils, ropes, and appendages as 3D decoration. The possibilities are endless!
Pottery is one of the most versatile and engaging clay projects for budding artists of any age to explore. From functional mugs to sculptural vases, kids will love creating their own ceramic masterpieces. See examples and step-by-step instructions here: Simple Cup and Bowl Project.
Clay Jewelry
Jewelry is one of the most fun and creative ways for kids to work with clay. Making wearable art allows them to turn their clay creations into accessories they can show off. Clay jewelry possibilities are endless!
One of the simplest clay jewelry projects is making beads. Let kids roll clay into pea-sized balls, Then pierce a hole through each bead using a skewer or straw. Allow the beads to air dry fully, then string them onto elastic cord or thread to create funky clay bead necklaces and bracelets.
Slightly larger flattened clay beads can be turned into pendants by adding an eye hook before drying. Make heart shapes, animal faces, geometric patterns and more. These pendants can be hung on cord, chain or ribbon to create necklaces with custom clay charms.
For clay earrings, cut or shape flatter pieces of clay into disks, rectangles, hearts or other earring shapes. Use a straw to punch a hole near the top before drying, then insert earring wires. Let kids get creative with clay textures, colors and designs.
Using molds is an easy way to make uniform clay jewelry pieces. Press clay into mold cavities to make patterned beads, shaped pendants, and dimensional earrings. Clean edges can be achieved without additional shaping.
For freeform jewelry, roll chunks of clay into rods, balls and teardrops. Twist, bend and pinch the clay with fingers to create one-of-a-kind organic shapes. Add texture with stamps or toothpicks. Let dry fully then paint if desired.
The options for making jewelry from clay are endless. Encourage kids to brainstorm their own ideas and make their clay art into wearable keepsakes.
Clay Magnets
Clay is the perfect material for creating fun and colorful refrigerator magnets. With just some clay and a little creativity, you can make all kinds of imaginative magnet designs.
Shaping the clay into magnets is easy. Simply roll or mold the clay into any shape you’d like. Circles, squares, hearts, and animals are all good options. Make the magnets in varying sizes for visual interest. Let the shaped clay pieces air dry or bake them according to the clay instructions.
Next, add decorative elements to your magnets. Imprint patterns into the clay using cookie cutters, sculpture tools, or household objects. Make textures by pressing in sequins, beads, buttons, pasta, or other items. Cut out clay shapes and attach them. Add dimensional details like coils or balls of clay. Get creative with different embellishments.
To finish, apply a clear coat like polyurethane, mod podge, or glue to seal and protect the clay. This will help the magnets withstand use on the refrigerator. Glue a magnet to the back of each piece. Now enjoy your handmade clay magnets!
For inspiration, see: https://www.merrimentdesign.com/diy-clay-magnets-fridge-clay-crafts.php
Clay Prints and Stamps
Kids love making prints and textures in clay. It’s a great way to explore shapes, patterns and textures. Here are some fun ways to make prints and stamps with clay:
To make prints, roll out some clay flat and let your child press objects into it like leaves, flowers, seashells, coins, etc. They can create beautiful nature prints or patterns in the clay (Source). Let them experiment with household items to see what interesting textures and prints they can make.
Creating custom stamps is easy too. Roll clay into the shape of a stamp, using cookie cutters, play dough tools or their hands. Add shapes, letters or patterns. Let it firm up, then use it to stamp patterns onto clay. Store stamps in plastic bags so they stay soft (Source). Kids can create stamped jewelry, ornaments and more.
Clay printing explores shapes, textures and patterns in a fun, hands-on way. Let kids explore making prints and stamps to create one-of-a-kind clay art.
Clay Animals
Kids love being creative and making fun animal characters out of modeling clay. Molding animals, insects, dinosaurs, and other creatures is a great way to spark imagination. Realistic textures like scales, fur, or feathers can be achieved by imprinting the clay with everyday household objects.
Start by gathering a variety of materials like pinecones, combs, forks, and bubble wrap that can imprint textures. Roll pieces of clay into the desired animal shapes. Use tools to add textural details like scales on snakes by dragging a fork across the clay, fluffy fur on a cat by pressing a hairbrush into the clay, or feathers on a bird by imprinting pinecone edges.
Get creative with fantasy creatures as well! Sculpt a fierce dragon with pointed spikes made from a plastic fork. Give a magical unicorn swirls etched with a toothpick or flowing waves made by twisting a pencil into the clay. Let kids explore their imaginations through crafting mystical animals.
Focus on shaping basic details like eyes, ears, tails, wings, and noses to achieve realistic and recognizable animal creations. Bake finished sculptures according to clay package instructions. Clay animals make fun toys for imaginary play or use magnets to display them on the fridge for the whole family to enjoy!
Advanced Clay Projects
For older kids and teens looking for a challenge, consider more complex clay projects that allow them to explore intricate shapes and new techniques. Some advanced clay ideas include:
Creating human figurines with proportional bodies and facial features. Pay attention to small details like hands, feet, eyes, etc. This project from Helen Dohn on Pinterest features a detailed human figurine made entirely from clay.
Sculpting animals in action poses. Rather than a stationary creature, sculpt one that appears mid-movement like this running horse from Pinterest. Use clay tools to add texture to fur or feathers.
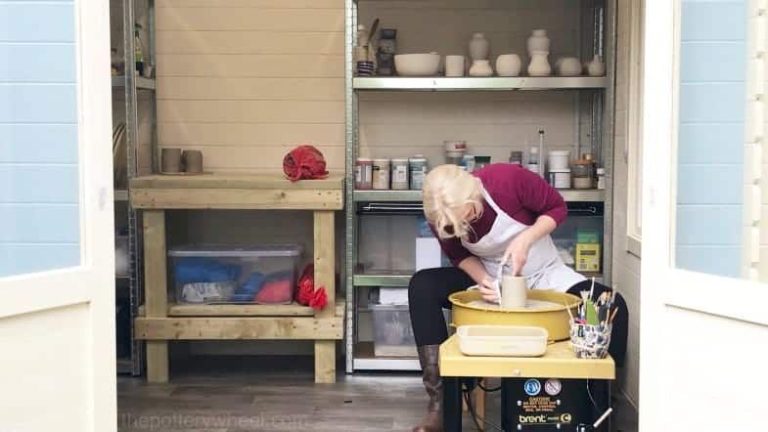
Making functional pottery like cups, bowls, and vases on a pottery wheel. Throw symmetrical shapes and practice shaping clay into smooth vessels. Add lips, handles and decorative patterns. Glaze and fire afterward.
Creating complex dioramas with multiple figurines and 3D environments. Design detailed scene and backgrounds before adding characters. This allows for more intricate storytelling through clay.
Constructing clay jewelry such as beads, pendants and earrings using molds and extruders. This jewelry box project from Ora Bart’s Art Lessons combines jewelry making with 3D design.
As kids gain experience, encourage them to come up with their own advanced clay projects. Combining multiple techniques like sculpture and pottery can lead to new creative outcomes. The possibilities are endless with a little imagination!
Tips and Inspiration
Properly storing clay is crucial for keeping it soft and usable for future projects. Here are some tips for storing clay:
- Wrap unused clay tightly in plastic wrap or place it in a resealable plastic bag, squeezing out excess air. This prevents the clay from drying out. Store in an airtight container.
- To keep clay soft, you can add a wet paper towel to the storage container. The moisture helps keep the clay malleable.
- Store clay in a cool, dry place out of direct sunlight. Heat and light can dry and harden clay.
- If clay does start to dry out and harden, knead in a commercial clay softener or try misting it with water and kneading gently to restore flexibility.
Troubleshooting clay projects:
- If air bubbles appear during baking, knead the clay longer before sculpting and smooth the surface right before baking.
- Avoid overhandling the clay which can lead to cracking. Handle the clay as little as possible when sculpting.
- Use acrylic paints for finishing. Watercolors or markers can bleed into the clay.
- Allow adequate drying time before baking, as recommended by the clay brand. Rushing can cause cracking.
Inspiring kids’ creativity with clay:
- Let them freely experiment and get messy at first to explore the clay’s possibilities.
- Look at pictures of sculptures together and visit a ceramics studio for inspiration.
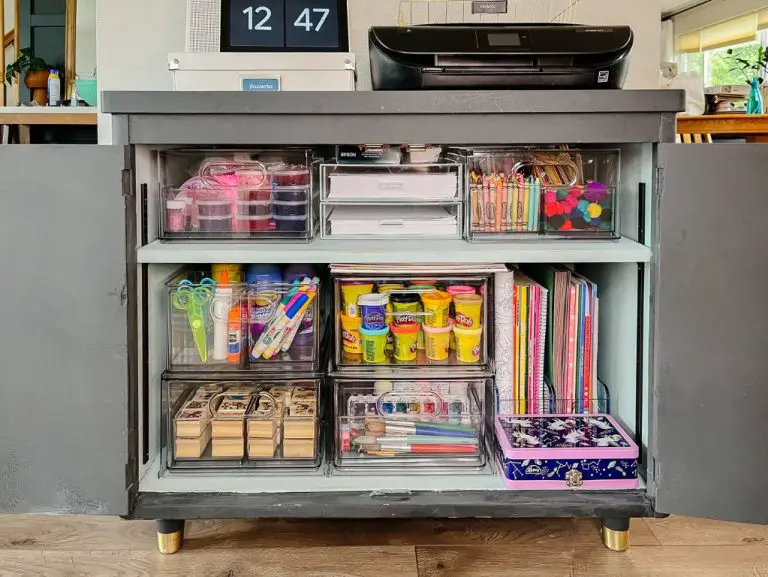
- Set up a dedicated workspace for clay projects.
- Provide tools like sculpting sticks, rollers, and cookie cutters.
- Suggest adding details like beads, feathers, or sticks to their creations.
- Display their finished pieces proudly.
With the right tips and inspiration, clay offers endless creative potential for budding young artists! Let their imaginations run wild.