What Does Air Dry Clay Stick To?
Air dry clay, also sometimes called “modeling clay”, is a type of modeling material that has become very popular for arts and crafts. It is made from natural materials like clay minerals, water, and cellulose-based binders.
Unlike traditional clays that require firing in a kiln, air dry clay cures through evaporation. When exposed to air, the water in the material evaporates out, causing the binders to harden and the clay to set. This makes air dry clay very convenient to work with, as no baking or firing is required for finished pieces.
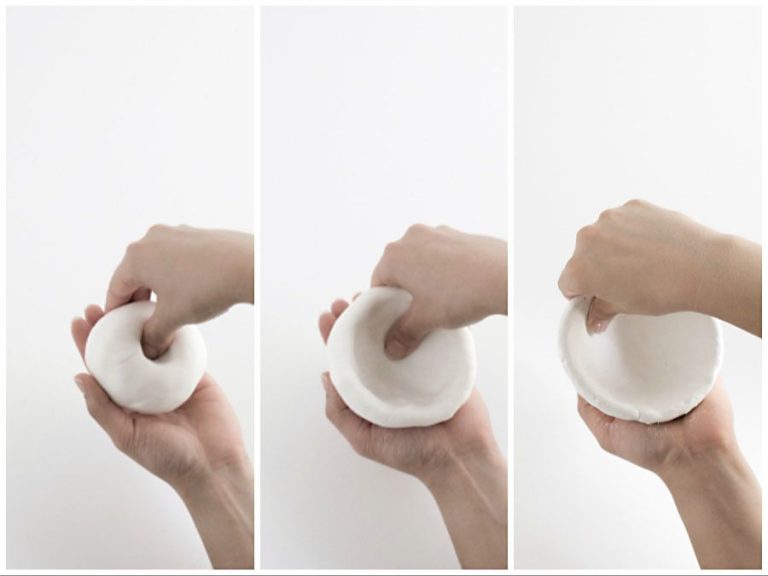
Some key properties that make air dry clay an excellent material for crafting and modeling are its soft texture, moldability, and light weight. It’s easy to shape and sculpt smooth forms or detailed patterns. Air dry clay can be molded into a variety of shapes and creations. Once dry, it has a porcelain-like finish and can be decorated with paint, glaze, or left natural.
Because of its versatility and ease of use, air dry clay has become very popular for a wide range of craft projects, from jewelry making to decorative figurines and sculpture. Both kids and adults enjoy using it for fun DIY projects and artistic works.
Surfaces Air Dry Clay Will Stick To
Air dry clay is a very versatile medium that will stick well to a variety of common art and craft surfaces without any special preparation needed. Here are some of the most popular surfaces that air dry clay adheres to:
Canvas – Canvas provides an excellent surface for air dry clay. The porous fabric gives the clay something to grip onto for a strong bond. Air dry clay sculptures and shapes can be affixed to canvas to create unique 3D artworks.
Cardboard – Most cardboard and cardstock readily accept air dry clay. The clay will stick well to corrugated cardboard, cardboard boxes, and even thicker cardstock paper. Cardboard’s slight texture helps the clay adhere.
Wood – Bare wood also bonds very well with air dry clay without any prep needed. Smooth sanded wood or rougher unfinished wood will both work. The clay can stick into the tiny grooves in the grain.
Most plastics – Many common plastics make good partners for air dry clay, including finished plastic products and sheets of raw plastic materials like acrylic, styrene and polycarbonate. The clay may stick a bit more firmly to raw plastics vs smooth finished products.
Paper – Basic paper and cardstock hold air dry clay nicely. The clay will mold right onto the paper surface to create paper mache-style creations.
Papier-mâché – Since papier-mâché is made from paper and paste, air dry clay also bonds extremely well to surfaces covered in papier-mâché without any preparation.
Preparing Surfaces for Air Dry Clay
Proper surface preparation is key to getting air dry clay to adhere well. Here are some tips on getting surfaces ready before applying clay:
Cleaning and Sanding
Surfaces should be free of dirt, oil, grease and other contaminants. Clean thoroughly with soap and water, then sand lightly to roughen and remove any gloss. This helps the clay grab onto the surface better. Be sure to wipe away any dust after sanding.
Applying Adhesive
For smooth, non-porous materials like glass, metals and plastics, an adhesive will be needed for the clay to stick. white glue, spray adhesive or double-sided tape work well. Apply a thin, even layer to the surface and let it dry completely before pressing on the clay. This gives the clay something to grip.
Tips for Making Air Dry Clay Stick
Air dry clay can stick well to many surfaces if prepared properly. Here are some tips for getting your clay to adhere:
Score or roughen smooth surfaces like glass, plastic, or metal before applying the clay. This gives the clay something to grip onto. Use sandpaper or a sharp tool to lightly scratch the surface.
Use liquid clay as an adhesive by diluted it slightly with water and applying a thin layer between the clay and the surface. This creates a tacky bonding layer.
Seal porous materials like wood, paper, or fabric first. Brush on a thin layer of varnish, decoupage medium, or glue before adding the clay. This prevents the clay from being absorbed.
Apply even pressure when attaching the clay. Roll out sheets or balls of clay and press firmly over the entire surface to maximize contact and adhesion.
Surfaces Air Dry Clay Won’t Stick To
Certain surfaces are naturally difficult for air dry clay to cling to. The key is knowing which materials to avoid when working with air dry clay. Here are some of the most problematic surfaces to be aware of:
Silicone – Silicone is slick and prevents air dry clay from forming a strong, durable bond. This includes silicone bakeware, silicone molds, and any item coated in a silicone finish. The clay will simply slide right off these non-stick surfaces as it dries and shrinks.
Wax – Wax repels water rather than absorbing it, so air dry clay has trouble adhering to waxy surfaces. This includes candles, wax paper, or items with a waxy coating. The clay will peel away as it dries.
Oil-based clay – Since air dry clay relies on water evaporation to harden, it won’t properly set up against oil-based clays. Avoid direct contact between air dry and polymer clays.
Water – Obviously air dry clay won’t adhere underwater. But high moisture also prevents the clay from drying out and bonding to a surface. Don’t apply clay to wet materials.
Using Alternatives for Problem Surfaces
If air dry clay won’t stick to a particular surface no matter what you try, there are some alternatives you can use to still attach your clay creations:
- Attach the air dry clay sculpture to a piece of cardboard or cardstock first using a strong adhesive clay. Then attach the cardboard backing to the problem surface using tacky glue or double-sided tape.
- Coat the problem surface first with a sealant, primer or gesso before applying the air dry clay. This can help the clay grab onto slippery surfaces like metal, plastic or glass.
- Use pins, floral wire, pipe cleaners or low-temp hot glue inserts to mechanically attach air dry clay shapes to the surface. The inserts give the soft clay something firm to wrap around and cling to.
Getting creative with backing materials, surface prep or mechanical attachments can help you stick air dry clay to surfaces it normally won’t adhere well to.
Storing Unused Air Dry Clay
When you are done working with air dry clay for the time being, it’s important to store any unused clay properly so it doesn’t dry out. Here are some tips for storing air dry clay:
Seal the clay in an airtight container. Air dry clay dries out when exposed to air, so putting it in an airtight plastic container or bag will help keep it usable for longer. Make sure to push out any air bubbles before sealing the container.
Place plastic wrap directly on exposed clay. If you have some clay that you have been working with that is exposed to air, lay a piece of plastic wrap or a damp paper towel directly on the surface before sealing in an airtight container. This will help prevent it from drying out.
Store in a cool, dry location. Storing air dry clay in a cool place, away from direct sunlight or heat sources, will help extend its shelf life. Avoid storing clay in places that get hot or humid.
With proper storage techniques, most air dry clays will stay fresh and workable for 6 months to a year. Just be diligent about keeping the clay sealed away from air exposure. And if a batch does start to dry out, you may be able to restore it by kneading in a little water.
Troubleshooting Adhesion Issues
If your air dry clay is not sticking to the surface as expected, there are a few troubleshooting tips to try:
First, carefully check the surface you are trying to stick the clay to for any dust, debris, or grease that could be preventing adhesion. Wipe the surface completely clean with a dry cloth. Also make sure both the clay and the surface have dried fully. Any moisture between the clay and the surface can impede bonding.
If cleaning the surface does not help, try adding a small amount of water to the clay before pressing it onto the surface – this can temporarily increase tackiness. Alternatively, use an adhesive like white glue or acrylic medium to help the clay adhere. Apply a thin layer of adhesive to the surface, let it dry slightly so it is tacky, then press on the clay.
With proper surface prep and using moisture or adhesive to assist, air dry clay can stick well to most smooth materials. Avoid overly porous surfaces, as the clay can absorb too much moisture.
Safety Precautions When Using Air Dry Clay
When working with air dry clay, it’s important to keep some basic safety precautions in mind:
Avoid ingestion. Air dry clay is non-toxic, but should not be eaten. Make sure to keep the clay out of your mouth and away from young children who may try to put it in their mouths.
Wash hands after use. After handling air dry clay, be sure to wash your hands thoroughly with soap and water before eating or touching your face. This helps prevent accidental ingestion.
Keep out of reach from children. When not being used, air dry clay should be kept out of reach of small children. Supervise older children when using air dry clay.
By following these basic safety tips, air dry clay can be used safely for arts, crafts and modeling projects.
Conclusion
In summary, air dry clay will stick well to most clean, smooth surfaces like wood, plastic, glass, metal, terra cotta, and ceramic. Preparing surfaces is crucial for optimal adhesion by removing debris, dust, oils, and rough textures. Sanding glossy items can also help air dry clay grip better.
Some key techniques for getting the best bond include moistening the contact areas, using liquid clay as “glue”, and sealing joints with acrylic mediums. Avoid overly porous substances like unglazed clay and plaster which soak up moisture from the clay. Smooth, non-absorbent surfaces generally provide the most success.
With proper prep and application, air dry clay can stick to a wide array of materials for diverse projects. Paying attention to surface preparation and using adhesives as needed lead to strong, long-lasting bonds. Air dry clay opens up a world of creative possibilities when you know what it will adhere to.


