Why Is My Rub N Buff Not Sticking To Metal?
What is Rub n Buff?
Rub n Buff is a waxy metallic paint that can be used to add a gilded or antique effect to metal, plastic, glass, ceramic, wood, and more. It comes in a variety of metallic colors like gold, silver, copper, and brass. Rub n Buff is popular for craft projects, jewelry making, car restoration, and furniture refinishing.
There are two main types of Rub n Buff – wax-based and oil-based (url). The wax-based Rub n Buff contains carnauba wax, mineral spirits, and fine metallic pigments. It has a creamy consistency and dries to a hard finish. Oil-based Rub n Buff has a similar composition but contains linseed oil rather than mineral spirits. It has a thinner consistency and needs to be sealed for protection.
Both types can be used to add a metallic, antiqued finish to surfaces by rubbing the product on with a soft cloth or cotton swab. The finish can range from a subtle sheen to a dramatic metallic look depending on the application technique.
Proper Surface Preparation
Properly preparing the metal surface is one of the most important steps when using Rub ‘n Buff. Any oils, dirt, or debris left on the surface can prevent the Rub ‘n Buff from adhering properly. According to Thrifty Decor Chick, you’ll first want to clean the surface thoroughly with a degreaser or soap and water. It’s critical to remove any traces of oil, grease or residue. Once dry, lightly sand or scuff up the metal using fine grit sandpaper. This helps the Rub ‘n Buff grip onto the roughened surface. Be sure to wipe away any metal dust before applying the Rub ‘n Buff.
As noted in Our Fifth House, cleaning and lightly sanding provides the ideal surface for Rub ‘n Buff to adhere to. Proper prep ensures you’ll get the best coverage and longest lasting finish. Don’t skip this step – put in the elbow grease first to remove any debris and create a rough surface by sanding. This allows the Rub ‘n Buff to cling tightly for a durable metallic finish.
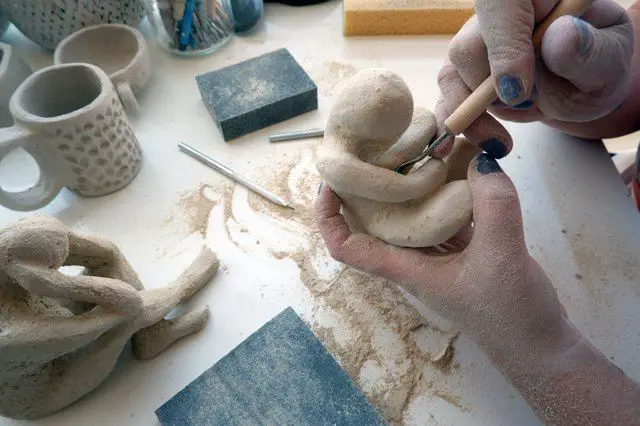
Using the Applicator
To properly apply Rub n Buff, it’s important to use the right applicator and technique. According to Thrifty Decor Chick, the product can be applied with your fingers, a soft cloth, or a foam applicator (source). The key is applying the product smoothly and evenly across the surface. Overloading the applicator can lead to uneven coverage and messy drips.
Driven By Decor recommends using a disposable glove, a piece of an old t-shirt, or a soft cloth as your applicator (source). Only put a small amount of Rub n Buff on your applicator at a time, about the size of a pea. Then rub it evenly over the surface in a thin layer before reloading the applicator. This will help prevent blotchiness or streaks in the finish.
Take care not to overload the applicator with too much product. Start with a little and add more as needed for full coverage. Gentle, even motions will provide the best results. Pay attention to edges, grooves, or embellishments on the surface to ensure complete coverage. With the right applicator and technique, you can achieve a beautiful metallic Rub n Buff finish.
Applying the Right Amount
When using Rub n Buff, it’s important not to apply too much at once. According to this article, you’ll get the best results by using thin, even layers and allowing each layer to completely dry before adding another. Applying too much Rub n Buff at once can cause pooling, uneven finishes, and other issues.
Start by putting a small amount of Rub n Buff on your finger or cloth applicator. Spread it thinly and evenly over the surface you want to cover. Let that layer dry fully, which usually takes 5-10 minutes. Then inspect the area and apply another thin layer if needed to build up the color and metallic effect. Don’t try to apply thick globs of Rub n Buff all at once – several thin layers is the key for an even, quality finish.
The product dries quickly, so avoid the urge to overdo it. Patience here pays off. As this guide notes, if an area starts to look gloppy, stop adding more and let it dry before continuing. Building up color gradually helps the Rub n Buff stick to the surface better and avoids messes. With the right technique of multiple thin layers and drying time, you can achieve beautiful metallic effects on metal, wood, glass, and more.
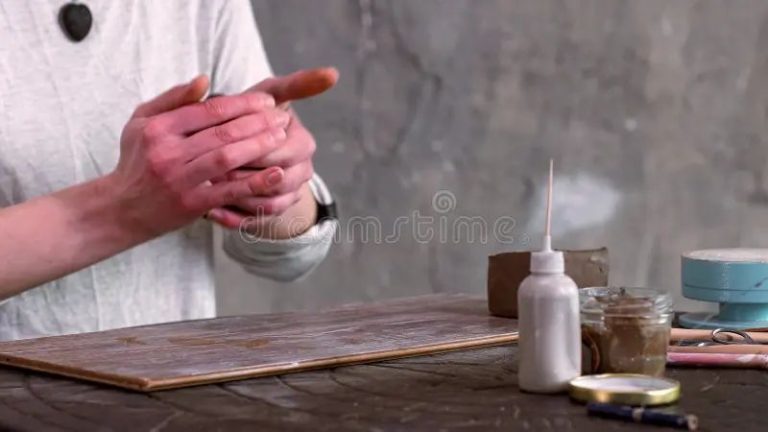
Heat Setting
Properly heat setting Rub n Buff is one of the most important steps for getting it to adhere well to metal. The heat allows the wax-based formula to melt slightly and bond to the metal surface.
Use a hair dryer or heat gun to gently warm the metal after applying the Rub n Buff. Move the heat source slowly over the surface, about 6 inches away. Be careful not to overheat any one spot. The Rub n Buff should become shiny and liquid-looking as the heat melts the waxes.1
Continue heating until all the Rub n Buff appears wet and smooth. The heat allows the waxes to properly adhere. Let the piece cool completely before handling.
Applying too much heat can burn the wax or damage the surface underneath. Use a moderate, even level of heat across the whole area until the Rub n Buff liquifies.
Some crafters suggest heat setting in multiple short bursts, allowing the metal to cool slightly between each pass of the heat gun. This helps prevent overheating any single spot.
Once cooled, the heat-set Rub n Buff should have an evenly smooth, shiny appearance. It will be firmly bonded to the metal surface. Proper heat setting is key for getting a durable metallic finish.
Top Coating
Applying a clear top coat over Rub n Buff can help protect and preserve the finish. According to one thread, a clear coat helps prevent tarnishing and protects the finish from fingerprints and scratches (source). However, some users warn that clear coating can diminish the shine and metallic look of Rub n Buff, so it’s important to test first (source).
When choosing a top coat, opt for a spray lacquer, acrylic, or polyurethane clear coat. Avoid enamel paints as they can react with the wax medium in Rub n Buff. Apply light mist coats and allow ample drying time between coats for best results. Test compatibility on a small area before clear coating the entire project.
Common Mistakes
Some of the most common mistakes when using Rub ‘n Buff include:
Skipping Surface Preparation
One key reason Rub ‘n Buff may not adhere properly is insufficient surface preparation. The substrate needs to be thoroughly cleaned and sanded for the wax and pigments to grip properly. As recommended by experienced Rub ‘n Buff users, metal surfaces should be lightly sanded with 220 grit sandpaper before application to remove any oils, rust or existing coatings 1. Skipping this critical step can lead to poor adhesion and flaking.
Applying Too Thick
It’s important to apply Rub ‘n Buff in very thin, even coats. Putting on too much product in one pass can cause clumping, cracking, and poor adhesion. As one Reddit user described it, “a little goes a long way” with Rub ‘n Buff 2. Use a soft, dry cloth to gently buff off any excess after application. Building up sheer, tissue-thin layers is the key to smooth, durable results.
Not Heating Properly
While Rub ‘n Buff air dries, heating the product after application helps it fully cure and adhere to the metal. A heat gun, hair dryer or stove top can be used to gently heat the metal, melting the wax and sealing the finish. Skipping this softening/heat setting stage reduces durability. Rub ‘n Buff directions recommend heating the piece for 30 minutes at 200°F after application for optimal bonding 3.
Tips for Problem Areas
If you are having issues getting Rub n Buff to adhere properly, especially on smooth surfaces like metal or plastic, there are a couple tips that may help:
For smooth surfaces, extra preparation may be required. According to https://www.therpf.com/forums/threads/rub-and-buff-help.80901/, rubbing the surface with extra fine steel wool or sandpaper can help give the Rub n Buff something to grip onto. You want to rough up the surface slightly without fully removing the base layer of paint or finish.
Using an adhesion promoter like a spray primer can also help Rub n Buff stick to slick surfaces according to https://ourfifthhouse.com/2012/07/rub-n-buff-how-to-easy-tips/. Apply a light coating to the clean surface, let it dry, then apply the Rub n Buff as normal.
Both extra abrasion and adhesion promoters help provide a tacky base so the Rub n Buff can grab onto the surface better without sliding off smooth non-porous materials.
Alternative Products
While Rub n Buff is a popular metal wax, there are other options to consider for certain projects or desired effects. Some alternatives include:
DecoArt Metallic Wax is a highly-rated alternative to Rub n Buff that comes in a variety of metallic colors. It can be applied to metal, glass, wood, and more. The wax produces a bright, reflective finish.
Renaissance Wax is made from natural waxes and is commonly used by museums. It leaves more of a matte, satin finish and is good for antiques. Renaissance Wax provides durable protection.
Patina paints and solutions create antique, aged metal effects. They come in various colors and can be layered. Patinas involve a chemical reaction with the metal so they bind very durably. Patinas are best for achieving rustic, vintage looks.
Oil paints should be considered for covering and color-changing larger surface areas. The pigmented oils penetrate and tint the metal. Multiple coats can be layered to create dimension. Oils allow for blending and custom coloring.
Other specialty waxes and paints for metal exist, such as jewelers wax, luster dusts, interference paints, and more. It’s best to use Rub n Buff when aiming for a bright, mirror-like metallic look. But explore other options when different effects are desired.
Summary
Rub n Buff is a versatile metallic wax that can be used to add a beautiful antique patina to metal, wood, glass, and more. However, for the best results, it’s important to follow key steps in preparation and application:
- Properly clean and prep the surface so the wax adheres
- Use the applicator sponge or soft cloth evenly and sparingly
- Apply gentle pressure to rub the wax into the crevices and details
- Add thin layers and build up the patina gradually
- Heat set with a heat gun or blow dryer if needed
- Apply a clear topcoat for durability and protection
With proper preparation and application, Rub n Buff can turn ordinary items into gorgeous metallic showpieces. The techniques do take some practice, but the stunning results are well worth the effort. Use these tips to troubleshoot any issues with Rub n Buff not sticking or rubbing off, and you’ll be on your way to metallic masterpieces.