Creative Clay Projects For Children: Ideas To Inspire
Clay is one of the most versatile, engaging, and educational art materials for children. It engages all of the senses – from the feel of the smooth, cold clay in their hands to the earthy smell. Working with clay helps develop fine motor skills, hand-eye coordination, creativity, and self-expression. While clay has been used for artistic and functional creations for thousands of years, it has long been recognized as an ideal medium for children. Some of the earliest evidence of prehistoric art by children has been found in remnants of clay figurines and pots.
This article will provide a variety of creative clay projects to inspire kids of all ages. From simple nature-inspired prints and food models to fantasy creatures and abstract art, children can explore different techniques while learning about the limitless possibilities of clay. With the proper guidance, clay can open up new avenues of imagination and confidence in creating.
Clay Basics
There are several types of clay that are commonly used for kids’ craft projects. Polymer clay, like Sculpey, is made from PVC resin and hardens when baked in the oven. It comes in a rainbow of colors and is very easy for little hands to shape and mold. Air-dry clay is another popular choice – brands like Crayola Model Magic are lightweight clays that air dry naturally. You can even make homemade clay using ingredients like flour, salt, and water. This edible clay is fun for preschoolers to squish and shape.
Basic clay tools include rolling pins, clay cutters, and modeling tools. To store clay, keep it in an airtight container or plastic bag. Polymer clay will harden if exposed to air over time. For softer modeling clay, a damp paper towel can help keep it malleable if it starts to dry out.
Nature Inspired
Nature provides endless inspiration for creative clay projects with kids. Some fun ideas include:
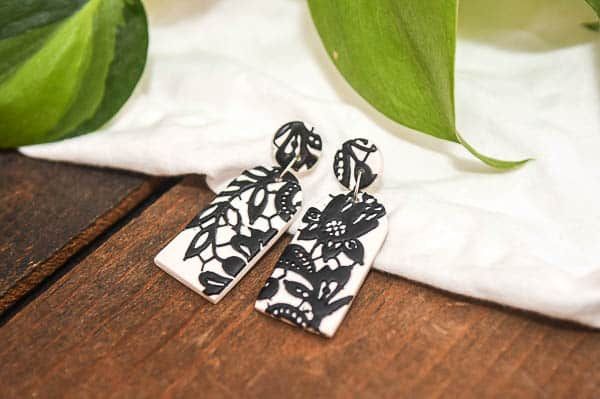
Leaf or flower prints – Let kids make imprints in clay using leaves, flowers, or other natural materials they collect. Press the objects gently into a slab of clay to capture their shape and texture. According to artfulparent.com, this easy nature craft is fun for kids to experiment with.
Imprinting natural objects like shells – Seashells, feathers, sticks and more can be pressed into clay to make natural imprints. Encourage kids to use their imagination and create patterns or pictures.
Bird or animal sculptures – Clay is perfect for sculpting creatures found in nature. Guide kids in making simple figures of animals like frogs, turtles, or songbirds. Let them add textures and details using natural items or clay tools.
Food Fun
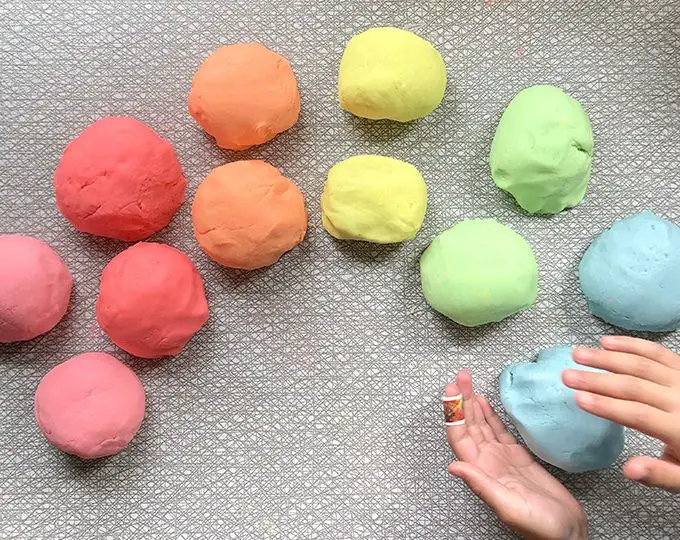
Clay food models are a fun and creative way for kids to play with their food without the mess. Simple shapes like balls or logs can easily become fruit, vegetables or favorite treats with a few added details. According to this Pinterest board, fun clay foods to make include fruit like strawberries, apples, and oranges as well as donuts, cookies, cake, and ice cream cones.
Kitchen tools like cookie cutters, garlic press, and rolling pin can make imprints and indentations in the clay to add texture and dimension to food models. Try pressing a cookie cutter into the clay for the top of a pizza or use a garlic press to make melon rind. Get creative with kitchen gadgets to add realistic details.
Clay can also be used to create faux food jewelry or magnets. Make clay waffles, eggs and bacon into charms or cut out clay cookies to decorate magnets for the fridge. According to this Pinterest board, jewelry and magnets let kids wear and play with their clay creations even after they harden.
Fantasy & Abstract
Kids love using their imaginations to create magical creatures and abstract art with clay. Here are some fun fantasy and abstract clay projects to try:
Make imaginary creatures like dragons, monsters, or aliens out of clay. Let kids sculpt creatures with wild shapes, textures, and features. Add details like scales, fur, horns, antennae or wings with tools or other materials like foil, feathers, or beads (https://www.pinterest.com/lezleehustad/clay-projects-for-kids/).
Try abstract sculpture or freeform art. Instead of sculpting a specific object, encourage kids to play with shapes, textures, and colors. Focus on exploring materials rather than a planned outcome. Sculpt coils, dots, squares – whatever feels fun! (https://www.artcampla.com/new-blog/abstract-clay-project-for-kids)
Make texture canvases by imprinting clay with found objects like shells, leaves, fruits, nuts, bolts, gears, or bubble wrap. Layer different textures and shapes to create an abstract collage. Use tools to add lines, poke holes, or sculpt freeform shapes.
The possibilities are endless with fantasy and abstract clay art. Give kids freedom to sculpt whatever their imaginations dream up! The process of sculpting with clay allows children to express creativity, experiment with materials, and have fun crafting with their hands.
DIY Clay Recipes
There are several types of clay that kids can make at home without needing to cook or bake them. These clays are fun, inexpensive, and easy for children to work with.
No-Cook Clay Dough
Simple no-cook clay dough is made by mixing together baking soda, cornstarch, and water. This air-dry clay recipe can be made in just a few minutes. All you need is around 1 cup cornstarch, 1 cup baking soda, and 1 1⁄4 cups water. Mix the dry ingredients first, then stir in the water a little at a time until a dough forms. Add food coloring if desired. Store leftover clay dough in an airtight container.
Homemade Polymer Clay
Homemade polymer clay is made using glue, cornstarch, and baby oil or mineral oil. Mix together 1⁄2 cup craft glue or white school glue with 2 cups cornstarch until well combined. Then stir in 1⁄4 cup baby oil or mineral oil a little at a time until the clay is smooth and pliable. This clay can be shaped when soft and will harden when left to dry in air.
Air-Dry Clay
A simple air-dry clay recipe combines flour, salt, and water. Mix together 1 cup flour, 1⁄2 cup salt, and 1⁄2 cup water. Cook over medium heat while stirring continuously until the dough pulls away from the pot. Allow to cool before handling. This clay will dry hard when left in the air for 1-2 days.[1]
Taking it Further
Once your clay projects are complete, there are several ways to enhance them and take your creations to the next level. Adding color through paint or glaze is a great option. Acrylic paint works well for adding color while glazes can give projects a glossy finish and vibrant hues when fired in a kiln. Display your finished pieces around your home or gift them to friends. Mini clay sculptures make great refrigerator magnets or desk accessories. Larger projects can be displayed on shelves, coffee tables or mantels.
If you’re looking to make a business out of your clay creations, setting up an Etsy shop is a great idea. Selling handmade items through an online marketplace allows you to turn your hobby into a side hustle. Be sure to calculate costs for materials and shipping when pricing items. Local craft fairs and markets are another venue for selling clay pieces. Having an Instagram account to showcase your latest creations can help promote your handmade business and attract customers.
No matter how you choose to use your clay projects when complete, the possibilities are endless. With some creativity and practice, you can continue enhancing your skills and taking your artistic talents to the next level.
Troubleshooting Tips
Clay projects can sometimes run into issues like cracking, breaking, or just plain mistakes. Here are some tips for troubleshooting common clay problems in kids’ projects:
To avoid cracks and breakage:
– Make sure the clay is conditioned properly by kneading and wedging it before starting. This removes air bubbles that can lead to cracking.
– Don’t let thick or large projects dry too quickly. Slow drying reduces stress on the clay.
– Avoid very thin parts which are prone to breaking, or add bulk with foil or wire inside.
– Bake projects on a flat, level surface so they don’t warp or crack while drying.
(Source: https://www.photographicmemoriespa.com/Web-Galleries/Blog/Clay-Problems-and-Rock-Problems)
To fix clay mistakes:
– Add more clay to fill cracks or holes. Use water to smooth and blend new clay into existing work.
– Clay can be reheated and reworked if needed. Knead baked polymer clay to soften it again.
– Imperfections can become features – turn cracks into texture, holes into windows, etc.
– Accept the imperfections as part of the handmade process and the child’s learning experience.
(Source: https://www.deepspacesparkle.com/working-through-a-bad-clay-day/)
To store unfinished clay pieces:
– Wrap in plastic wrap or put in a sealed container to keep moist.
– For longer storage, rub a thin layer of vegetable oil into the clay before wrapping up.
– Avoid temperature extremes. Store clay at room temperature away from heaters or AC vents.
– Label pieces with child’s name and date if storing a classroom collection.
Safety First
When children play with clay, proper adult supervision is crucial. According to the Penn State Extension, “Any material for children must be safe. All children need to be well supervised.”
Some children may have allergies to certain ingredients in modeling clay, so check labels carefully. The Extension recommends oil-based clays as safe options that “do not stick to skin or other surfaces.”
Proper storage of clay is also important. The Penn State Extension advises keeping “all products out of children’s reach and properly closed.” Allow time for projects to dry before storage. Store leftover clay in sealed containers away from heat to avoid drying out.
With attentive supervision and care taken in choosing clay, kids can enjoy the many benefits of sculpting clay creatively and safely.
Sources:
Play with clay — Early Learning Professionals
Tip of the Week: Choosing Non-Toxic Modeling Clay for Kids
Inspiring Kids with Clay
Working with clay provides many benefits for a child’s development and self-expression. The sensory nature of clay makes it an ideal medium for free play and creative exploration. Children can pound, squeeze, roll, and shape the clay however they wish, which allows them to express emotions and release energy in a positive way. The open-ended nature of clay also encourages them to follow their own interests and imagination.
When introducing clay, it’s important not to judge a child’s creations or expect perfection. The goal should be keeping things light and fun, rather than producing polished art. Allowing kids the freedom to play without pressure or criticism builds their confidence and self-esteem. Praise their efforts and creative thinking, not just the end result. Clay is meant to inspire open-ended creativity, not replicate adult expectations. With encouragement and support, kids can experience the many developmental benefits of clay while simply following their natural curiosity.
Clay provides a soothing, sensory experience that engages a child’s mind and body. Playing with clay enhances fine motor skills, spatial reasoning, chemistry knowledge, and creativity. The endless possibilities clay offers allows children to bring their biggest ideas to life. Guiding them with patience and imagination as they sculpt, mold, and imprint the clay will inspire a lifelong love of learning and creative expression.