Elevate Your Sculptures: Advanced Clay Sculpting Tips
Choosing the Right Clay
The type of clay you choose for sculpting depends on your project goals and desired results. There are several main categories of sculpting clay to consider:
Polymer clay is made from PVC, doesn’t harden until baked in an oven, and is great for fine details and smooth surfaces. Popular brands include Sculpey and Fimo. Polymer clay is durable, takes color well, and doesn’t need sealing after baking. Downsides are that it can be brittle and breaks if thin sections are stressed (https://www.sculptureatelier.com/blog/what-clay-should-i-use-to-start-sculpting).
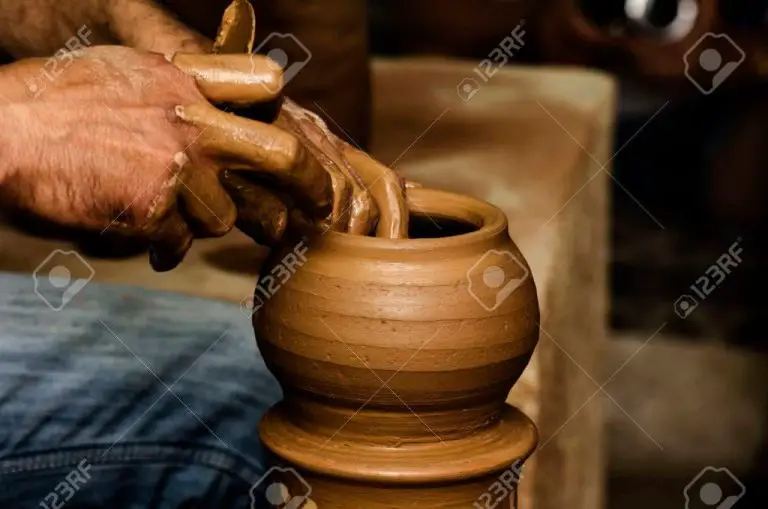
Oil and water based clays are messy but enable sculpting solid and hollow forms. Oil clays like plasticine stay flexible and never cure, while water clays like pottery clay harden either by air drying or firing in a kiln. These are good choices for larger, free-standing sculptures. Water based clays can crack while drying if sculpted too thick.
Self-hardening clays cure by air drying and require no baking or firing. They make instant sculptures possible but often lack durability. Homemade recipes using glue, cornstarch, and other ingredients fall into this category.
Consider the level of detail needed, if the sculpture will be handled, painted, or left plain, and the size of the project. Talk to experienced sculptors or clay suppliers for advice on selecting the right type of clay for your goals (https://www.sculpture-gallery.co.uk/best-clay-for-sculpting.irs). Test different clays on a small scale before committing to one for a large sculpture.
Sculpting Tools
Having the proper sculpting tools is essential for successfully creating detailed clay sculptures. Some key tools to have include:
Armatures made of wire, plastic, or wood provide structure and support for your clay sculpture. An armature allows you to sculpt over it to achieve more complex shapes and poses (Diamond Core Tools). Using an armature is especially helpful for larger sculptures.
Sculpting sticks, loops, ribs, and shapers in various shapes and sizes are useful for shaping, smoothing, and detailing the clay. These tools allow you to refine curves, add texture, and sculpt intricate designs (JPost).
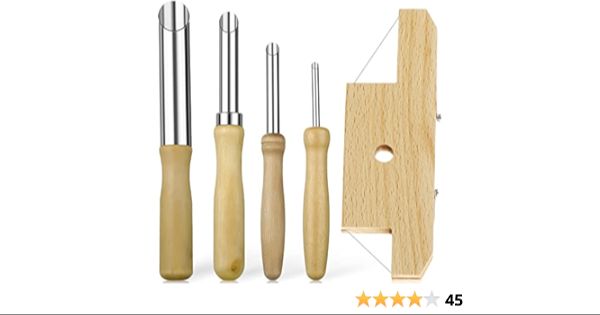
Texture tools like rollers, combs, and cutters can imprint patterns onto the clay surface. Clay cutters help slice clay cleanly and precisely. Carving tools with different shaped tips are vital for sculpting fine details and achieving more realistic effects.
Starting with an Armature
An armature provides essential internal support for clay sculptures. Armatures allow sculptors to build complex shapes and poses that would be impossible with clay alone. Using a customized armature enables total control over the final form.
Armatures are often made from wire, mesh, wood, or other rigid materials. Metal wire offers flexibility to bend and shape the frame. Mesh and wooden dowels add sturdiness for spanning larger forms. The armature design depends on the intended sculpture and desired pose.
Constructing an armature involves careful planning of the proportions and attitude. Armatures can be as simple as a few bent wires or as complex as fully posed human figures. The key is customizing the armature for your specific sculpting goals. Allow extra length for bulking clay layers. Use pliers to bend and twist wires into natural bends. Wrap foil around frame segments to build up volume.
With a well-designed armature at the core, sculptors can achieve incredibly dynamic creations in clay. The interior support enables working with large amounts of clay without risk of collapse or drooping. Starting right with the armature allows complete freedom when sculpting the exterior details.
“Make an Armature for Sculpting!” https://www.instructables.com/Make-an-Armature-for-Sculpting/ provides an excellent tutorial on constructing armatures with wire and foil.
Sculpting Techniques
There are two main approaches to sculpting clay: additive and subtractive. With additive sculpting, you gradually build up the form by adding more clay. This technique allows you to smoothly blend new clay into the existing sculpture. Subtractive sculpting involves carving away clay from a larger block to reveal the desired form. This can create interesting textures but requires removing excess material.
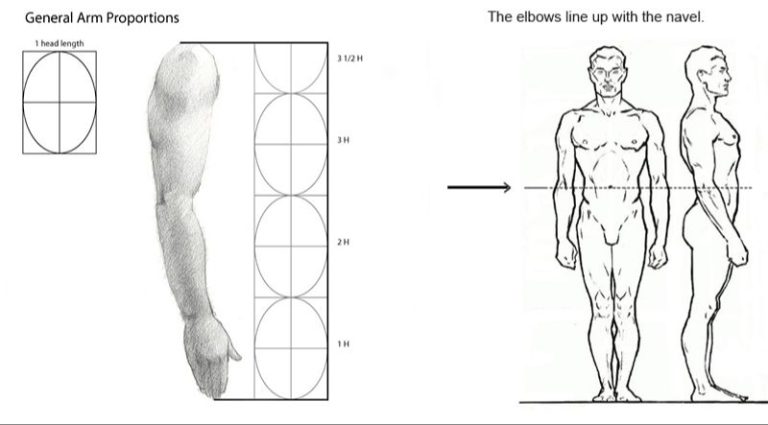
When sculpting, it helps to use reference images or life models to achieve realistic forms. Pay attention to anatomy, proportion, and perspective when aiming for a lifelike sculpture. Consider making wire or clay armatures first to establish the basic pose and proportions before adding detail.
To create convincing textures like skin, hair, or fabric folds, utilize various sculpting tools and techniques. Use loop tools to smoothly blend seams and create transitions. Add wrinkles, pores, and imperfections to avoid an artificial look. Consider alternate techniques like scraping, piercing, smoothing, and stippling to reproduce diverse textures.
When parts of the sculpture are complete, seamlessly blend them together. Smooth over joints by gently massaging and melding the clay. Eliminate visible seams for a cohesive finished sculpture. Pay special attention to delicate areas like hands, faces, and fingertips to realistically merge sections.
With practice and care, these techniques will elevate your clay sculptures to new heights of realism and artistry. For more tips, see this helpful guide: Clay Sculpture Techniques and Tips
Sculpting Detail
When sculpting a detailed figure, it’s important to consider the level of detail based on the viewer’s distance from the sculpture. The closer the viewer will be, the more refined the details should become.
For facial features viewed up close, carefully sculpt the eyes, nose, lips, wrinkles, etc. The eyes are especially important for conveying emotion and realism. Use small sculpting tools to indent tear ducts, bags under the eyes, and delicate eyelashes. The hair can be formed in wispy strands or chopped with a tool to mimic different hairstyles and textures.
For clothing and accessories, add intricate patterns, buttons, zippers, folds, creases, and seams for close viewing. Use thin pieces of clay for finer details like shoelaces, watch bands, necklaces, etc. Fingerprints work nicely for creating realistic fabric textures.
For areas viewed further away, less refinement is needed. Simplify details with more impressionistic features instead of intricate realism. Focus on the overall forms and proportions first before adding finer details.
Strategically choose where to concentrate detail based on which areas will be closest to the viewer. The face typically warrants the most scrutiny, while the back can be more generalized. Establish a priority for details that convey realism and save time on less viewed areas.
As mentioned in this Sculpture Atelier article, “How to Sculpt the Human Figure in Clay”, it’s important to start with the larger forms and primary masses before refining the smaller details.
Balancing and Joining
Proper weighting and balance are crucial for clay sculptures to stand upright without toppling over. Carefully evaluate the sculpture’s center of gravity and make adjustments as needed during the sculpting process. Adding clay to the base or using an internal armature can lower the center of gravity.
When joining separate parts of a sculpture, scoring and slipping the surfaces can create a stronger bond. Scoring involves scratching crisscross lines into the clay surfaces to be joined. Slipping means applying liquid clay slurry to the scored areas as an adhesive before pressing the pieces together. Let the pieces dry partially before joining to avoid cracking and use firm, even pressure when bonding them [1]. Fully dry clay can also be joined with cyanoacrylate glue.
Plan the sculpture design carefully to minimize fragile junctures. Allow sufficient drying time between adding parts. Hollow out heavy sections to reduce weight. Create joints between pieces at thick areas and reinforce the inside with wadded up newspaper or other fillers. Avoid thin connections that risk snapping off easily.
Drying and Curing
Proper drying and curing is crucial for preventing cracks and deformation in clay sculptures. As clay dries, it shrinks and can crack if it dries too quickly. Here are some tips for drying clay slowly to prevent cracks:
Limit air exposure by covering the sculpture with plastic wrap or placing it in a plastic bag with a damp paper towel. The moisture helps slow drying. Replace the paper towel as needed (Source).
Mist the sculpture with water spray while it is drying to keep it from drying too quickly. Avoid over-saturating (Source).
Allow thicker areas of the sculpture, like the center of the body, to dry partially before thinner extremities. This prevents cracking from uneven drying rates.
Curing times depend on the type of clay but can range from 24-72 hours. Let the clay cure fully before painting or varnishing. Test for dryness by pressing into an inconspicuous area.
Proper drying and curing results in strong, crack-free sculptures ready for the finishing touches.
Smoothing and Polishing
Achieving a smooth, polished finish for your clay sculptures requires patience and precision. Start by sanding the clay surface with fine grit sandpaper, between 200-400 grit. Sanding removes rough texture and shapes the sculpture. Move to progressively finer sandpaper, up to 2000 grit for the smoothest finish.
Apply even pressure and sand in small circular motions. Be cautious not to remove too much clay. Clean away clay dust between sanding sessions. Pouring isopropyl alcohol over the clay can help highlight rough areas that need extra sanding.
After sanding, buff the clay with a soft cloth or chamois. Use a power buffer for larger sculptures. This polishes the surface to a glossy sheen. For a matte look, lightly buff with steel wool.
Work slowly and carefully during sanding and buffing. Rushing can cause scratches or damage. Proper smoothing and polishing results in a flawless, professional finish for your clay sculptures.
Coloring Clay
Adding color to clay sculptures can really bring them to life. Acrylic and oil-based paints are popular choices for coloring polymer clay. Make sure to use paints designed for plastics, as regular acrylic paints may not properly adhere to the clay surface. Apply paint in thin layers and allow drying fully between coats for best results.
While paints work well for covering large surface areas, glazes, inks and stains can add more artistic effects. Alcohol inks produce a marbled look when blended directly into the clay. Pastels can be shaved to produce a chalky, weathered finish. Apply a matte glaze over the entire sculpture for an even, uniform appearance.
Consider adding special effects like cracks or texture using techniques like crumpling foil and pressing it into the clay. Painting liquid clay in layers and scribbling into it before baking can also produce interesting aged effects in the final piece.
No matter what coloring method you use, protect your finished sculpture with a sealant like acrylic spray or polyurethane resin. This prevents paint from rubbing off over time. With the right colors and effects, you can create museum-worthy sculptures from clay.
Displaying Sculptures
Once your clay sculpture is completely dry, you’ll need to think about how to properly display it. Choosing the right base or stand is crucial both for visually enhancing your sculpture and keeping it stable and secure. Many sculptors opt for simple pedestal bases in neutral colors that don’t distract from the artwork itself. However, you can also find creative bases that complement the sculpture’s shape or subject matter.
Protecting your clay sculpture from falls is vital. Temperatures and humidity changes can make clay brittle over time. Some tips to keep sculptures safe include:
- Using museum wax to secure pieces to bases
- Choosing shelving secured to the wall for displaying smaller pieces
- Protecting bottom edges with felt
- Avoiding bumping sculptures as much as possible
Proper lighting is also key. Look for accent lighting that illuminates the sculpture from multiple angles. Avoid direct sunlight which can cause fading. Go for soft, diffuse lighting that brings out the depth and textures of clay.
When deciding where to place your clay sculptures, look for stable surfaces away from high traffic areas. And consider displaying fewer large pieces rather than many small ones clustered together. With the right bases, lighting and placement, your clay sculptures will truly stand out.